EasyManuals Logo

Dymo Label User Manual

Dymo Label
64 pages
To Next Page IconTo Next Page
To Previous Page IconTo Previous Page
Page #13 background imageLoading...
Page #13 background image
Creating a New Label
9
Changing the Return Address
Next, you change the return address.
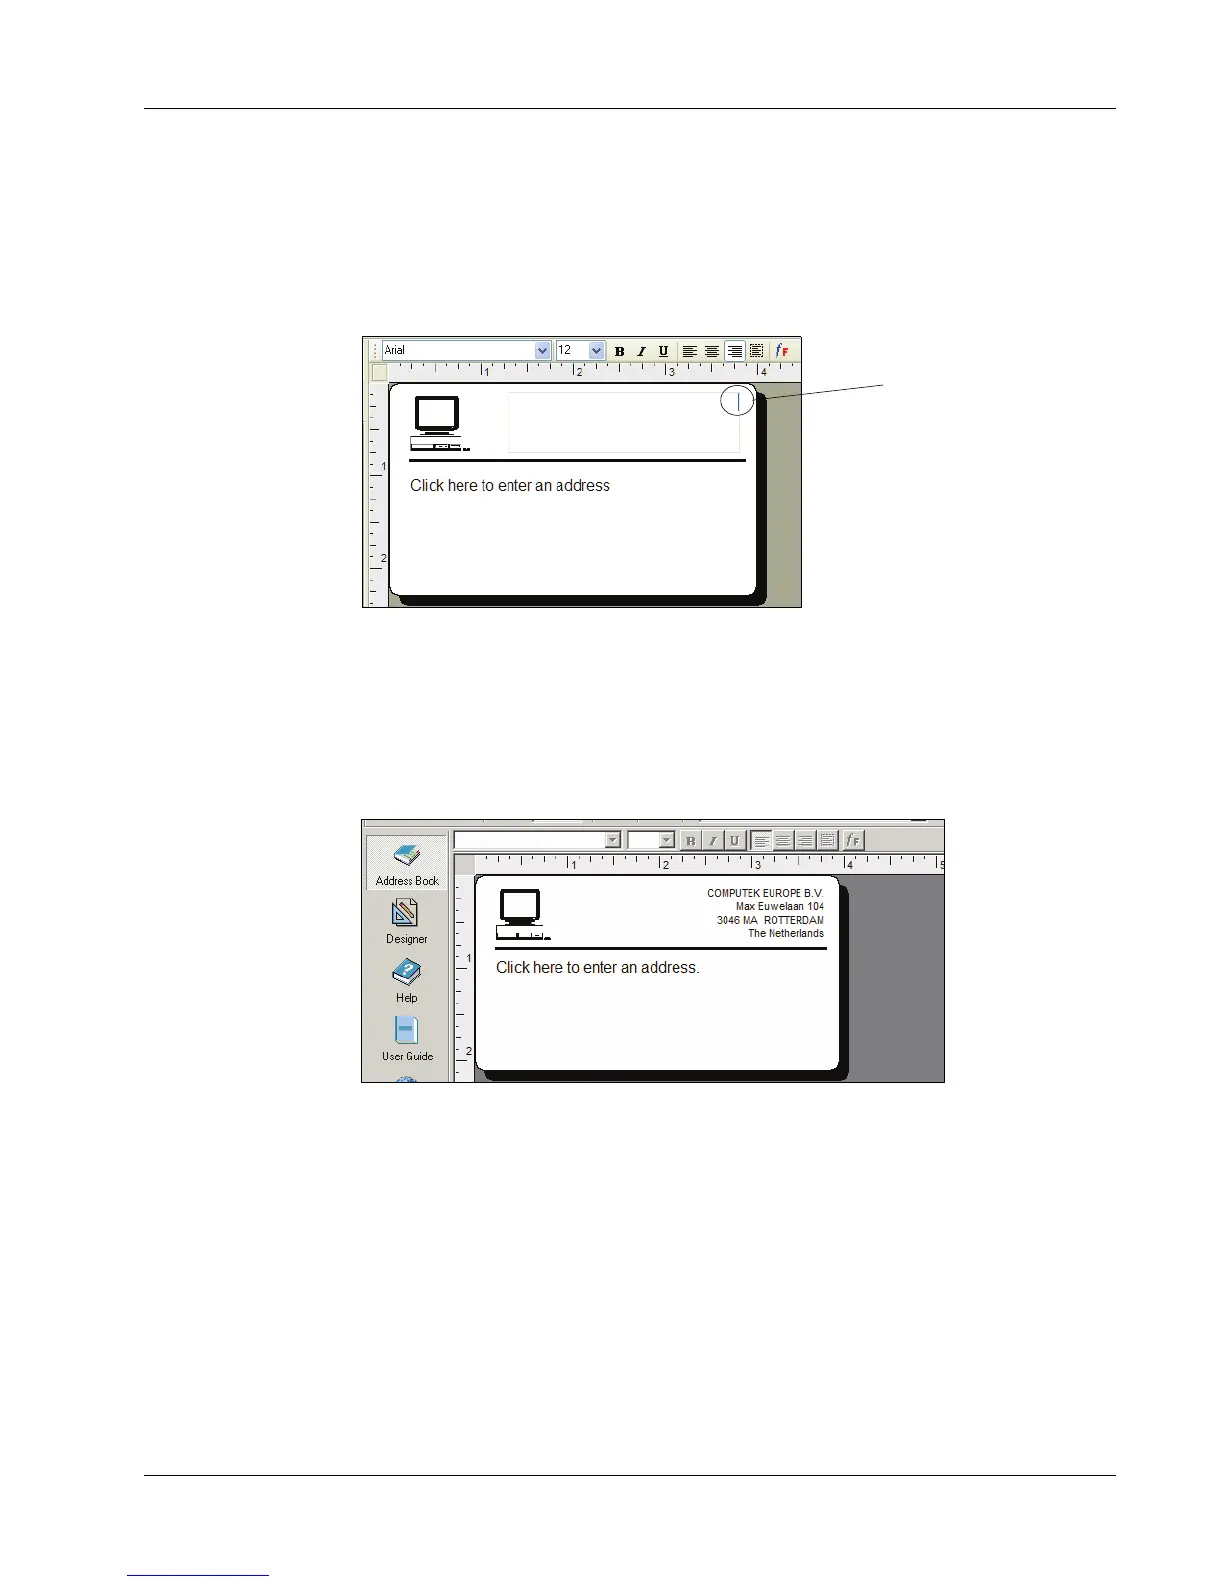
To enter a return address
1 Click the text in the label’s upper-right corner.
The flashing cursor appears where the default text had been.
2 Enter the following text:
COMPUTEK EUROPE B.V.
Max Euwelaan 104
3046 MA ROTTERDAM
The Netherlands
3 Click anywhere outside the text object.
The new return address appears on the label.
Changing the Recipient Address
Next, you enter a recipient’s address.
To enter the recipient’s address
1 Click once on the address object in the middle of the label.
The flashing cursor appears where the default text had been.
(Windows) To help identify objects, a hint appears when you move the pointer over an object.
Flashing
cursor

Table of Contents

Questions and Answers:

Question and Answer IconNeed help?

Do you have a question about the Dymo Label and is the answer not in the manual?

Dymo Label Specifications

General IconGeneral
PlatformWindows
ConnectivityUSB
FeaturesLabel design
IntegrationMicrosoft Office
CompatibilityDYMO label printers
Supported Label PrintersDYMO LabelWriter series
Supported Label TypesAddress labels, Shipping labels, File folder labels, Name badges
Database SupportMicrosoft Excel, CSV, TXT
Image SupportBMP, JPG, GIF, PNG, TIFF

Related product manuals