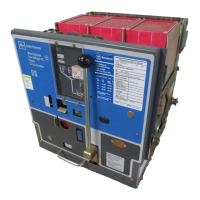
Page 14
Note:
On
breakers equipped for power operation,
when they are
in
the compartment and
in
either the
TEST or CONNECT position, the spring-charge motor
normally runs automatically and charges the closing
springs as soon as the breaker opens. The closing
springs normally remain discharged while the
breaker stands
in
the closed position. Also see Sec-
tion 5.1.2.1.
Now to become better acquainted with the breaker,
charge the closing springs, close and open the breaker
several times. Also, place the levering crank handle
on
the levering device work shaft and rotate the levering
arms to their various positions by turning the levering
crank handle. Leave the levering arms horizontal, with
rollers toward rear
of
breaker, i.e.
in
the remove posi-
tion.
The breaker is now ready to be put into its various oper-
ating positions
in
the compartment.
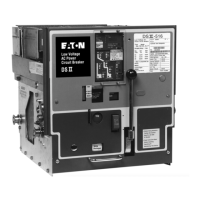
4.5 PLACE THE BREAKER IN THE TEST POSITION
Push the breaker into the REMOVE position.
YOU WILL NOTE THAT, WITH THE COMPARTMENT
DOOR OPEN, THE FRONT PANEL ASSEMBLY OF
THE BREAKER FORMS A STEEL PROTECTIVE
SHIELD.
Place crank on the levering device worm shaft. Turn
crank clockwise until drawout unit position indicator
shows "TEST." Remove the levering device crank. The
shutter will close over the hex shaft. All manual opera-
tions can now be performed. On power operated break-
ers the spring is charged automatically as the breaker
arrives
in
the TEST position. The breaker can also be
opened with the shunt trip device, and it can be electri-
cally closed with the spring release device.
4.6 PLACE THE BREAKER IN THE CONNECT
POSITION
Press the trip plate and lower the shutter. Place the crank
handle
on
the levering device worm shaft and turn the
crank clockwise until the CONNECT position stop is
reached, as indicated by sudden increase
in
load on the
crank, as previously described
in
paragraph 4.1.
Note however, that before the stop is reached,
an
increase
in
load on the crank will be felt after the breaker
has moved about
an
inch. This is caused
by
the making
1.8. 33-790-11
up on the main disconnecting contacts. The load on the
crank will decrease after reaching a peak. The next
increase
in
load is when the stop is reached.
Note: Do not try to crank after the stop is reached.
Further tightening
of
the crank does not help keep
the breaker
in
position. When the crank handle
is
removed, the shutter and the trip plate should snap
into normal position.
4.7 REMOVE THE BREAKER FOR FINAL
INSPECTION
Withdraw the breaker from the CONNECT position
in
the
compartment to the end
of
the extended rails following
the reverse procedure described above. Inspect it thor-
oughly to see that no foreign objects have lodged within
it.
If
any defects were found during these preliminary
operations, complete their corrections at once.
4.8 FINAL INSPECTION
MAKESURETHETHREE~)ARCCHUTESARE
PROPERLY INSTALLED. MAKE SURE ALL FOUR (4)
INSULATING BARRIERS ARE PROPERLY
INSTALLED.
1.
With the breaker withdrawn, rotate levering device to
connected position before attempting to charge the
spring.
2.
Close and trip the breaker several times as previ-
ously described.
3.
Return the levering device to the remove position;
i.e., with the roller arms pointing toward the rear as
shown
in
Figure
6.
4.
This completes the "dry run."
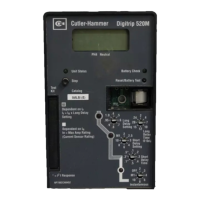
4.9 AMPTECTOR TRIP SETTINGS
When the breaker is shipped, the calibrating dials
of
the
Amptector trip unit are
at
the nominal settings. For spe-
cific overload tripping characteristics to coordinate with
the load
or
the system, refer to Section 8 and Curves
found later
in
this instruction book.
4.10 PLACE THE BREAKER IN SERVICE
Lever the breaker into the connected position as previ-
ously described, and latch the compartment door.
Effective October 1998
Courtesy of NationalSwitchgear.com
 Loading...