54
Chapter 7—EMC installation
POWERXL SERIES VFD MN040002EN—February 2018 www.eaton.com
Installation in corner-grounded network and
ITsystem
Corner grounding and IT system are allowed for all the drive
types.
In these circumstances the EMC protection class must be
changed to level C4. This is done by removing the built-in
EMC Screw with a simple procedure described below.
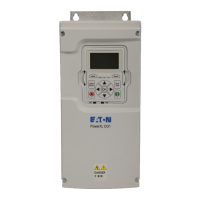
In addition on FR2 and FR4 the MOV screw is required to be
removed, see Figure 38.
WARNING
Do not perform any modifications on the AC drive when
it is connected to mains.
WARNING
Electric shock hazard—risk of injuries! Carry out wiring
work only if the unit is de-energized.
After disconnecting the supply, wait at least five minutes
before removing the cover to allow the intermediate
circuit capacitors to discharge.
WARNING
Failure to follow these instructions will result in death or
serious injury.
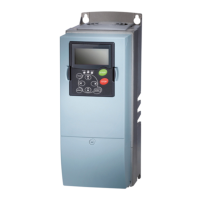
Remove the main cover of the AC drive and remove
the EMC/MOV screws depending on frame size (see
Figure36–Figure 39). Once the screw is removed, it can be
reconnected to re-engage the EMC protection.
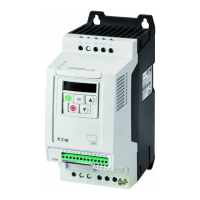
Figure 36. Location of the EMC Screw in Frame 0
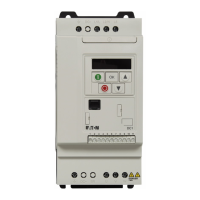
Figure 37. Locations of the EMC Screw in
Frame 1 and Frame 3
 Loading...