The BOLTMARK
®
II‑series PrinTers
Basic OPeraTing insTrucTiOns
302018/02/27#2.0EN
maintaining the Printhead
4
5
6
7
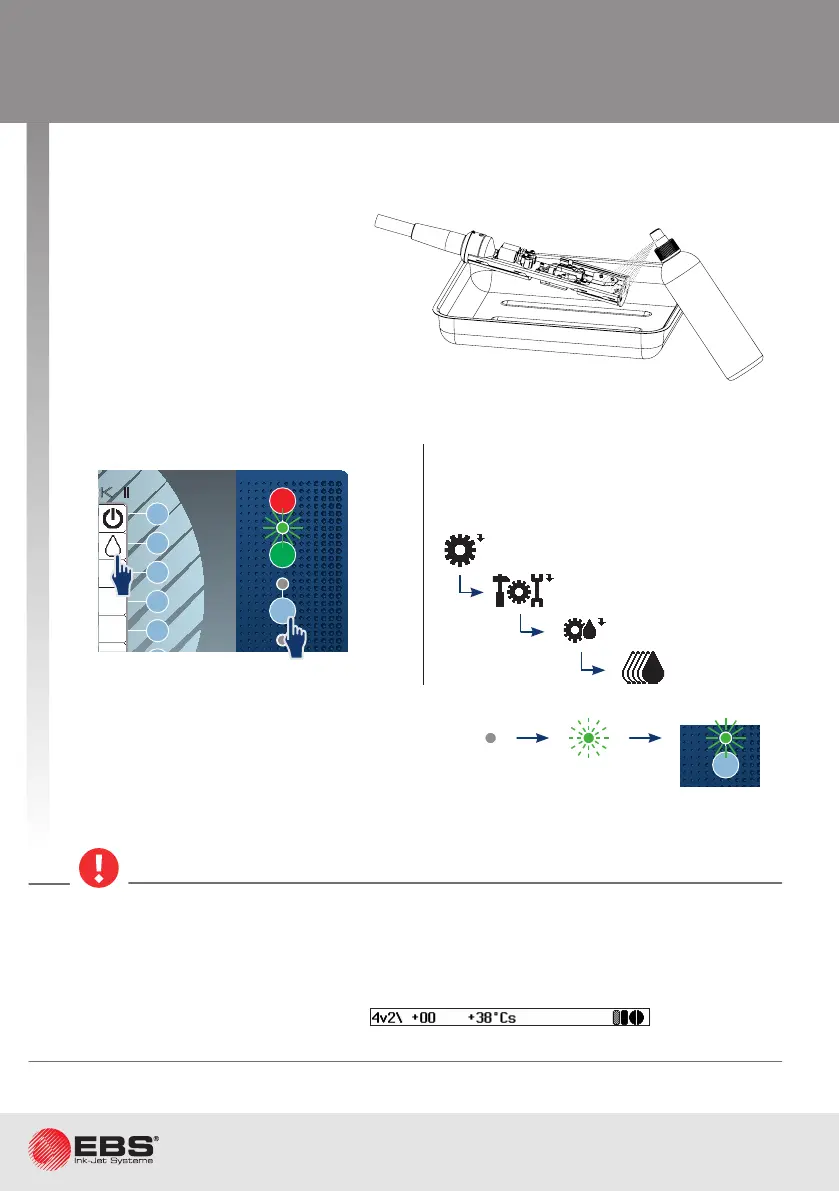
Place the printhead in a metal vessel (a drip pan).
Start ink ow in the printhead.
Insert the printhead into the cover, screw home the fastening screw and resume nor-
mal operaon.
Remove any remnants of ink
from the electrodes, the nozzle
and the guer area with sol-
vent (by means of a sprayer).
A compressed air gun can also
be used.
Starng in regular mode.
Ink ow is acvated when the ink ow LED
illuminates.
If the printhead needs to be started quick-
ly, follow the brief procedure for starng
ink ow.
• While installing the printhead cover make sure that the fastening screw is screwed home
rmly; the screw provides not only mechanical fastening but electrical connecon between
the cover and the printer housing, as well.
• The printhead is equipped with a sensor that detects the removed cover condion.
On loosening the screw that fastens the printhead cover, prinng pauses automacally
and the printer enters service mode (v). Prinng cannot
be resumed unl the cover is reinstalled and the fastening screw is screwed home.
OFF
ON
INK
ON / OFF
READY
CLEAR
ALARM
ERROR
PRINT
ON / OFF
Enter
Delete Par
Shift
Space
Alt Alt
Shift
Caps
Esc
Insert
Ctrl
Enter
F5
F4
F3
F2
F1
®
II
1
1
Fast ink ON
Printer sengs
Service
Print head service
INK
ON / OFF
READY
CLEAR
ALARM
ERROR
PRINT
ON / OFF
Enter
Delete Par
Shift
Space
Alt Alt
Shift
Caps
Esc
Insert
Ctrl
Enter
F5
F4
F3
F2
F6
F1
BOLTMARK
®
II