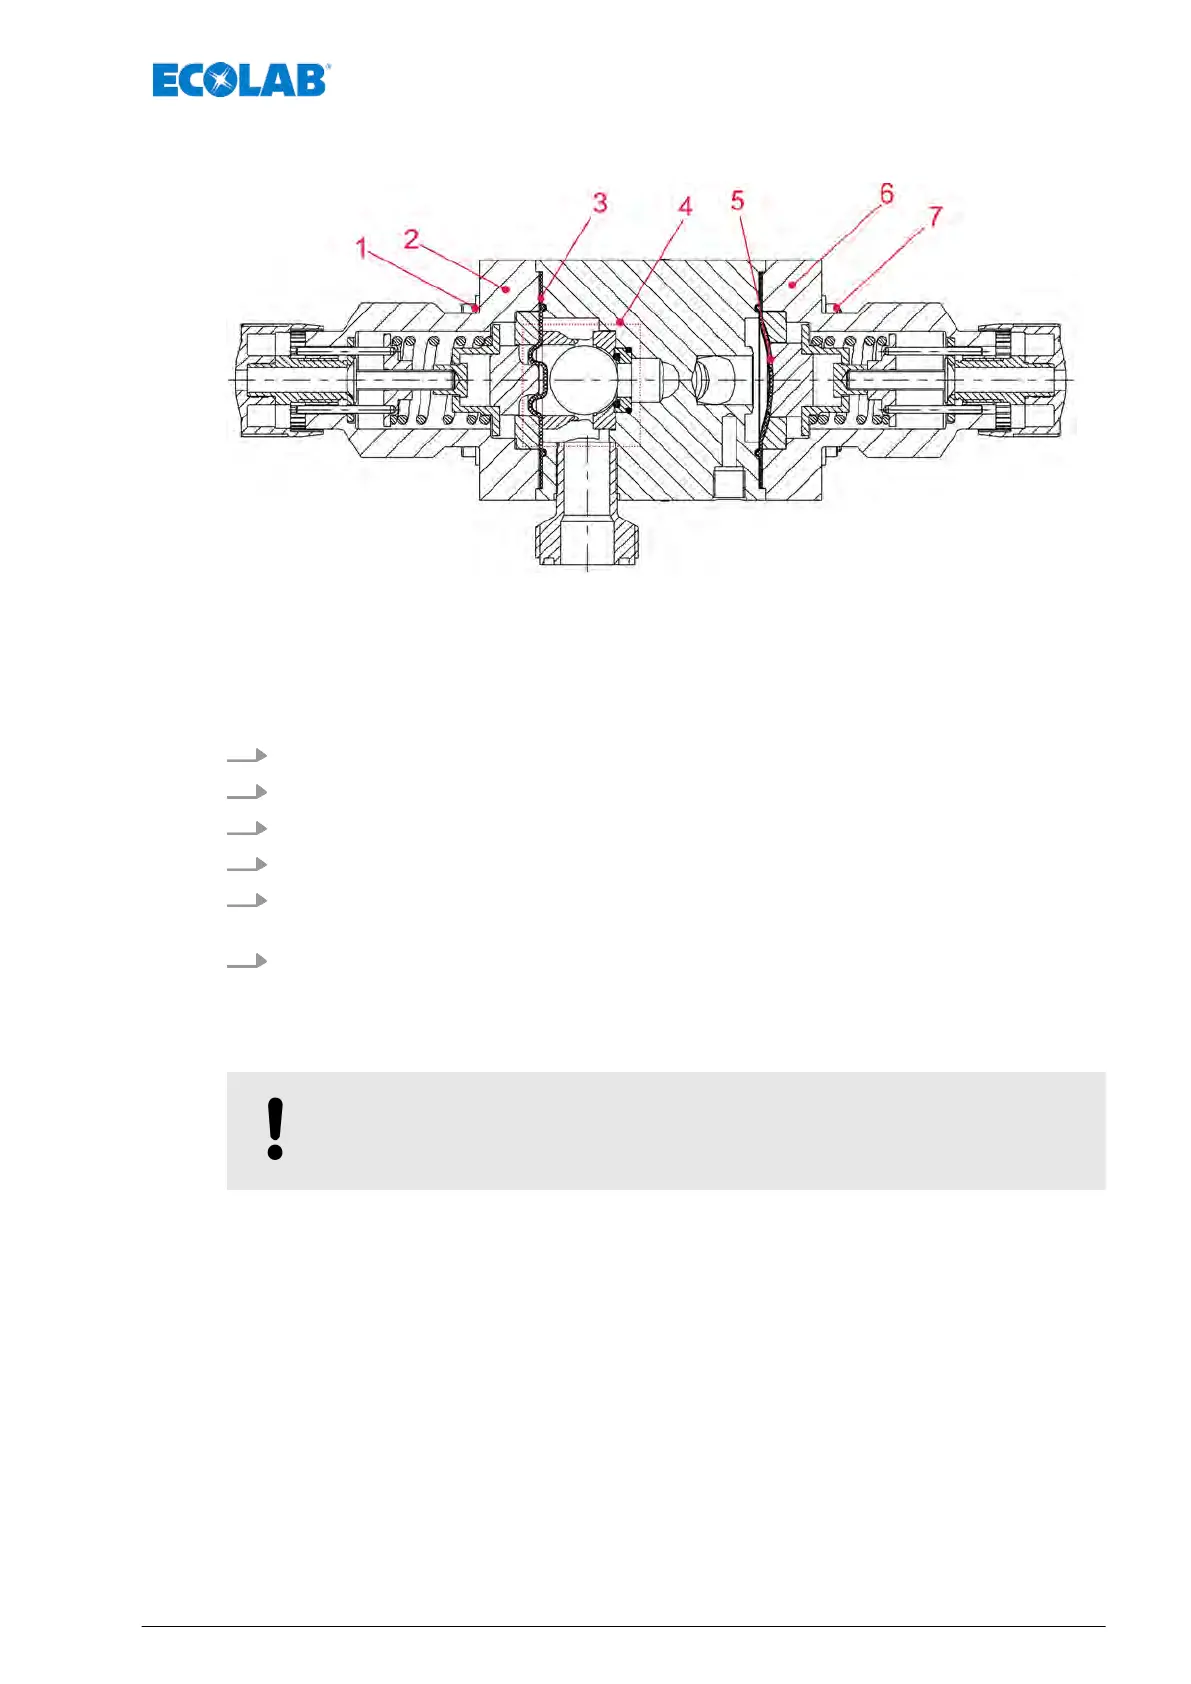
9.1 Diaphragm replacement
Fig. 11: Diaphragm replacement
1 Valve-housing bolt
2 Valve head (overpressure side)
3 Diaphragm (overpressure side)
4 Overflow ball valve
5 Diaphragm (pressure-maintenance side)
6 Valve head (pressure-maintenance side)
7 Nuts, M 6
1. Remove the caps from the valve-housing bolts (Item 1) and nuts
(Items 6 and 7).
2. Slacken nuts (Items 6 and 7) using a wrench, size SW10, and remove them.
3. Remove valve head (Item 2 or 6).
4. Remove exposed diaphragm (Item 3 or 5).
5. Carefully insert a new diaphragm (the white, coated side toward the interior) and
close the valve head again.
6. Insert the valve-housing bolts, screw the nuts on by hand, tighten in a crosswise
alternating pattern (T
orque: 8 Nm) and replace the bolt caps.
The Article Nos. for ordering of spare parts can be found in
Ä
Chapter 10 ‘Spare parts and wear parts / Accessories’ on page 35.
NOTICE!
T
ighten valve screw tightening torque after 24 hours.
Tightening torque 3 - 4 Nm.
Maintenance
33 417101434 Rev. 5-05.2019