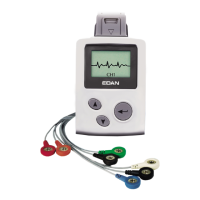
SE-2003&SE-2012 Holter System Recorder User Manual
- 29 -
5 Recording
5.1 Overview
The operation steps of SE-2003/SE-2012 recorder are as follows:
1. Decide recording plan, such as lead mode, pacemaker pulse data needed or not;
2. Insert SD card into card-reader of analysis system or directly connect it with analysis system
via USB cable to register E-label. The registered SD cards prevent possible confusion caused
by recording of different patients at the same time;
3. Place electrodes;
4. Load a full and fresh AAA battery;
5. Set recording parameters through recorder keyboard and LCD;
6. Preview ECG wave through LCD and check whether electrodes are properly placed and
make adjustment if necessary;
7. Start to record through menu when all steps above are ok;
8. Begin to record formally after recorder initialization;
9. Check wave quality of ECG signal during recording process through LCD and check
placement quality of electrodes;
10. End of recording.
NOTE:
1. SE-2012 supports three kinds of lead mode: 10-electrode standard 12-lead mode, 7-
electrode-3-channel mode and 5-electrode-3-channel mode. Recorder will
automatically identify and record data generated from different leads accordingly.
2. SE-2003 supports 7-electrode or 5-electrode 3-channel mode.
5.2 Start Recording
The start menu of initiating recording is process-based. According to different parameters set in
Advance Setting, all processes, from simplified to complete, are listed as below:
Startup
confirmation
ECG preview
Input
Patient ID
Start
recording

 Loading...