A705-61-880 Issue M
Page 30 © Edwards Limited 2012. All rights reserved.
Edwards and the Edwards logo are trademarks of Edwards Limited.
Maintenance
3. Inspect all electrical cables; check that they are not damaged and have not overheated. Replace any cables that
are damaged or have overheated. Check that all electrical connections are secure. Tighten any connections that
are loose.
4. Inspect all process and exhaust pipelines; check that they are not corroded or damaged. Replace any pipelines
that are corroded or damaged. Check that all process and exhaust connections are secure. Tighten any
connections that are loose.
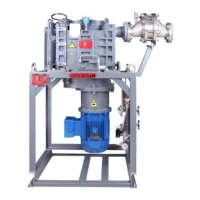
Figure 6 - Exploded view of the gas-ballast air filter
5.6 Inspect the interstage relief valve and replace
the hinge bushes, valve flap and valve 'O' ring
(if necessary)
If you think that the interstage relief valve does not operate correctly, use the following procedure to inspect it.
Refer to Figure 7.
1. Remove the four M8 bolts (11) which secure the retainer (9) to the exhaust manifold (3).
2. Fit two of the bolts (11) into the jacking holes (10) and tighten the bolts to remove the retainer (9) from the
exhaust manifold (3).
3. Remove the valve flap (7) and valve body (2) assembly from the exhaust manifold (3).
4. Inspect the valve:
If the retainer (9) or valve body (2) are damaged or corroded, you must replace the interstage relief valve:
refer to Section 5.10.
If any of the valve flap (7), the hinge bushes (1) or the valve 'O' ring (6) are damaged, replace the damaged
component with a new component.
5. Clean the inside of the exhaust manifold (3) to remove any deposits; if necessary, use a suitable cleaning
solution. If you use a cleaning solution, ensure that all of the solution is removed before you fit the new
interstage relief valve components.
6. Inspect the 'O' rings (8, 5, 4) and, if necessary, fit new 'O' rings.
1. Top-cap
2. Inlet
3. Filter element
4. Filter body
 Loading...