35
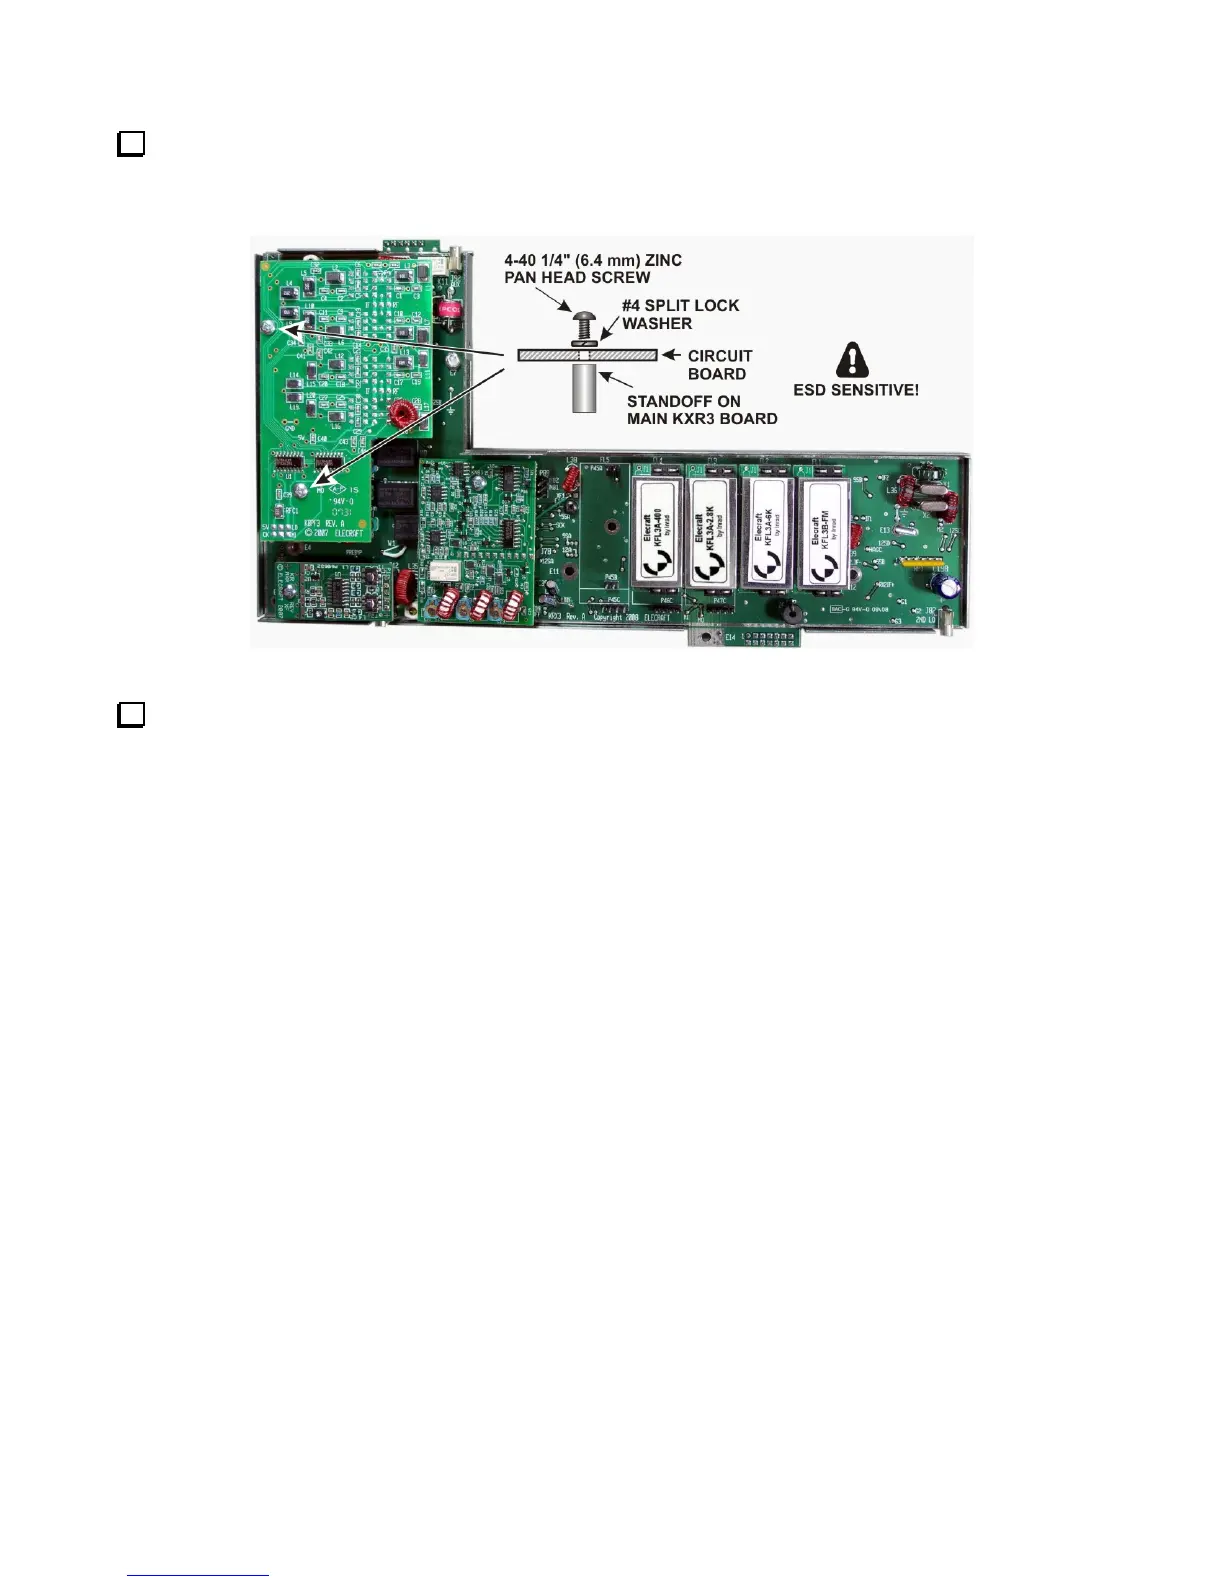
If you have the KPBF3 option, install the board now with 4-40 1/4” (6.4 mm) pan head screws and #4 split
lock washers as shown in Figure 41. These screws and washers are supplied with your KBPF3 option. Be sure
all three connectors on the KPBF3 are properly mated with their counterparts on the KRX3A board.
Figure 41. Mounting the KPBF3 Board.
Locate the sub receiver RF module top cover. It has a label with places to record the bandwidth (BW), and
frequency offset (FRQ) of each filter. Copy the information from Table 1. Note that the filters read right to left
on the label, just as they were installed on the pc board. Place a check mark by Sub (for sub receiver) on the
label. Use pencil in case you change your filters later. The label also has a row for Gain. This is a value you can
determine after your installation is finished to adjust the overall gain for each roofing filter so the audio remains
constant when switching from one filter to another. Making this adjustment is described under Filter Loss
Compensation in your K3 Owner’s manual.