36
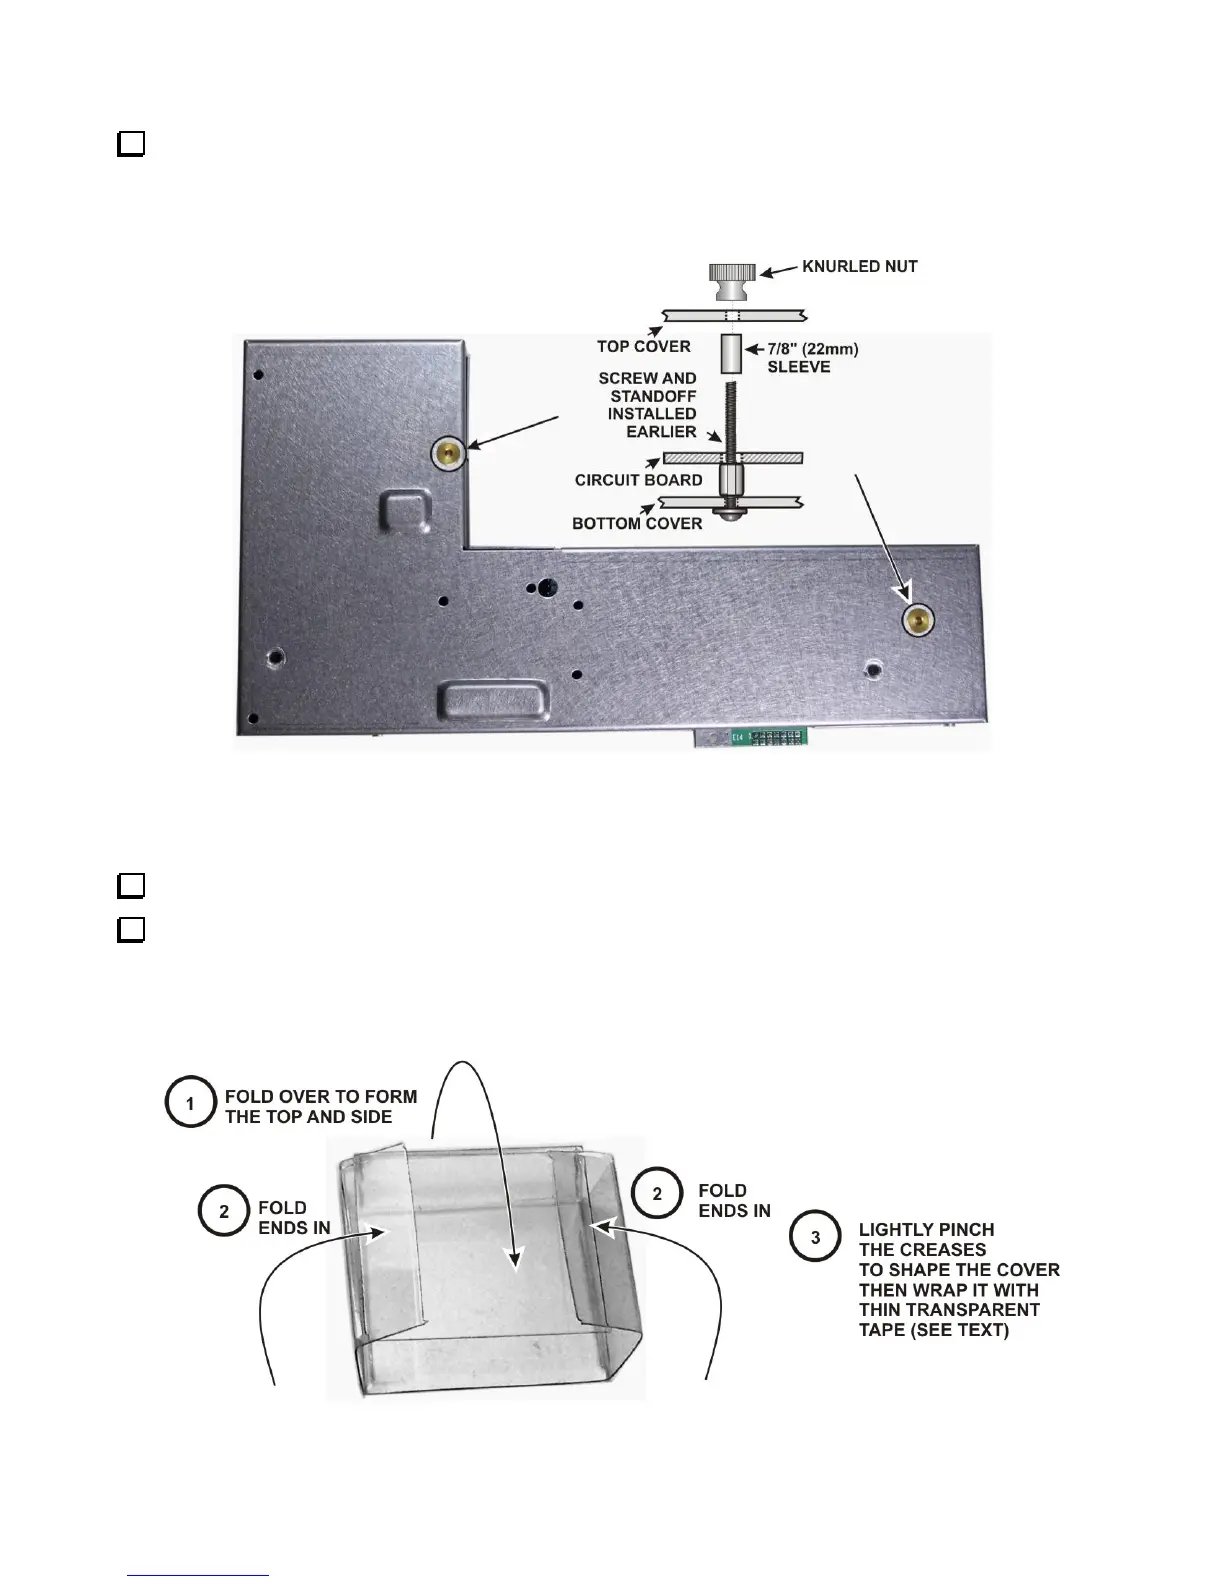
Place a 7/8” (22 mm) unthreaded sleeve over each of the long screws so they rest against the top of the
circuit board (see Figure 42), then place the top cover over the assembly and adjust its position so the edge of
the top fits inside the bottom and rests against the KRX3A main board on all sides. The long screws will pass
through holes in the top cover. Secure the top with knurled nuts tightened only enough to hold the cover in place
so it isn’t loose.
Figure 42. Installing the Shield Top.
Installing the KRX3A Sub Receiver Module
If you haven’t removed it already, remove the chassis stiffener bar. The stiffener is shown in Figure 7.
The exposed rim of Battery BT1 on the K3 main RF board must be insulated to prevent shorting against the
bottom of the KRX3A enclosure. A plastic battery cover is provided. Fold the battery cover as shown in Figure
43. Pinch the creases to set the bends to form a rectangular box with one open end, then wrap the cover with thin
transparent tape such as Scotch
Magic
TM
mending tape (see Figure 44). The tape ensures the cover holds its
shape over time.
Figure 43. Folding the Battery Cover.