22
NOTE!
For cooking food dipped in flour, set the temper-
ature to 170 ℃.
A higher temperature doesn’t improve the cooking
results, but cause faster deterioration of the oil (the
residual flour in the oil tends to burn).
IMPORTANT
During cooking, manually remove any cooking
residuals in the oil.
The prolonged presence of these residuals alters
the taste and fragrance of the oil, reducing its useful
life.
For a quick and good measurement of the degree of
oil deterioration, use litmus paper (strips) available
on the market.
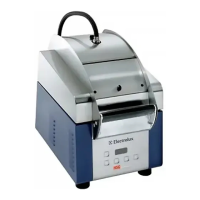
G.2 Gas models
G.2.1 Switching on
The thermostatic valve control knobs have the following
positions:
“Off“ position
“Pilot ignition“ position
“Burner“ position
• Press knob “M“ lightly and turn it a few degrees anticlock-
wise to release it.
• Press down fully and turn it to “pilot ignition”; a click will
indicate sparking.
• Keep knob “M“ pressed in that position for about 15-20
seconds to allow gas to reach the pilot burner (pilot ignition)
and the thermocouple to heat up.
• With the pilot lit, turn knob “M“ to “burner“ to light it.
• Then use “N“ to select the required temperature.
NOTE!
In case the spark generator will not light, proceed
by keeping the knob “M“ pressed and draw near
the pilot an external flame
G.2.2 Switching off
• Turn knob “M“ to “Pilot ignition“, to turn off the main burner.
• To switch off the pilot burner, turn knob “M“ to “Off“ position.
G.3 Interlock
The valve features a thermal re-light locking device enabled
until the thermocouple is hot.
Such device, called interlock, keeps engaged for about 40
seconds in case of accidental pilot flame shut off, hence
allowing accumulated gas to flow out through the chimney
prior to light any spark again.
Forcing the interlock leads to a valve damage which is not
covered by the original manufacturer warranty.
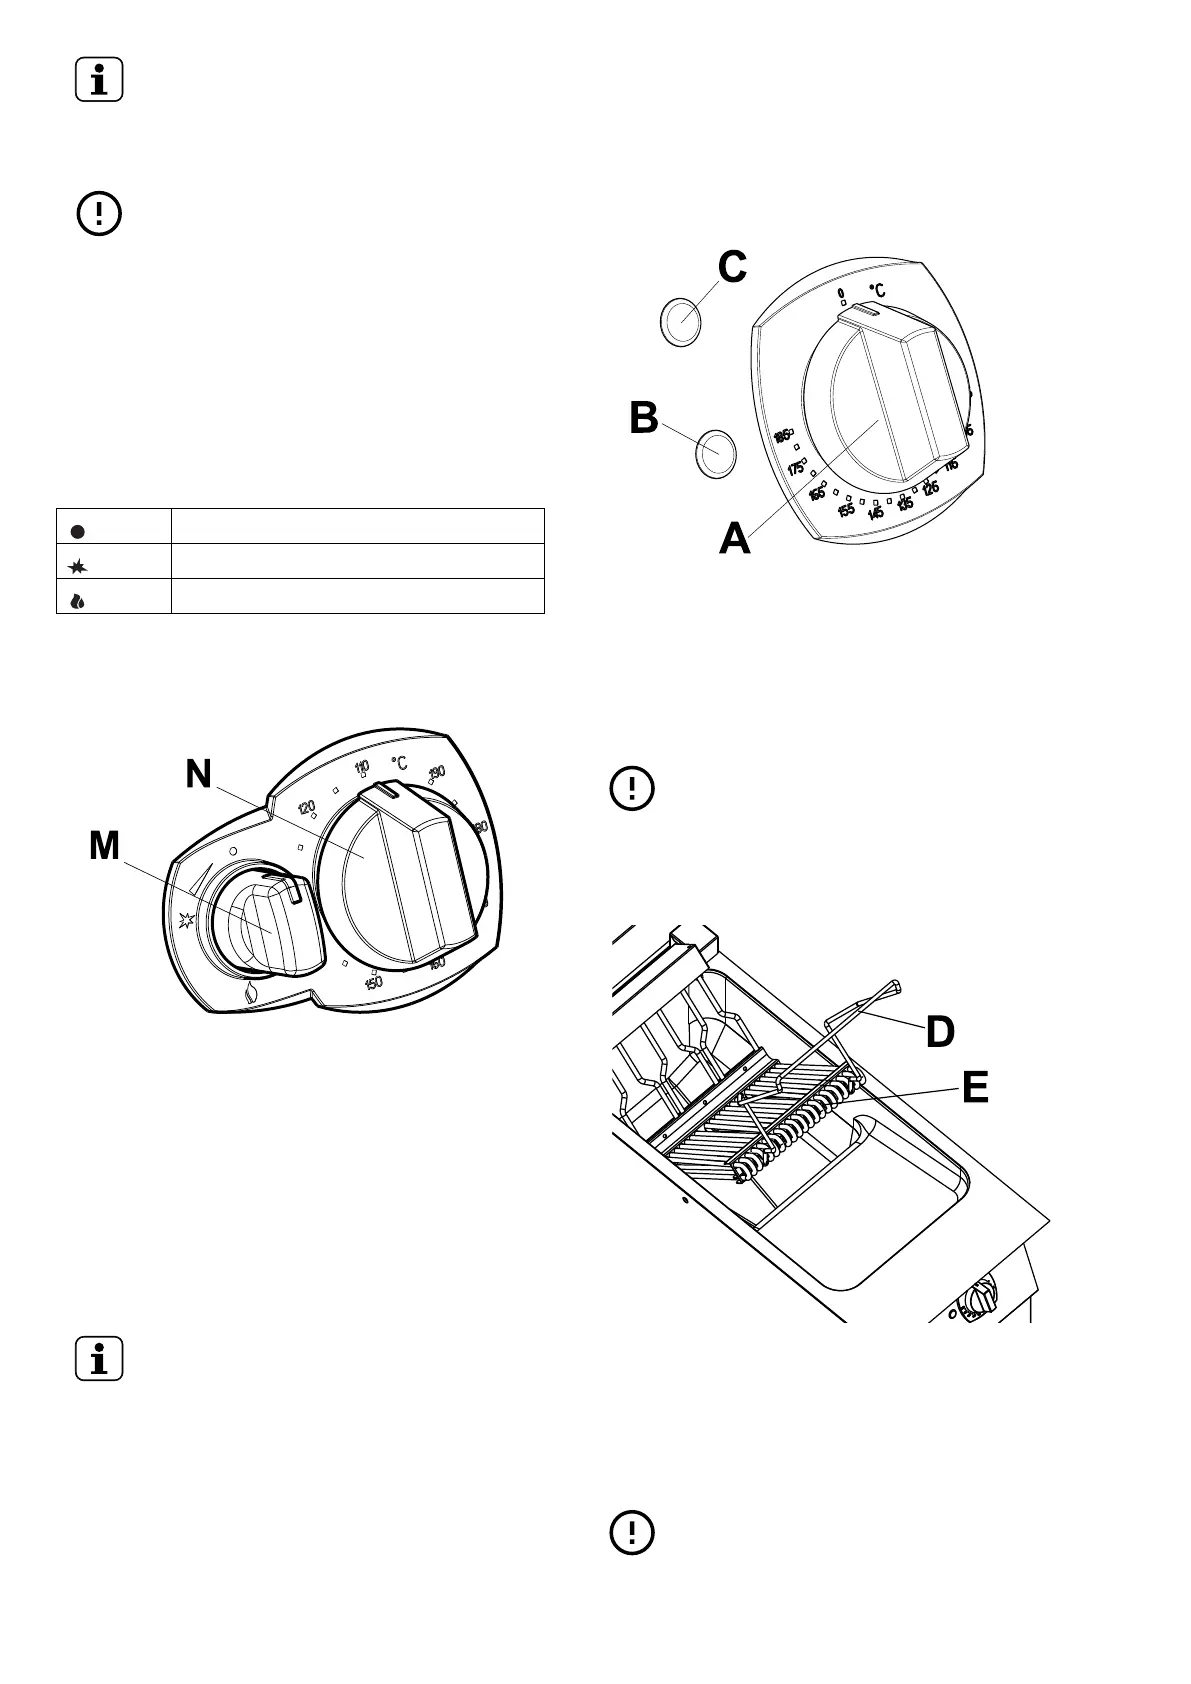
G.4 Electrical fryers
G.4.1 Switching on
• Turn the knob of thermostat “A“ to the value corresponding
to the required cooking temperature.
• Lighting up of green indicator “B“ signals that the power is
on.
Lighting up of yellow indicator “C“ signals that the heating
elements are on; it goes off when the set temperature is
reached.
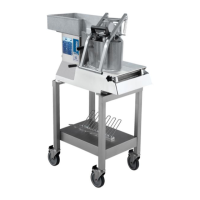
IMPORTANT
When using a fryer with heating elements inside the
tank, pay particular attention when handling them,
using the special support bracket “D“.
For greater safety, a microswitch cuts off the power
when the heating elements “E“ are raised.
G.4.2 Switching off
• Turn the knob of thermostat “A“ anticlockwise to position “0“.
G.5 Draining oil
IMPORTANT
Emptying the tanks should be done at cold oil.
• Switch the fryer off;