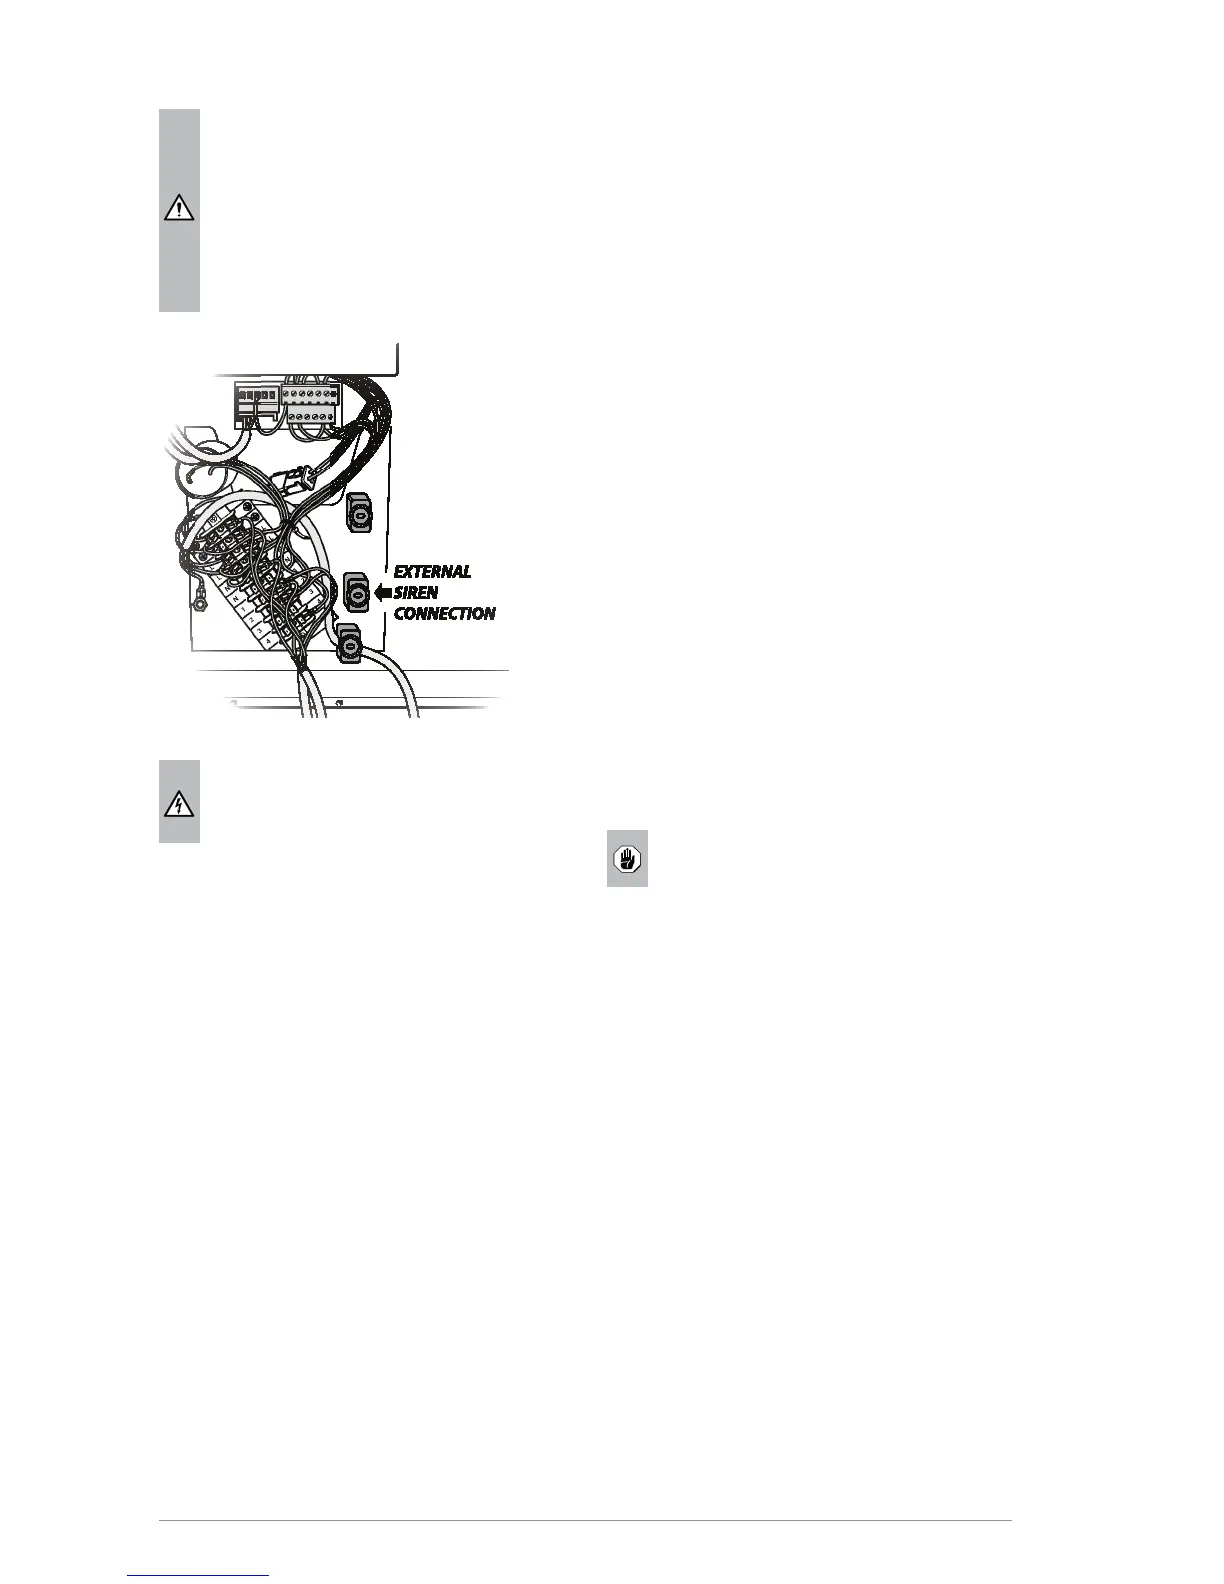
ATTENTION
230V mains voltage be-
tween terminals 4-N.
B.3.4 Evacuating the lines and charging with refrigerant
gas
B.3.4.1 Leakage test
Wash the inlet and delivery pipes with pressurised dry
nitrogen.
Connect a nitrogen cylinder to the high and low pressure
connectors, also making sure to install a pressure gauge
(using a “T” union). Charge the high and low pressure lines
with gas, until reaching a pressure of approx. 15 bar. Close
the cylinder valve and, after at least 1 hour, check that the
pressure has not dropped below the previous reading level.
B.3.4.2 Vacuum
Empty the circuit manually by opening the valves on the
unions.
Connect the pipes to a vacuum pump (preferably a two-
stage model with vacuum gauge and high and low pressure
connectors). Reach a vacuum level equal to or lower than
70mTorr (0.0931 mbar). On reaching this level, maintain it
for about 15 minutes, then charge the unit as follows:
B.3.4.3 Charging with refrigerant
Charge the high and low pressure lines with R134a for refrig-
erant gas and R404A for liquid refrigerant until the pressure
between the cylinders and the circuit is balanced (the initial
charge of uid is approx. 20÷30% the total charge).
Then shut o the high pressure line, start the compressor
and charge with gas slowly until the bubbles in the uid
indicator disappear.
ATTENTION
Charging with refrigerant must be done by a
specialised technician.
B.3.5 Checks at rst startup
Check on the refrigerant ow indicator if the charge is su-
cient and, if necessary, complete it following the instructions
in § 3.4.3.
Using a digital thermometer, make sure the temperature
reading on the control panel matches that measured with
the instrument inside the appliance.
The Manufacturer declines any liability if the acci-
dent-prevention regulations are not respected.
 Loading...