81
ENGLISH
C.1 Operation
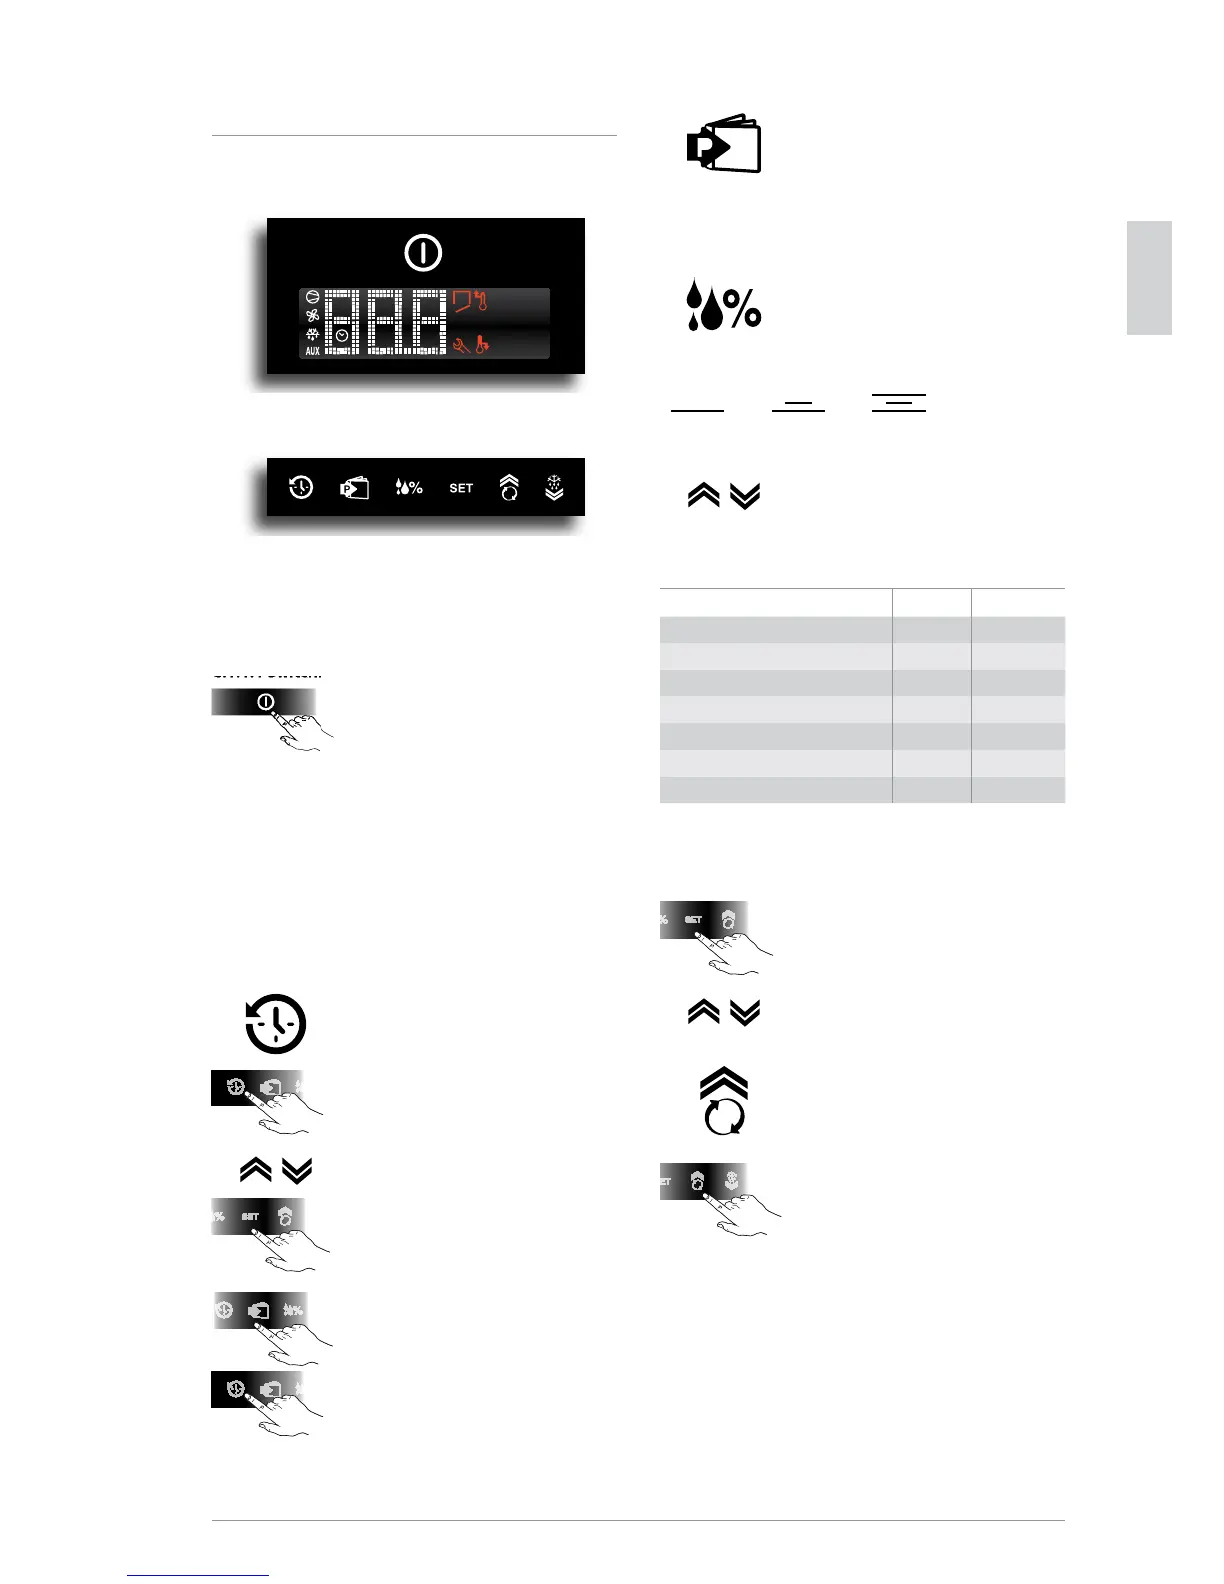
C.1.1 Digital temperature controller and control panel
Fig. 1
Fig. 2
The digital temperature controller has a button for switching
the appliance on and o (g.1) and 6 buttons for control and
programming the instrument (see g. 2).
C.1.1.1 Switching the appliance on
Connect the power cable to a power outlet.
The instrument display does a Lamp Test
and the message OFF appears. To activate
and deactivate the appliance press the
button for 5 seconds.
The display will show the message ON (for
activation) or OFF (for deactivation). Even
if the machine is deactivated with the On
and O button it still remains powered.
This switch only disconnects the power
to the loads connected to the instrument.
C.1.1.2 Control panel buttons (g. 2)
History button
It memorises the temperature every 24
hours from switch-on for a total of 62
memorisations. It memorises high/low
temperature alarms. Press the History but-
ton once to access the list of daily memo-
rised values (t0 = current day; t1, t2,
t3,etc.=previous memorisation days). With
the buttons it is possible to view the tem-
peratures of previous days.
Press the button Set to display the mem-
orised temperature of that period; press
the button P to return to the list of stored
values.
Press the button P for a few seconds to exit
the History function. After the installation
of the appliance, at least 24 hours must
pass for the rst temperature to be record-
ed. Holding down the button for a few
seconds will reset the previous memorisa-
tions.
Programs button
It is used in the HISTORY function (see
par. C.1.1.2).
Press the button P to also access the
Technical Menu, which cannot be modied.
Humidity button
IT IS available in refrigerated models only
and is used to set 3 dierent humidity
levels. Depending on the humidity level
the display will show images with 1, 2 or
3 lines that indicate: low, medium and
high humidity.
Use the buttons to select the most suitable
humidity level.
Table of categories, compartment temperature and
humidity setting
Categories Temp.°C Humidity
Fresh meat (beef, mutton, pork) 4 90%
Poultry -2 90%
Fruit & Veg 6 90%
Eggs, butter, cheese, charcuterie 6 90%
Fresh sh 4 90%
Patisserie 6 90%
Beverages 8 60%
To conrm the degree of humidity selected,
press the button Set for 5 seconds.
Set button
If pressed for more than 1 second it displays
and/or sets the set point. To increase or
decrease the values , use the buttons
To conrm the new value, press the button
Set again.
Continuous cycle button
Pressing the button for more than 5 sec-
onds activates the “TC” Turbo Cooling cycle
function (the message ccb=start appears),
or activates the temperature reset function,
skipping Defrost. During the continuous
cycle the compressor always stays on; the
low temperature alarm is deactivated; the
message TC and the temperature value
alternate on the display. The continuous
cycle ends when:
the button is pressed (the message
cce=end appears);
the lowest foreseen temperature is
reached;
the maximum duration is reached
(time 1h);
the instrument is switched o.
1 line (30%) 2 lines (60%) 3 lines (90%)
 Loading...