Do you have a question about the Elegoo Neptune3 and is the answer not in the manual?
Steps for updating the screen firmware, including disassembly and TF card insertion.
Instructions for updating the motherboard firmware, including TF card insertion and reboot.
Recommendations for hot end and hot bed temperatures for optimal leveling accuracy.
Details on board firmware updates, including bug fixes and new features like Z-offset saving.
Information on viewing motherboard and screen firmware versions via the 'About Machine' menu.
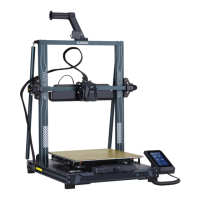
This document outlines the firmware update process and provides important information regarding the ELEGOO Neptune 3 3D printer, covering both screen and motherboard firmware.
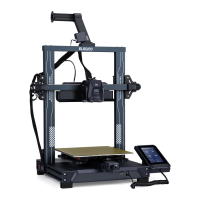
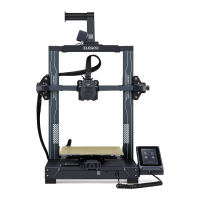
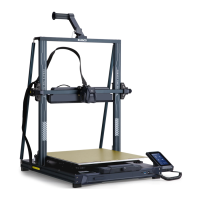
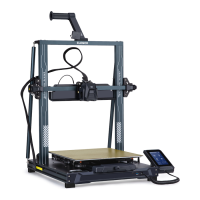
The ELEGOO Neptune 3 is a 3D printer that requires regular firmware updates to ensure optimal performance, introduce new features, and address any bugs. The firmware consists of two main components: the screen firmware (DWIN_SET) and the motherboard firmware (ZNP_ROBIN_NANO.bin). The screen firmware manages the user interface and interactions on the printer's display, while the motherboard firmware controls the printer's core functions, such as motor movements, heating elements, and overall print execution. Updating these firmwares is crucial for maintaining the printer's functionality and accessing the latest improvements.
Firmware Update Process: The firmware update process for the Neptune 3 is designed to be straightforward, involving a TF card for transferring the firmware files to the printer.
Downloading Firmware:
Users can access the latest firmware files from the official GitHub repository: https://github.com/NARUTOfzr/Neptune_3. The download method is clearly illustrated, guiding users to click on the "Code" button and then select "Download ZIP" to obtain all necessary files. This ensures that users always have access to the most current and stable firmware versions.
File Preparation:
Before initiating the update, users must prepare a TF card by formatting it to FAT32 file system with an allocation unit size of 4096 bits. This step is critical for ensuring that the printer can correctly read the firmware files. Once formatted, the two essential firmware files, DWIN_SET (for the screen) and ZNP_ROBIN_NANO.bin (for the motherboard), must be copied directly into the root directory of the TF card.
Screen Firmware Update: The screen firmware update involves a physical intervention. Users need to disassemble the back shell of the printer's screen, as shown in the provided images, to access the TF card slot. After inserting the prepared TF card, the printer needs to be rebooted. The screen will then display an "Updating FW..." message, indicating that the update is in progress. This process typically takes around 70 seconds. Upon completion, the screen will show the updated interface, confirming the successful installation of the new screen firmware.
Motherboard Firmware Update: For the motherboard firmware, the process is simpler. Users insert the prepared TF card into the machine's main TF card slot. After rebooting the printer, the system will automatically detect and install the new motherboard firmware. During this loading phase, the screen will display a specific interface (referred to as "pic3"). Once the update is complete, the printer will transition to its normal operational interface (referred to as "pic4"), signifying a successful motherboard firmware update.
Leveling Temperature Recommendations: The manual provides specific recommendations for leveling temperatures to ensure accuracy. For the hot end, a temperature of 0 °C is recommended to prevent fan rotation and temperature fluctuations from affecting leveling precision. For the hot bed, the recommended temperature is the filament's required temperature plus 5 °C, which helps to avoid leveling inaccuracies caused by thermal deformation of the hot bed.
Z-offset Management:
The firmware includes features to manage the Z-offset, which is crucial for print quality. Initially, the Z-offset value set during printing was not saved to EEPROM, meaning it would be lost after power off or failure. To address this, an update introduced a solution: users can now save the Z-offset to EEPROM by navigating through Settings → Temperature → Leveling Temperature and clicking Save after printing is completed or canceled. This ensures that the Z-offset is retained for future prints. Furthermore, a later update simplified this by allowing the Z-offset to be saved automatically if the user clicks stop → confirm or confirm after printing is completed.
Filament Break Detection and Management: The printer features "Break Detection" to identify filament breaks during printing. If a break is detected or if the user manually pauses the print, the extruder will retract the filament by 6mm to prevent leakage. When the print is resumed, the extruder will advance the filament by 6mm back to its original printing position. This feature is particularly useful when replacing filament, as it advises against inserting new filament directly into the nozzle position to avoid issues.
Firmware Version Display:
A useful feature added in a recent update is the ability to view both the motherboard and screen firmware versions directly on the printer's display. This can be accessed through Settings → About Machine, allowing users to easily verify their current firmware status.
Regular Firmware Updates: The primary maintenance feature highlighted is the necessity of regular firmware updates. These updates are crucial for fixing bugs, improving performance, and adding new functionalities. The provided update logs detail specific improvements, such as enhanced leveling methods, optimized leveling and return-to-origin speeds, and the addition of leveling temperature settings.
Troubleshooting Leveling and Homing Issues: The manual offers a troubleshooting tip for leveling and homing failures. Users are advised to restart the printer or restore factory settings through the settings menu. Restoring factory settings will clear the leveling grid data, requiring a re-leveling process. This ensures that any corrupted leveling data is reset, allowing for a fresh calibration.
Support Contact:
For any issues or questions, users are directed to contact ELEGOO Support at 3dp@elegoo.com. This provides a direct channel for technical assistance, ensuring that users can receive help with firmware updates or other printer-related problems.
| Build Volume | 220x220x280mm |
|---|---|
| Layer Resolution | 0.1-0.4 mm |
| Nozzle Diameter | 0.4 mm |
| Filament Diameter | 1.75 mm |
| Connectivity | SD card, USB |
| Bed Leveling | Automatic |
| Max Nozzle Temperature | 260°C |
| Max Bed Temperature | 100°C |
| Display | 4.3-inch touch screen |
| Supported Filaments | PLA, ABS, TPU, PETG |
| Power Supply | 350W |
| Frame Material | Aluminum |