Do you have a question about the Elegoo MARS 4 and is the answer not in the manual?
Details on system, operation, slicer, and connectivity.
Details on technology, light source, resolution, and speed.
Details on dimensions, build volume, package, and weight.
Steps for preparing and starting the test print.
Procedures for removing and post-processing the printed model.
Instructions for installing the slicing software.
Guide to activating and using the slicing software.
Configuration of printer parameters within the software.
Settings related to resin density and cost calculation.
Details on layer height, exposure, and print settings.
Steps for slicing and exporting files for printing.
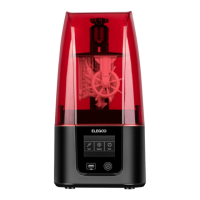
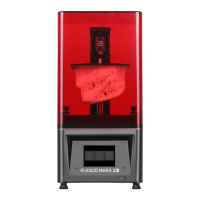
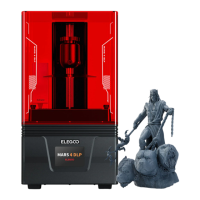
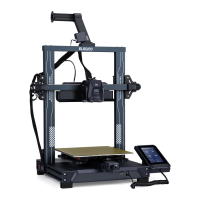
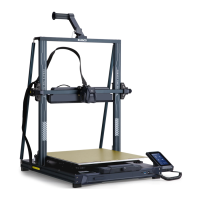
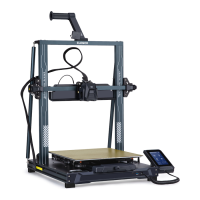
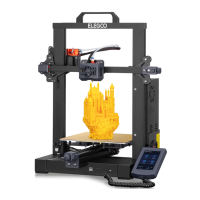
The ELEGOO MARS 4 is a 3D printer designed for stereolithography, offering users the ability to create three-dimensional objects from digital models. This user manual provides comprehensive instructions for setting up, operating, and maintaining the printer, ensuring a smooth and successful printing experience.
The ELEGOO MARS 4 is a resin-based 3D printer that utilizes MSLA (Masked Stereolithography Apparatus) technology. It employs a COB (Chip-on-Board) light source with a wavelength of 405nm to cure photopolymer resin layer by layer, building up a physical model. The printer is controlled via a 3.5-inch touch screen interface, allowing for easy navigation and operation. It supports slicing software such as Chitu Box and Voxeldance Tango, enabling users to prepare their 3D models for printing. Connectivity is achieved through a USB interface, facilitating the transfer of sliced files to the printer.
To begin using the ELEGOO MARS 4, users must first ensure the equipment is intact and all accessories are present. Any damage or missing parts should be reported to ELEGOO customer support. Before the first print, it is crucial to perform the leveling procedure for the build platform. This involves removing the resin tank, locking the build plate's screw knob, and loosening its two fixing screws. A leveling card is then placed between the build plate and the LCD screen, and the "Move Z axis to zero" function is selected on the touch screen. Once the printer stops moving, the build plate is pressed down, and the fixing screws are tightened. The leveling card should offer slight resistance when pulled out; if not, fine adjustments to the Z-axis position are made using the 0.1mm "down" or "up" buttons until the correct resistance is achieved. After leveling, the "Set Z=0" option is confirmed, resetting the initial height for the first printing layer. Finally, the Z-axis is raised by approximately 100mm, and an exposure test is performed to verify the LCD screen and LED light source are functioning correctly, displaying "ELEGOO TECHNOLOGY www.elegoo.com".
For model printing, the USB air purifier should be plugged into the USB port. Resin is then slowly added to the resin tank, ensuring it does not exceed the MAX line. The printer is covered, and a U disk containing the pre-sliced test model is inserted. Users can then select the model from the printer's interface to start printing.
After printing, the model processing involves waiting for the resin to stop dripping from the build plate. The screw knob of the build plate is loosened to remove it, and the model is carefully detached using a scraper. For optimal results, ELEGOO's cleaning and curing machine can be used for post-processing.
The printer supports both Chitu Box and Voxeldance Tango slicing software. For Voxeldance Tango, installation involves selecting the correct version from the USB flash drive. Activation requires running the software, choosing "Activate your license" and "Activate with printer hardware code." The 10-digit ID from the printer's "Settings" - "System" menu (displayed on the touch screen) is entered into the software, along with other relevant information. Once activated, users can open their 3D model files (STL format). The software allows for manipulation of the model's viewing angle, size, and position by left-clicking and dragging, zooming with the mouse wheel, and rotating with the right mouse button.
In the slicing software, users must select "ELEGOO MARS 4" as their default printer under "Parameter Settings." The build volume parameters typically do not need adjustment. Key resin parameters include resin density and resin cost, which can be input to calculate printing expenses. Important printing parameters to configure include Layer Height (recommended 0.05mm, adjustable from 0.01-0.2mm), Bottom Layer Count (default 2), Exposure Time (default 2.5 seconds), Transition Layers, Bottom Exposure Time (default 32 seconds), Wait After Lift (default 0 seconds), Wait Before Cure (default 0.5 seconds), and Wait After Cure (default 0 seconds). Movement parameters like Bottom Lift Distance, Lifting Distance, Bottom Retract Distance, Retract Distance, Bottom Lift Speed, Lifting Speed, Bottom Retract Speed, and Retract Speed also have default settings that can be adjusted if necessary. The Parameter Mode allows users to choose between static, high-speed, or smooth modes, which dynamically adjust printing parameters based on model complexity to optimize quality and speed. After setting all parameters, the model is sliced, and the sliced files are exported to a U disk or SD card, which is then inserted into the printer to initiate printing.
Proper maintenance is essential for the longevity and performance of the ELEGOO MARS 4. Users should avoid using sharp or pointy tools to scrape the resin tank to prevent damage to the release liner film. The resin tank should be cleaned thoroughly before changing resin colors. Both before and after printing, the build plate must be cleaned with paper towels or alcohol to ensure it is free of bumps or burrs.
Daily checks of the machine's exterior and all mechanical parts are recommended to identify any obvious damage, defects, or abnormalities. Maintaining a printing environment between 25-30 degrees Celsius and ensuring good ventilation in the printing room helps facilitate heat dissipation and resin odor volatilization.
If the Z-axis produces friction noise, lubricant should be applied to the lead screw. This lubrication should be checked and applied every 2-3 months, with increased frequency if printing is done more often. If the printer will not be used for more than 48 hours, any remaining resin in the tank should be poured back into its bottle and sealed. A filter should be used to remove any residue.
The release film's condition should be inspected before each print. If it is loose, scratched, or severely whitened, it should be replaced promptly. The release film is a consumable part and should be replaced at least once every 1-2 months, or more frequently with increased printing.
Care must be taken when removing the printing platform to avoid damaging the LCD screen. The LCD screen has an estimated service life of 2000+ hours, which can decrease with higher printing frequency. Daily screen cleaning and unplugging the machine after printing are recommended. If screen exposure issues or a significantly reduced service life affect print quality, the screen should be replaced.
The ELEGOO printer comes with a 1-year free warranty service, excluding consumables like the LCD screen and release film. The LCD screen specifically has a 6-month free warranty. The warranty does not cover problems resulting from self-disassembly, improper use, or normal wear and tear of the machine housing. For any printer issues, users are advised to contact ELEGOO customer support at 3dp@elegoo.com and refrain from disassembling or modifying the printer themselves, as this will void the warranty.
| Layer Thickness | 0.01-0.2 mm |
|---|---|
| Connectivity | USB |
| Technology | Resin 3D Printing |
| Material Compatibility | 405 nm UV resin |
| Printing Technology | MSLA/LCD |
| Light Source | UV LED |
| Power Supply | AC 100-240V, 50/60Hz |
| Printing Speed | 30-70mm/H |