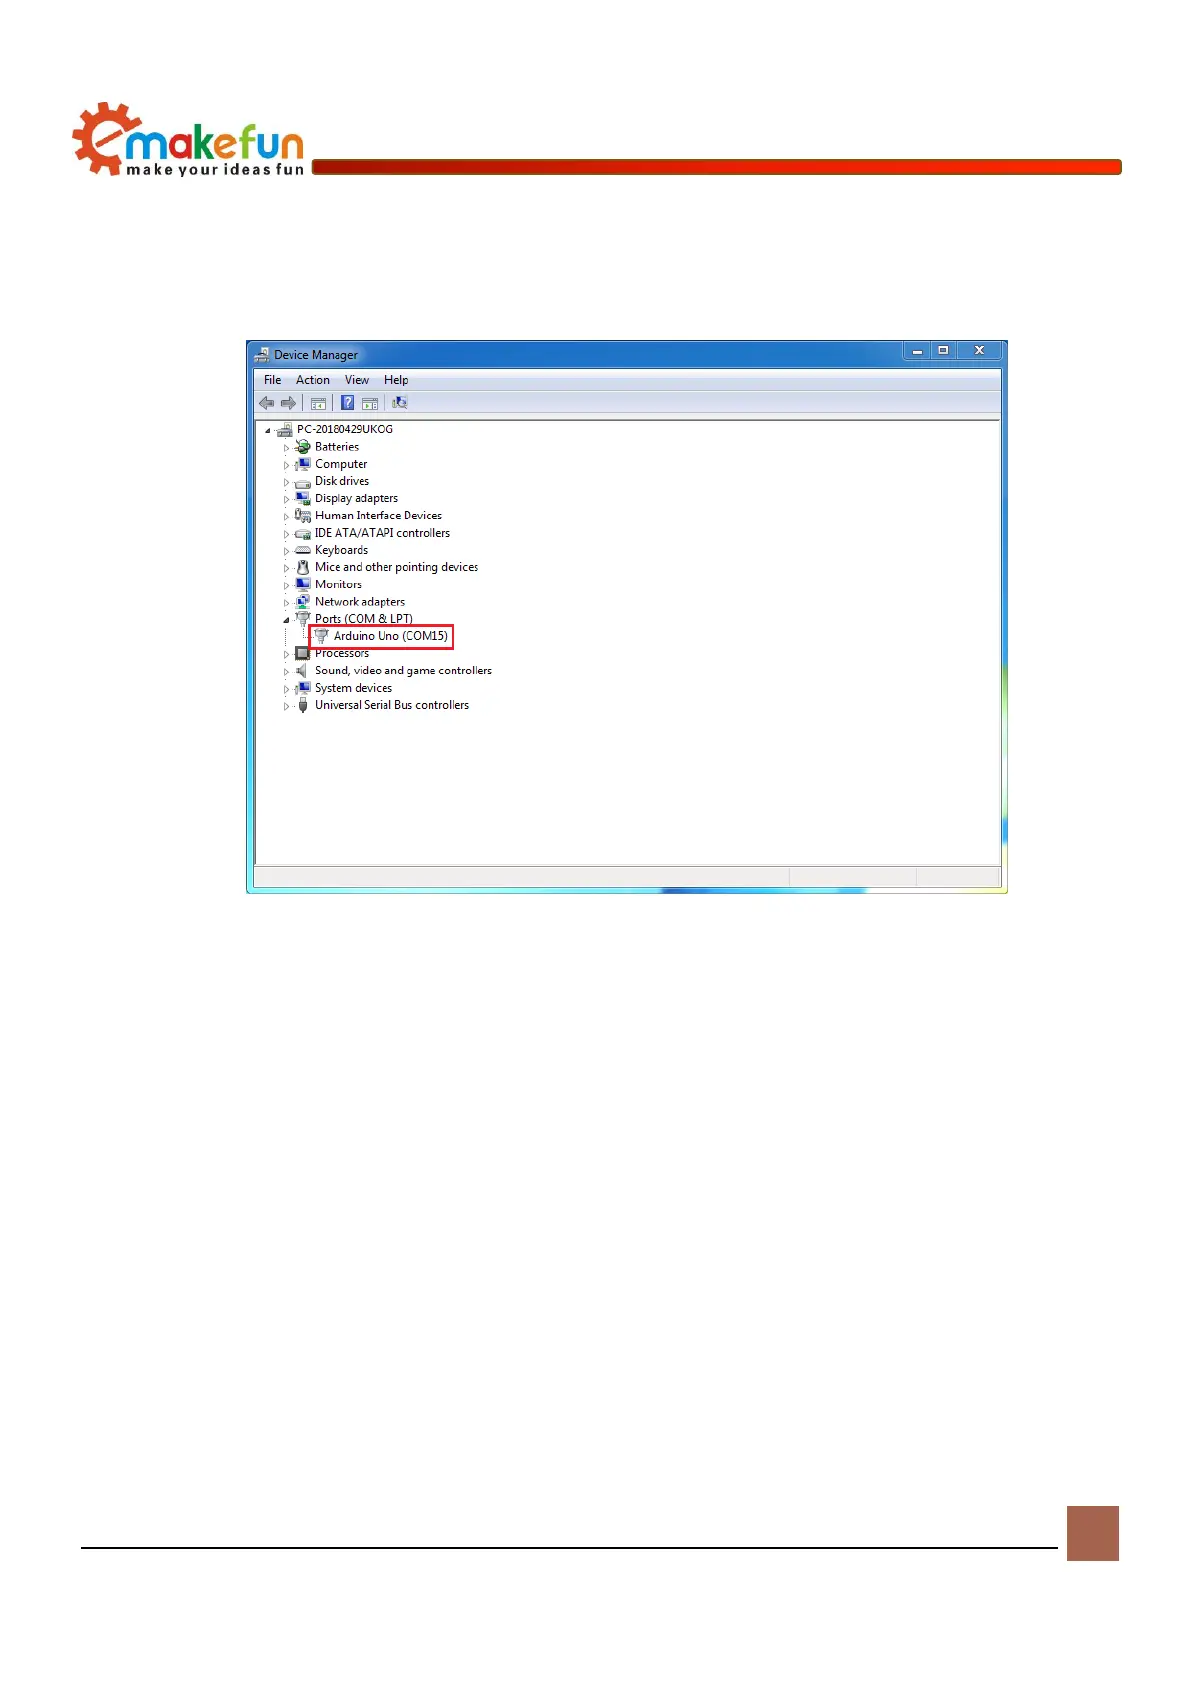
After the IDE installation, we connect the Arduino motherboard, right click on "My Computer"→
“Properties”→“Device Manager”→View“Port(COM 和 LT)”.If you see the interface below, the
driver has the installation is successful. At this time, we open the IDE and select the corresponding
development board model and port in the toolbar to use it normally.
Figure 4-2 Driver installation successful interface
Notice:
1)If you connect the controller board to your computer, the computer does not respond. Right click on "My
Computer" and select Open Device Manager to view the port (com&lpt). If there is no com or lpt, or if there
is only an unknown device, there is a problem with the controller board or USB cable.
2)Right click on "My Computer" and select Device Manager to view the ports (COM and LPT). If there is
a yellow Arduino UNO exclamation point, this means you need to install the driver yourself, the drive path:
MotorDriverBoard\ArduinoIDE.
3)If the driver is always installed but eventually fail. Please uninstall the driver and reinstall >
automatically install the driver > restart the computer.
Install driver
1、If your computer is a Windows 7 system:
1)Firstly, right click on "My Computer" and open the Device Manager to view the ports (COM and LPT).
At this point you will see a "USB Serial Port", right click on "USB Serial Port" and select the "Update