Disk-array enclosures
EMC VNX5400 Hardware Information Guide 119
Access to disk drives, fan modules, and LCCs
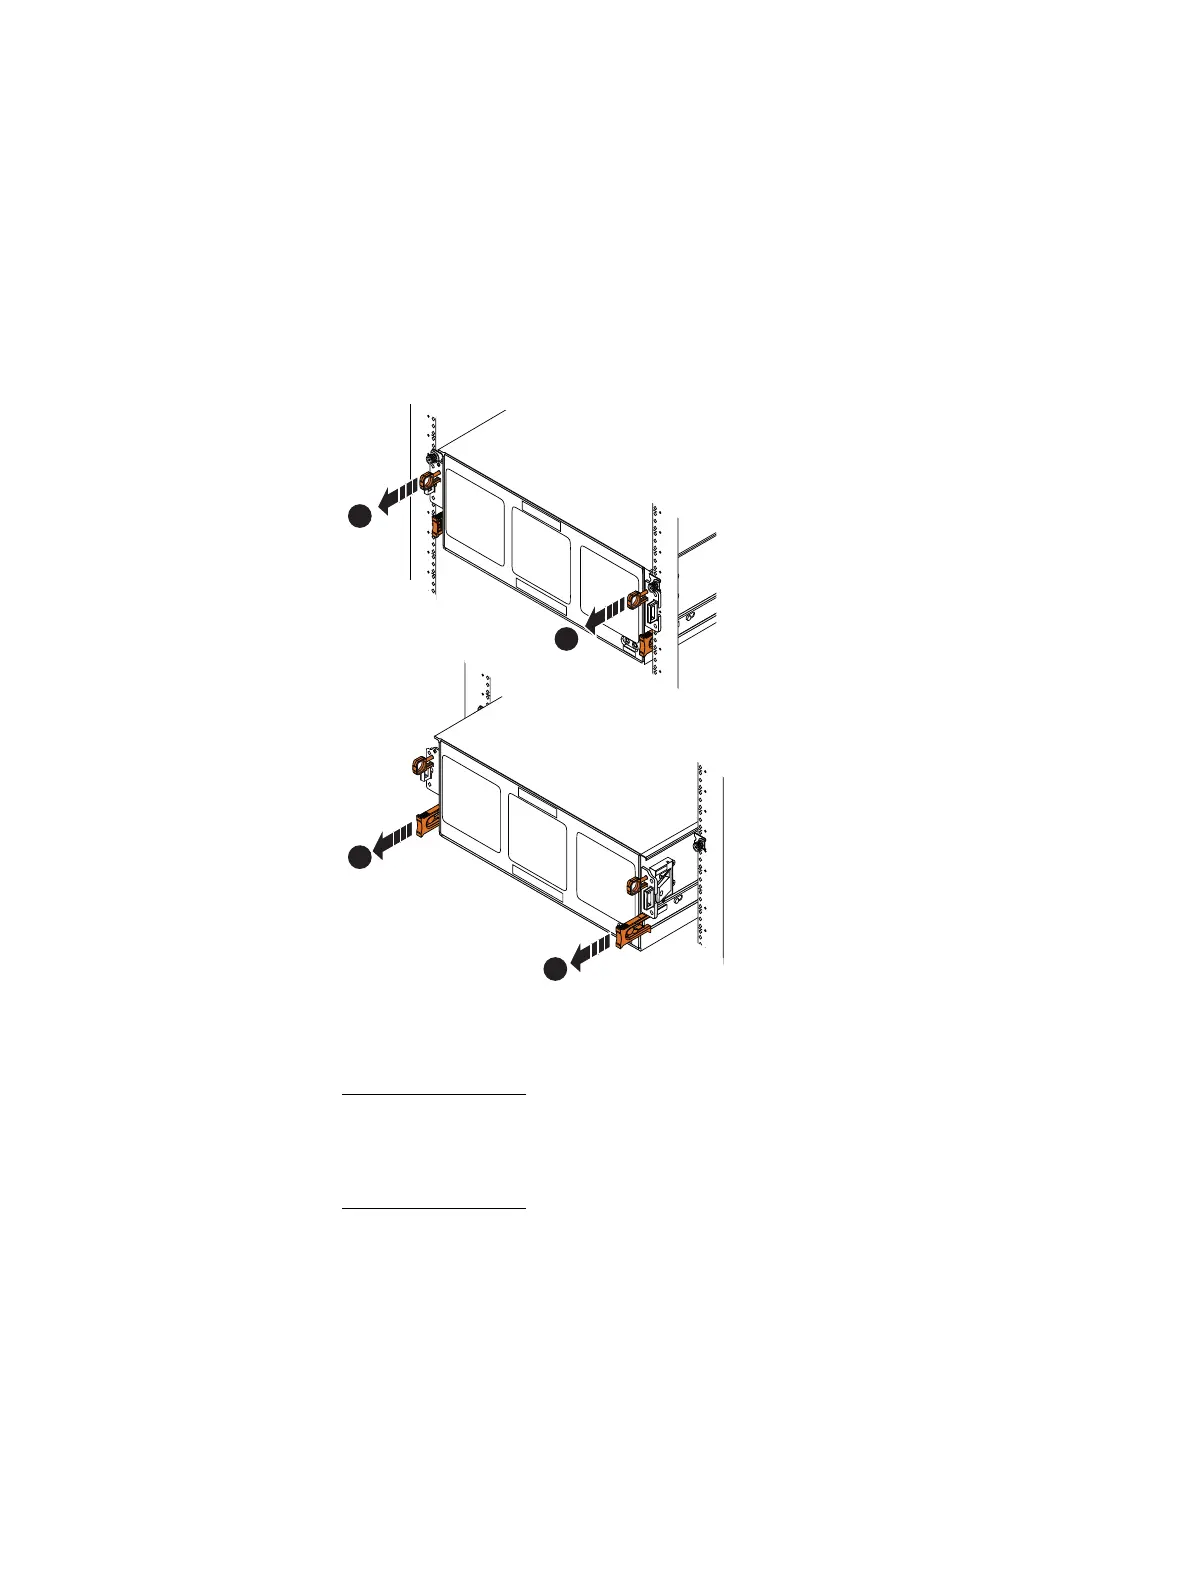
To gain access to the DAE, you must first, open the console, then unlock and remove the
front bezel. Next, to unlock the DAE from the rails, pull on the orange loops (see location 1
in Figure 97) on each side of the DAE. Finally, pull the orange tabs (see location 2 in
Figure 97) on each side of the DAE to slide the DAE out of the rack on its rails until it locks
into the secure service position. For complete instructions, see the
Replacing a disk in a
60-disk enclosure
procedure available online at https://mydocs.emc.com/VNX/ and go to
VNX Tasks,
then select Replace VNX hardware. Next, follow the steps in the wizard.
Figure 97 4U, 60 (2.5- or 3.5-inch) DAE (unlocking top, front ring pull latch mechanism and bottom
slide extension release levers)
Note: If the 4U, 60 (2.5- or 3.5-inch) DAE does not slide out of the rack (or cabinet) far
enough for you to access the internal components and lock on the rails in the service
position, verify that all the other DAEs are completely seated in the rack (or cabinet) by
pushing firmly on them.
CL4663
1
1
2
2
 Loading...