Page 12
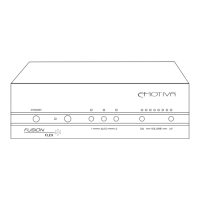
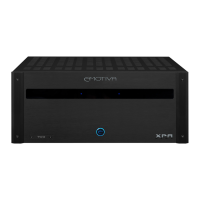
Fusion Flex Amplier
Installation Tips
Input Switching
The Fusion FLex Amplier has two separate stereo inputs. Explicitly choosing either Input 1 or
Input 2 (by either the front panel buttons, the IR remote, or the RS-232 remote) selects that input
as the signal source; choosing Auto as the signal source instructs the Fusion Flex Amp to use
whichever input signal is active; if Auto is selected, Input 1 has priority over Input 2 if both inputs
are receiving signal. If only a single input is to be used, Input 1 should always be chosen to assure
optimum performance.
Auto Power Mode
When the rear panel Power switch is set to On, and Power Mode is set to Auto, the Fusion Flex
Amplier will switch On when signal is detected at either input (regardless of which input is
selected as the signal source).
Volume and Input Setting Persistence
When the Fusion Flex Amplier is powered On from a full shutdown, or returned to operating
mode from Standby, the Volume level and Input selection will return to the settings in eect when
the Fusion Flex Amp was shut down.
Volume Lockout
The Fusion Flex Amplier has a special user Volume control lockout feature. This feature is
engaged by pressing the front panel Input 1 button and holding it for approximately 3 seconds.
THIS LOCKOUT MODE WILL REMAIN IN EFFECT EVEN IF THE FUSION FLEX AMP IS SET INTO
STANDBY MODE OR POWERED OFF AND ON AGAIN. The lockout mode is disengaged by again
pressing the front panel Input 1 button and holding it for approximately 3 seconds.
When the lockout mode is engaged, the front panel Volume controls and the IR Volume control
are disabled; the RS-232 Volume control functions will still operate normally. (This is not a Mute
function; the Volume remains set as it was when the lockout was initiated.) When the Input
1 button is pressed to engage the lockout mode, the Input selection will also switch to Input
1. Since the Input selection controls are not locked out, Input 2 or Auto may be re-selected
afterwards.
Ventilation and cooling
Even though the Fusion Flex Amp is quite ecient, it still produces some heat; to avoid
overheating, be sure to provide adequate clearance and ventilation, and do not block the vents.
Overheating adversely aects performance and shortens component life. We suggest locating
components that produce the most heat towards the top of your rack if practical, and leaving at
least 1U (1.75”) of rack space between components. Space between components can be left open
for ventilation, lled with a spacer, or used to house a forced-air cooling solution.