eMKW-TD0054-21- Page 10
It is essential that the test environment is as quiet as possible in order to ensure test compliance and that
the patient is not disturbed. The KUDUwave software will indicate if ambient noise is too loud and is
disrupting the test. The test environment should be free from any distractions that may disturb either the
operator or the patient as these may result in incorrect test results.
Preparing and Positioning the Patient
The patient should be seated in the test environment near to the test computer but should not be able
to view the computer screen. If the computer is being used so that the space bar is the patient response
button, then the computer can face the patient, however the testing screen must be put into hidden
mode. Read more under Working with Clinical Tests
. Care should be taken to ensure the patient is
comfortable so as to minimise distractions. If the patient is unable to sit, care must be taken to ensure
they are positioned in as comfortable and relaxed a position as possible. Patients who are notably anxious
should be calmed and reassured before testing. Furthermore, condition your patient as to how the test
will be conducted and use the software conditioning page to show them what the pure tones and masking
will sound like.
Preparing the KUDUwave™ Equipment
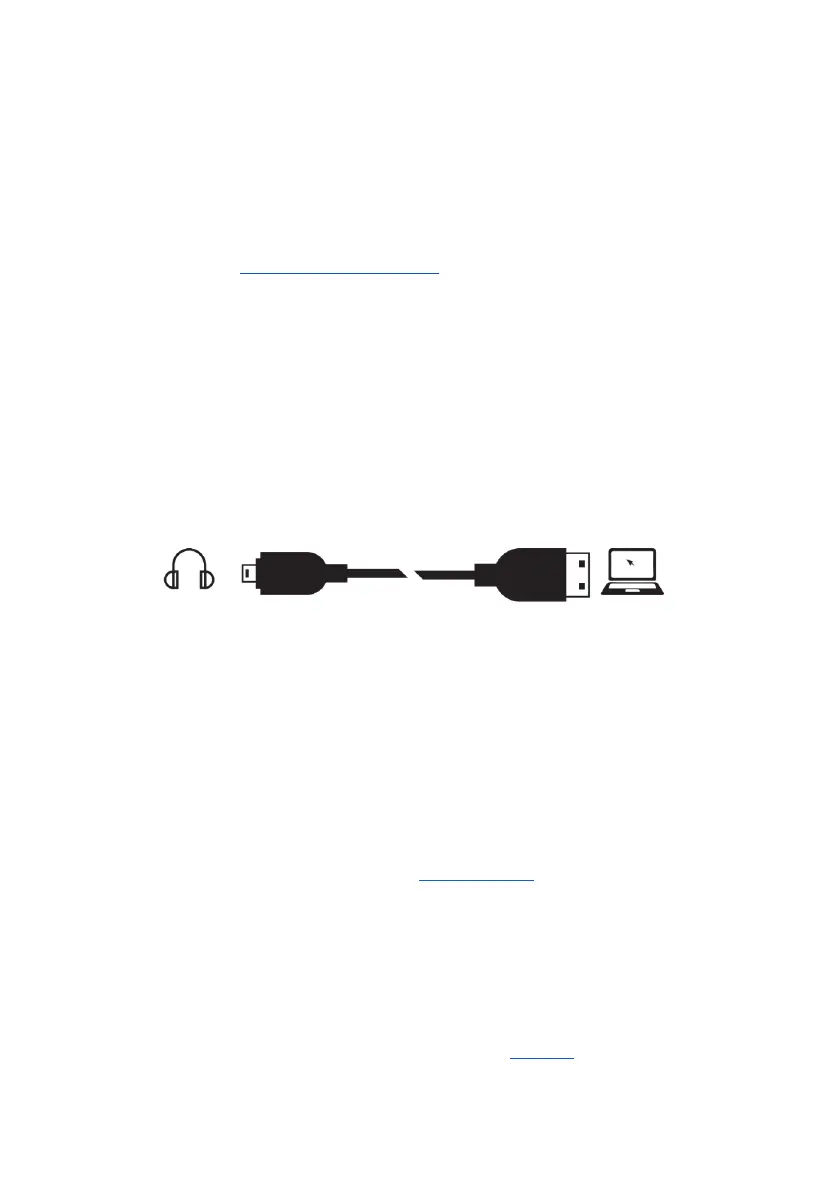
Connecting the KUDUwave™
Plug the larger USB plugs into the USB ports of the PC. Plug the smaller plugs into the corresponding
ports of the KUDUwave headset. Ensure these are secure and pushed all the way in until the LED light
comes on.
The KUDUwave will indicate the right side with a red light (Note this is not a warning light) and the left
side with a blue light when powered. You will now be able to begin testing. If the device is not plugged
in, it will not be possible to proceed to testing until the device is properly connected. Ensure that the
cables are positioned out of the way so that they are not a hazard.
Device Drivers
KUDUwave is a plug and play device and all drivers will automatically begin installing when KUDUwave’s
USB cables are plugged into a PC. If the device is plugged into a different USB port on the same computer
for the first time, then some drivers will be installed again. Please wait until Windows notifies you that
the drivers have been installed successfully.
Warning: If the drivers did not install correctly, you will need to remove the old drivers and reintroduce
the KUDUwave to the computer. Read more under Troubleshooting
.
Warning: If you launch the KUDUwave software before the drivers are installed, the KUDUwave
software will prompt you that it could not find the device, even though the device is plugged in. Close
and reopen the software once the KUDUwave device is set up. Contact Support should the software still
not find the device.
Performance Verification of the KUDUwave™
To test the KUDUwave hardware, plug in the device and perform X-Check (built in calibration verification
tool). This will also indicate any performance issues. Report any faults found to your distributor.