EMS 5000 FIREPOINT
©2015 EMS Security Group Ltd. All rights reserved. TSD258 Iss 3 25/06/15 AJM
18
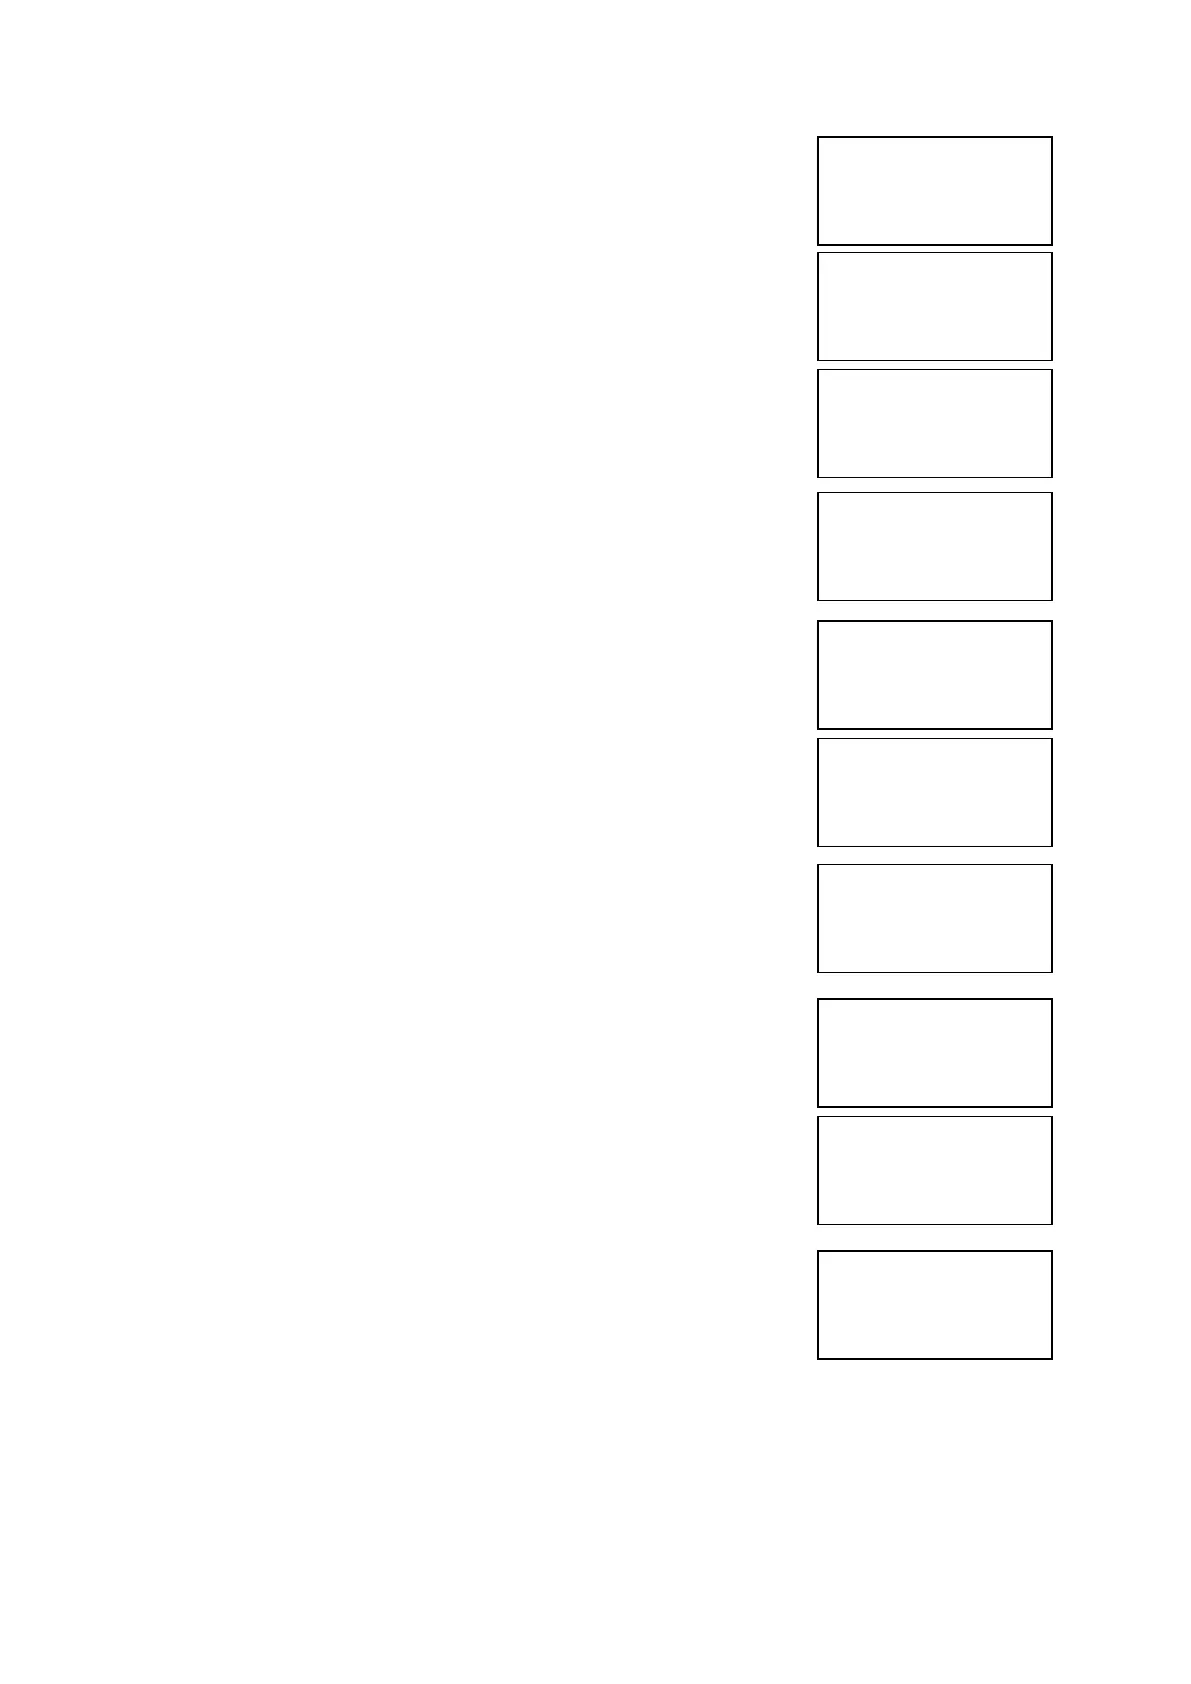
5 Press key four times and the screen will
display:
6 Press Yes key and the screen will now
display:
7 Press 221100 then press Yes key and the
screen will display:
8 Press key three times and the screen will
display:
9 Press Yes key and the screen will now
display:
10 Press Yes key to change and the screen will
now display:
11 Press 0 key and the screen will now display:
12 Enter the slot number that you want to add a
device to (e.g. 125) then press Yes key and
the Screen will now display:
13 Press key twice and the screen will now
display:
14 Press Yes key twice and the screen will now
display:
|Brigade Isolate |
>Engineers Config<
|Printer Options |
Yes= Select Time
Enter Your PIN
For Access>
Then Press YES
Time
|** Eng.; Config ** |
>Device Database <
|Sounder Options |
Yes= Select Time
|List Options |
>Log On Devices <
|Site Survey |
Yes= Select Time
Logon DISABLED(000)
Push YES to change
Push NO to escape
Push YES/NO Time
|**Logon Options** |
>Logon Slot :AUTO <
|Slot is :FREE |
Yes= Select Time
Enter Device
(Numbers 1-256)
Number>
Yes= Finish Time
|**Logon Options** |
>Logon Slot :125 <
|Slot is :FREE |
Yes= Select Time
|Slot is :IN USE |
>Logon is DISABLED<
| /\/\/\/\/\/\/\/\/\/\/\/\/\/\/\/\ |
|Slot is :IN USE |
>Logon is REPLACE<
| /\/\/\/\/\/\/\/\/\/\/\/\/\/\/\/\ |