EMS 5000 FIREPOINT
©2015 EMS Security Group Ltd. All rights reserved. TSD258 Iss 3 25/06/15 AJM
23
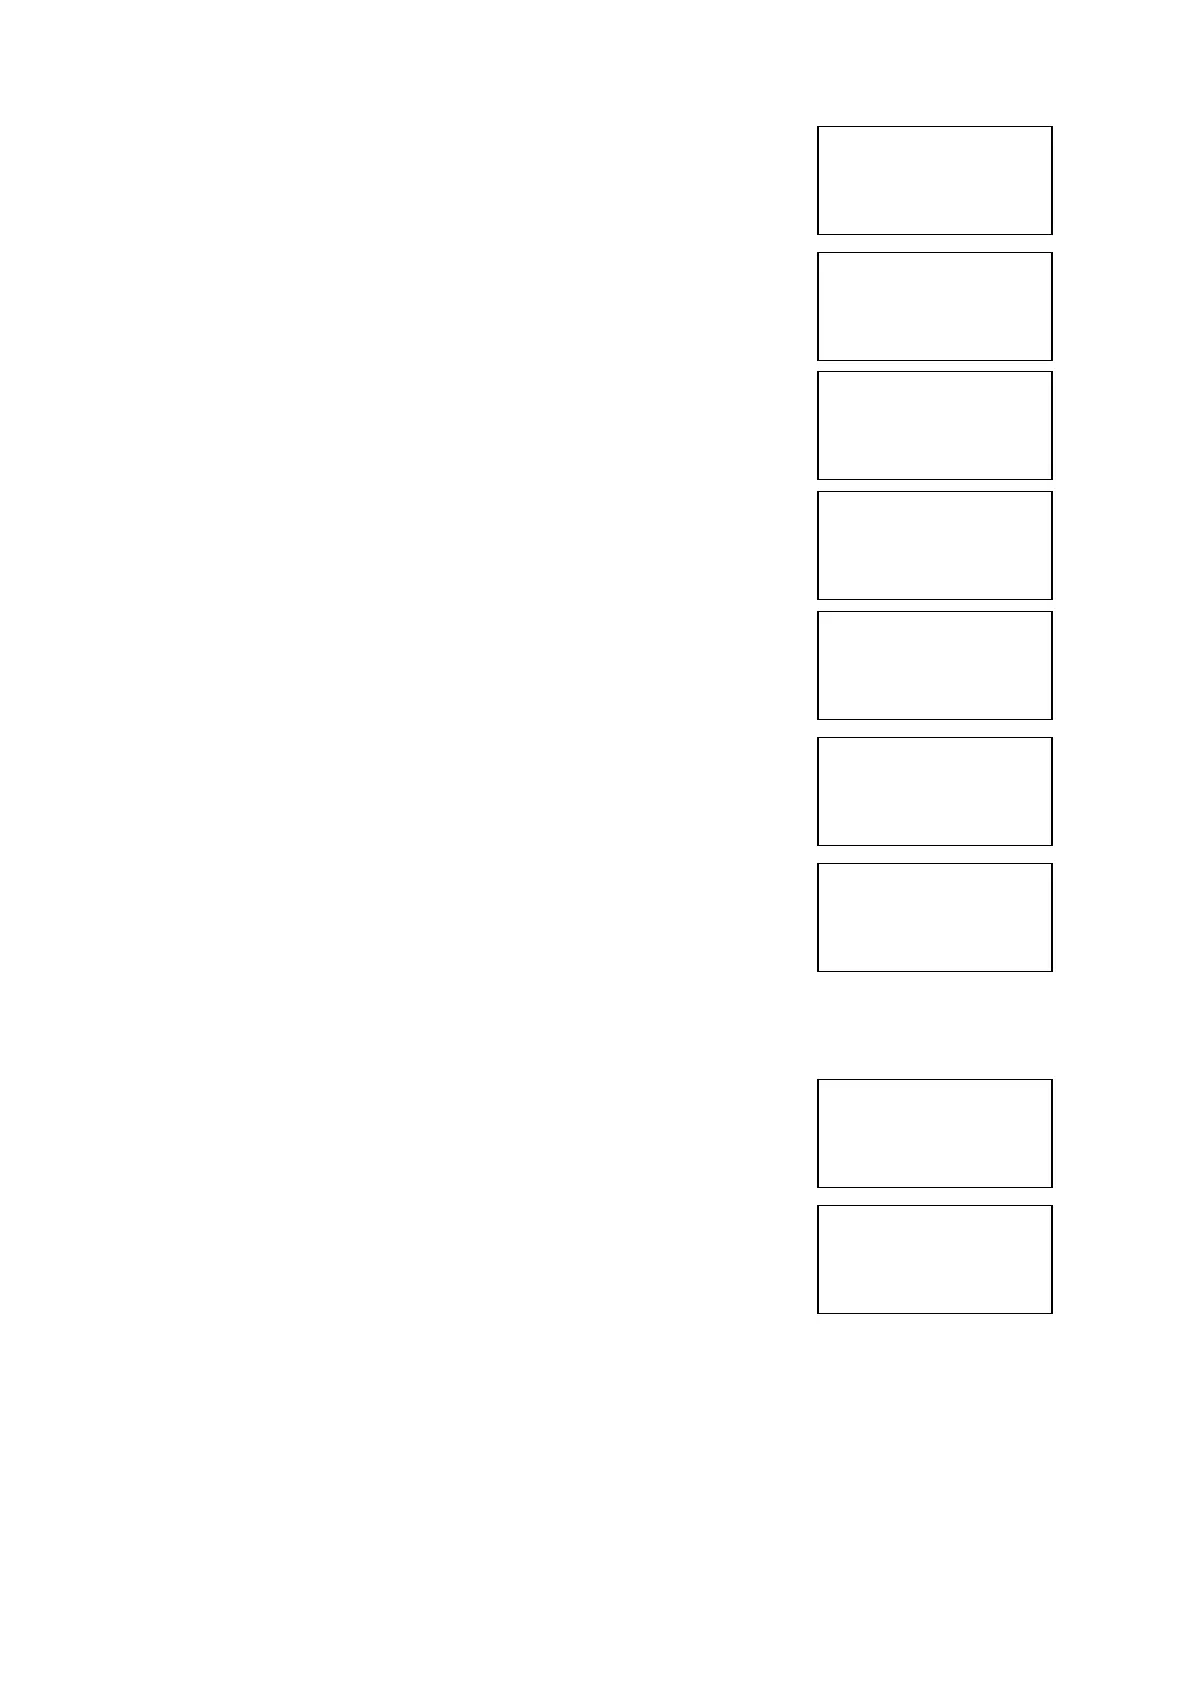
10 Press Yes key and the screen will now
display:
11 Press key once and the screen will now
display:
12 Press Yes key three times and the screen will
now display: (This puts the status back to ALL)
13 Press key once and the screen will now
display:
14 Press Yes key and the screen will now
display:
15 Press key once and the screen will now
display:
16 Press Yes key three time and the screen will
now display: (notice as the Y key is press the
status changes)
This needs to be repeated until all the zones are set back to ALL, then
continue to step 17
17 Press No key three times and the screen will
now display:
18 Turn the Control key switch to the off position
and the screen will now display:
| ** Zone Status ** |
>Zone is: 01 <
|Status : Test |
Yes= Select Time
|Zone is : 01 |
>Status : Test <
|^^^^^^^^^^^^^^^^|
Yes= Select Time
|Zone is : 01 |
>Status : ALL <
|^^^^^^^^^^^^^^^^|
Yes= Select Time
| ** Zone Status ** |
>Zone is: 01 <
|Status : ALL |
Yes= Select Time
| ** Zone Status ** |
>Zone is: 02 <
|Status : Test |
Yes= Select Time
|Zone is : 02 |
>Status : Test <
|^^^^^^^^^^^^^^^^|
Yes= Select Time
|Zone is : 02 |
>Status : ALL <
|^^^^^^^^^^^^^^^^|
Yes= Select Time
Panel in Access
Date Time