Access Point Installation Procedures
Enterasys Wireless AP3710/AP3725 Installation Guide 2-5
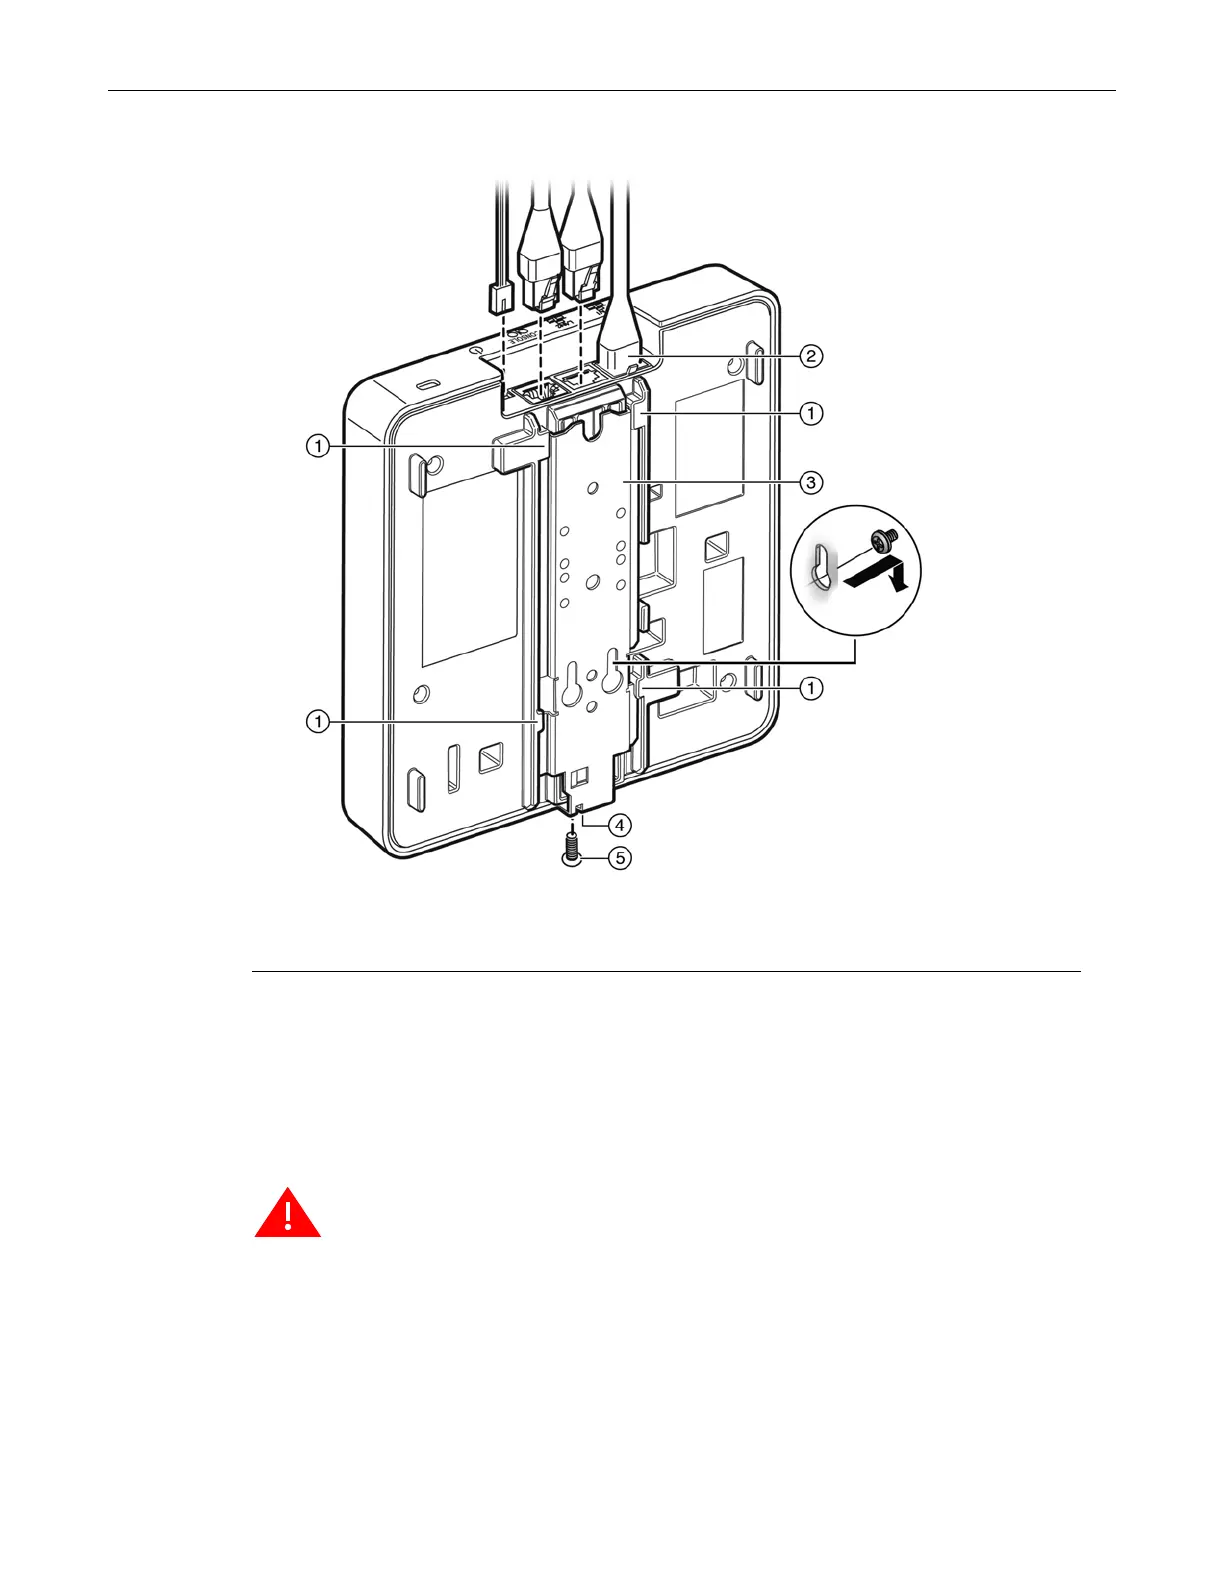
Figure 2-4 Mounting the AP on the Mounting Bracket
4. Plug the Ethernet cable into the RJ-45 port (and plug the power cord into the power port, if
applicable) on the back of the AP before mounting the AP on the bracket.
5. Place the back of the AP against the mounting bracket so that the bracket side rails fit into the
rail slots on the back of the AP and the locking screw hole in the AP aligns with the locking
tab. Slide the AP down until the AP rests on the locking tab, and screw in the locking screw
through the locking tab and locking screw hole. Figure 2-4 shows what the AP would look like
with the mounting bracket in place.
Mounting on a Junction Box, or in Place of an Older AP
You can replace an older AP or mount the AP3710/AP3725 on a junction box.
1. If there is a mounting bracket plate already in place from an older AP model, remove it.
2. Attach the AP mounting bracket where the older mounting bracket was, or directly to a
junction box, with two screws through the bracket junction box screw holes into the
1 Rail slots 4 Locking Tab and Locking Screw Hole
2 Ethernet Cables 5 Locking Screw
3 Mounting Bracket
Warning: If the locking screw is not inserted as described in this step, there is a strong risk the
Enterasys Wireless AP3710/AP3725 will fall from the bracket.
 Loading...