11
MN-37072 • Rev 2 • 05/16 • Designer Series Blanket Warmer
Operation Instructions
Optional Timer Control Feature
NOTE:
If the appliance is not equipped with this optional
automated timer feature or it is not in use this section
can be skipped.
The appliance time must be manually reset for daylight
saving time.
The times are displayed in 24-hour format (hh:mm).
Midnight is 00:00. Noon is 12:00. 1:00 P.M. is 13:00.
If the display has changed due to user interaction, the
display will reset a er five (5) seconds of inactivity.
If the start and stop times are the same, the appliance
will recognize the off time only and will not turn on
without user intervention. This is the best way to set the
warmer for the days when it is not needed.
The timer option must be off to reset the appliance time.
An E-60 error is displayed if the clock is not set or
the control has been off too long and the memory
has become corrupted.
Press the Timer On/Off button to initiate the
automatic start/stop timer operation. The on/off
indicator light next to this button will illuminate
when the timer is turned on.
Press the Time button to view the current time,
date, and day and initiate changes to the settings.
Press the Start Time button to view the current
automatic start time and initiate changes to
the set time.
Press the Stop Time button to view the current
automatic stop time and initiate changes to
the set time.
Resetting the Time
1. Acknowledge E-60 error
a. Press the Time button to acknowledge the
E-60 error displayed when the control has
been inactive.
2. View and adjust time
a. Press and hold the Time button for four (4)
seconds until the auto-timer on/off indicator
light blinks slowly and the display shows the
current set time.
b. Press the Up Arrow or Down Arrow button to
adjust the time in increments of one (1) minute
or press and hold the Up Arrow or Down Arrow
button to adjust the minutes more quickly.
3. View and adjust year
a. Press the Time button again to view or set
the year.
b. Press the Up Arrow or Down Arrow button to
adjust the year. The year will always adjust by
one (1).
4. View and adjust date
a. Press the Time button again to view or set
the date.
b. Press the Up Arrow or Down Arrow button to
adjust the date.
5. View and adjust day code (optional)
a. Press the Time button again to set the day
code (d1-d7).
b. Press the Up Arrow or Down Arrow button to
adjust the day code.
NOTE: Setting the day code is optional unless the user
configures the auto-timer to start or stop at a
diff erent time for each day of the week. Typically
Monday=d1, Tuesday=d2, etc.
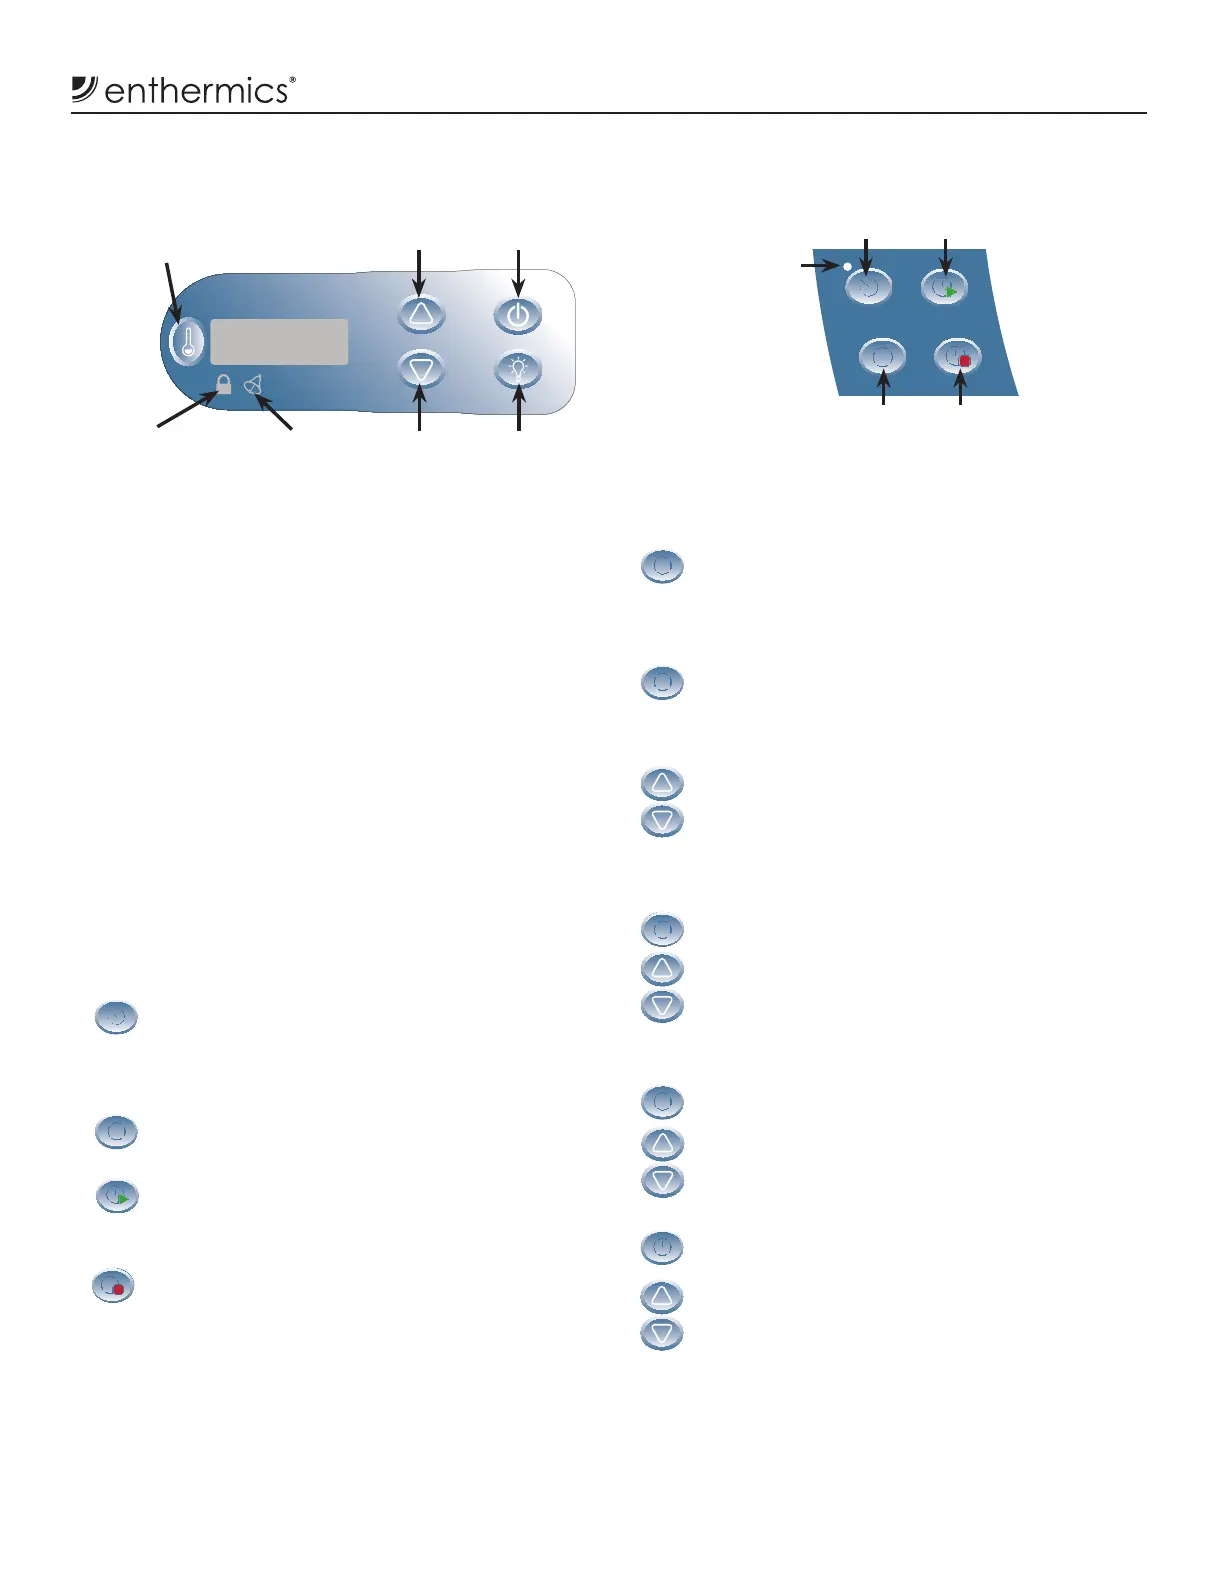
Timer On/Off
Button
Time Button
Set or View
Start Time Button
Set or View
Stop Time Button
Optional Timer Control
On/Off
Indicator
Light
Electronic Control and LED Display
Up Arrow
Button
Down Arrow
Button
On/Off
Button
Interior
Light Button
Button Lockout
Indicator Light
Error
Indicator Light
Temperature
Recall Button
 Loading...