14
Step1: Determine the installation location and heat-dissipation space
The controller shall be installed with sufficient airflow through the controller's radiators.
The minimum clearance is 150mm from the upper and lower edges to ensure natural
thermal convection.
Ensure that the controller can dissipate heat if installed in a closed
area. Suppose the controller is to be installed in an enclosed box. In
that case, ensuring reliable heat dissipation through the box is
important.
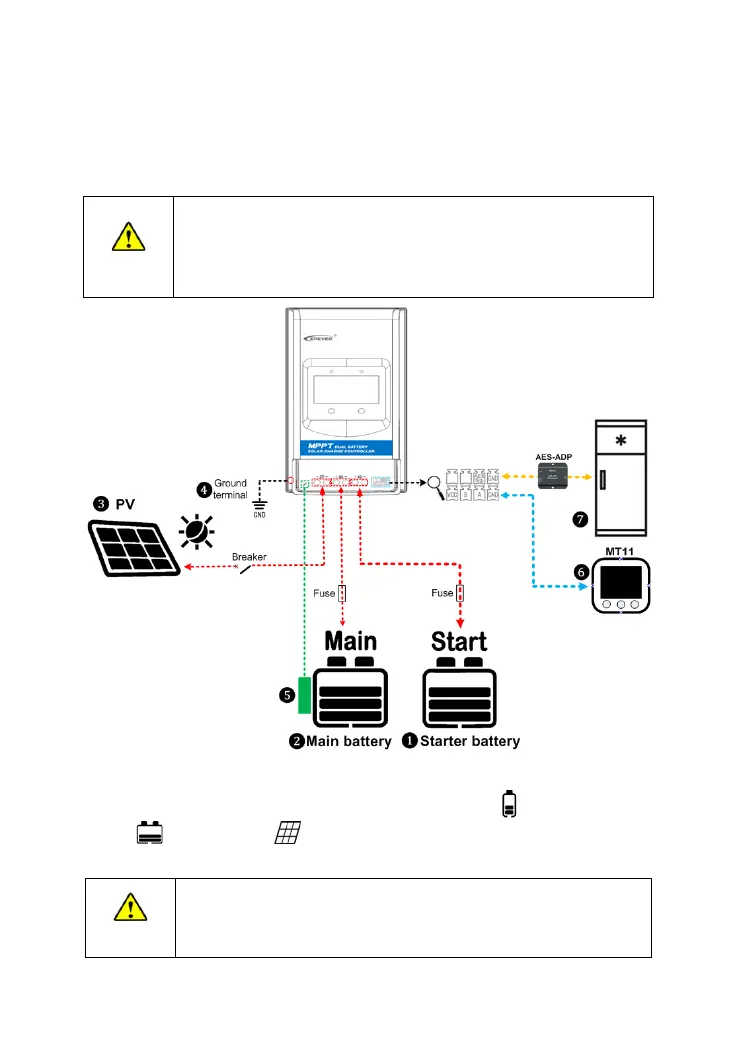
Step2: Wiring❶❷❸
Connect the system in the order of ❶Starter batteryBATT2 ❷Main battery
BATT1 ❸PV array by the above diagram and disconnect the system in
the reverse order❸❷❶.
The BATT1 and BATT2 must be set at the same voltage level, and
other situations are not supported for the moment.
Follow the above instruction for wiring. Otherwise, it may cause