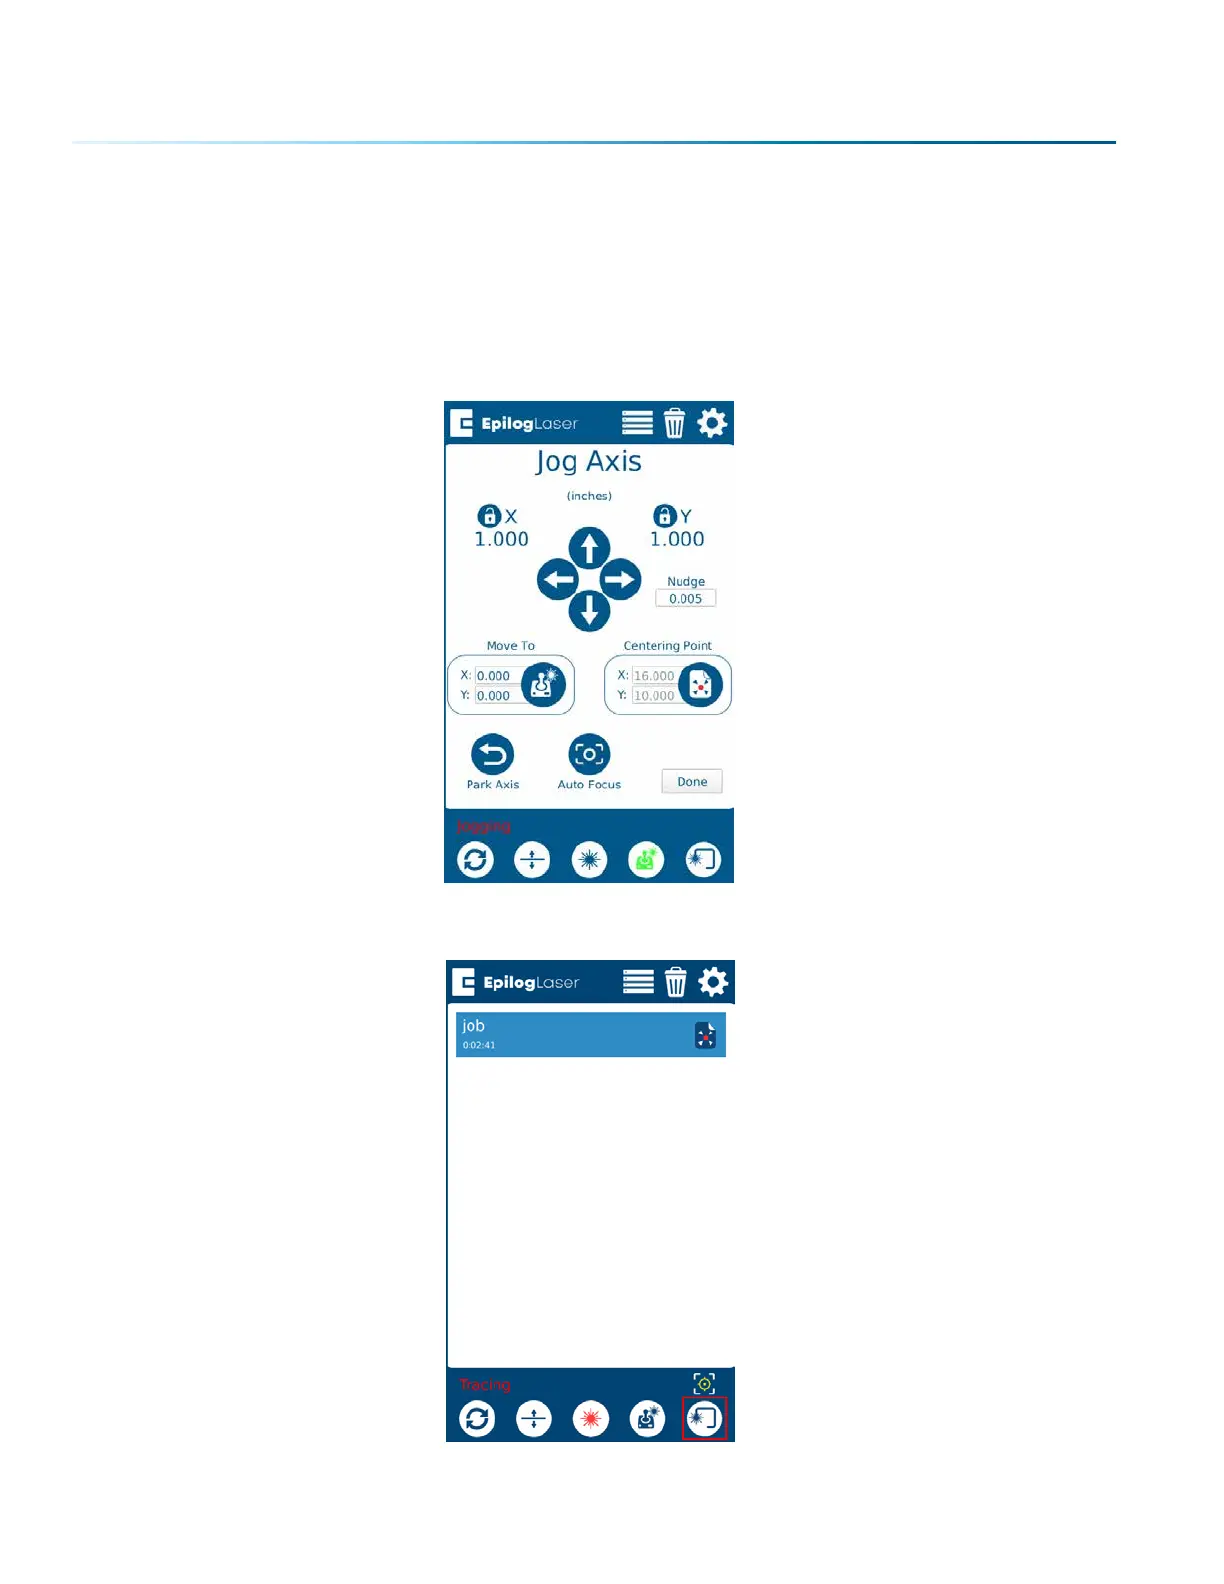
6. In the drop-down box next to Centering Point, select Center-Center.
7. Print the job to the laser.
8. Make sure your laser is focused to the work piece.
9. Jog the laser head to your work piece on the table with the red dot pointer turned on, and press
the button under “Centering Point” to set your center point.
10. Back at the Job Menu, select the job and press the Trace button with the Red Dot Pointer on to
check the outline of your artwork. The laser head will continue outlining the artwork until you press
the Trace button again.
- 118 -
SECTION 8: SYSTEM FEATURES
 Loading...


