SECTION 4: THE JOB MANAGER
Using the Epilog Job Manager
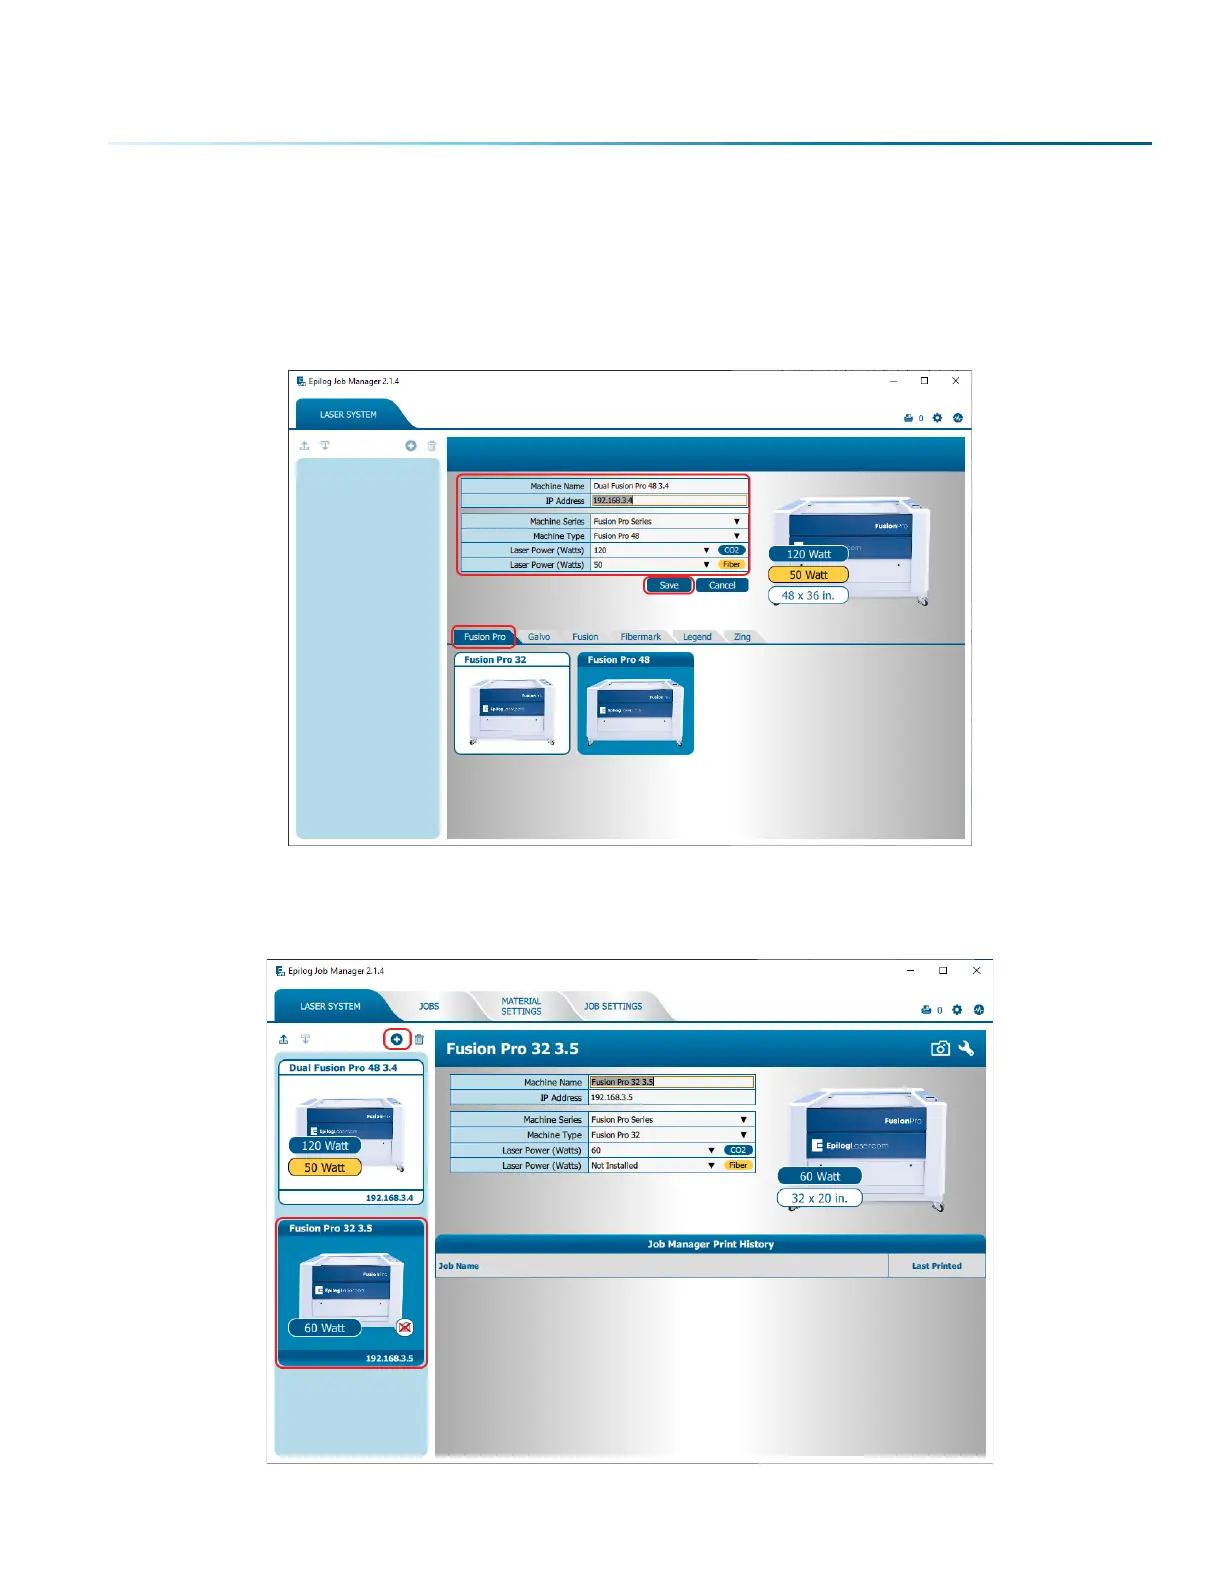
1. The first time you open the Job Manager you’ll see a tab for each of the machine models. Begin by
selecting the correct model, naming your machine, setting the IP Address, and selecting the correct
CO2 and fiber laser wattage (if you have a dual-source machine) then click Save.
2. Your new laser has been activated in the Job Manager and now appears in the le panel. It is now
ready to accept jobs from the print driver. Use the Add or Delete buttons to add or remove
additional machines. Below you can see we have installed an additional Fusion Pro 32 laser system.
- 35 -
 Loading...


