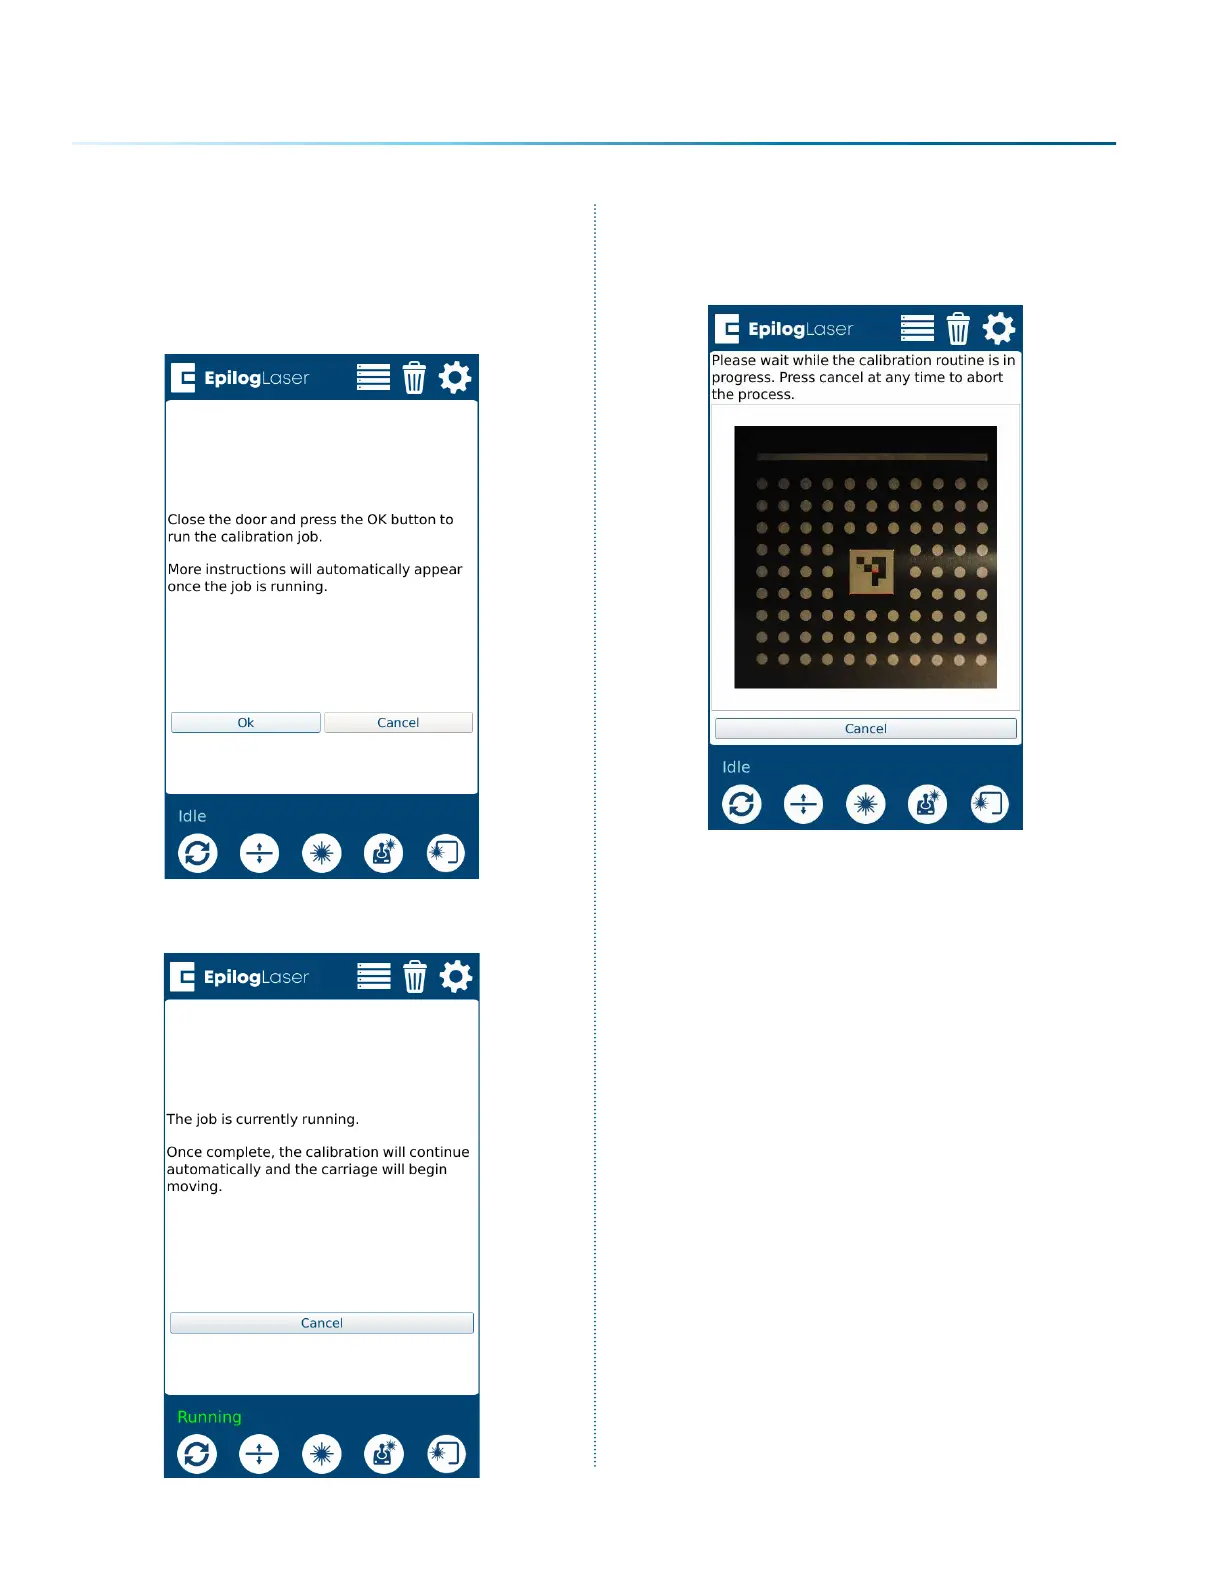
5. Follow the prompt and close the top door of
the engraver. Once “OK” is pressed the laser
will start engraving the calibration pattern.
The engraver will automatically focus to the
0.635mm thickness of the anodized
aluminum, the engrave a calibration pattern.
6. Allow the job to run until completion.
7. Once the job has finished engraving, the
camera at the laser head will take pictures
of the engraving to calibrate itself. This
process takes several minutes.
- 218 -
APPENDIX C: SYSTEM CALIBRATION
 Loading...


