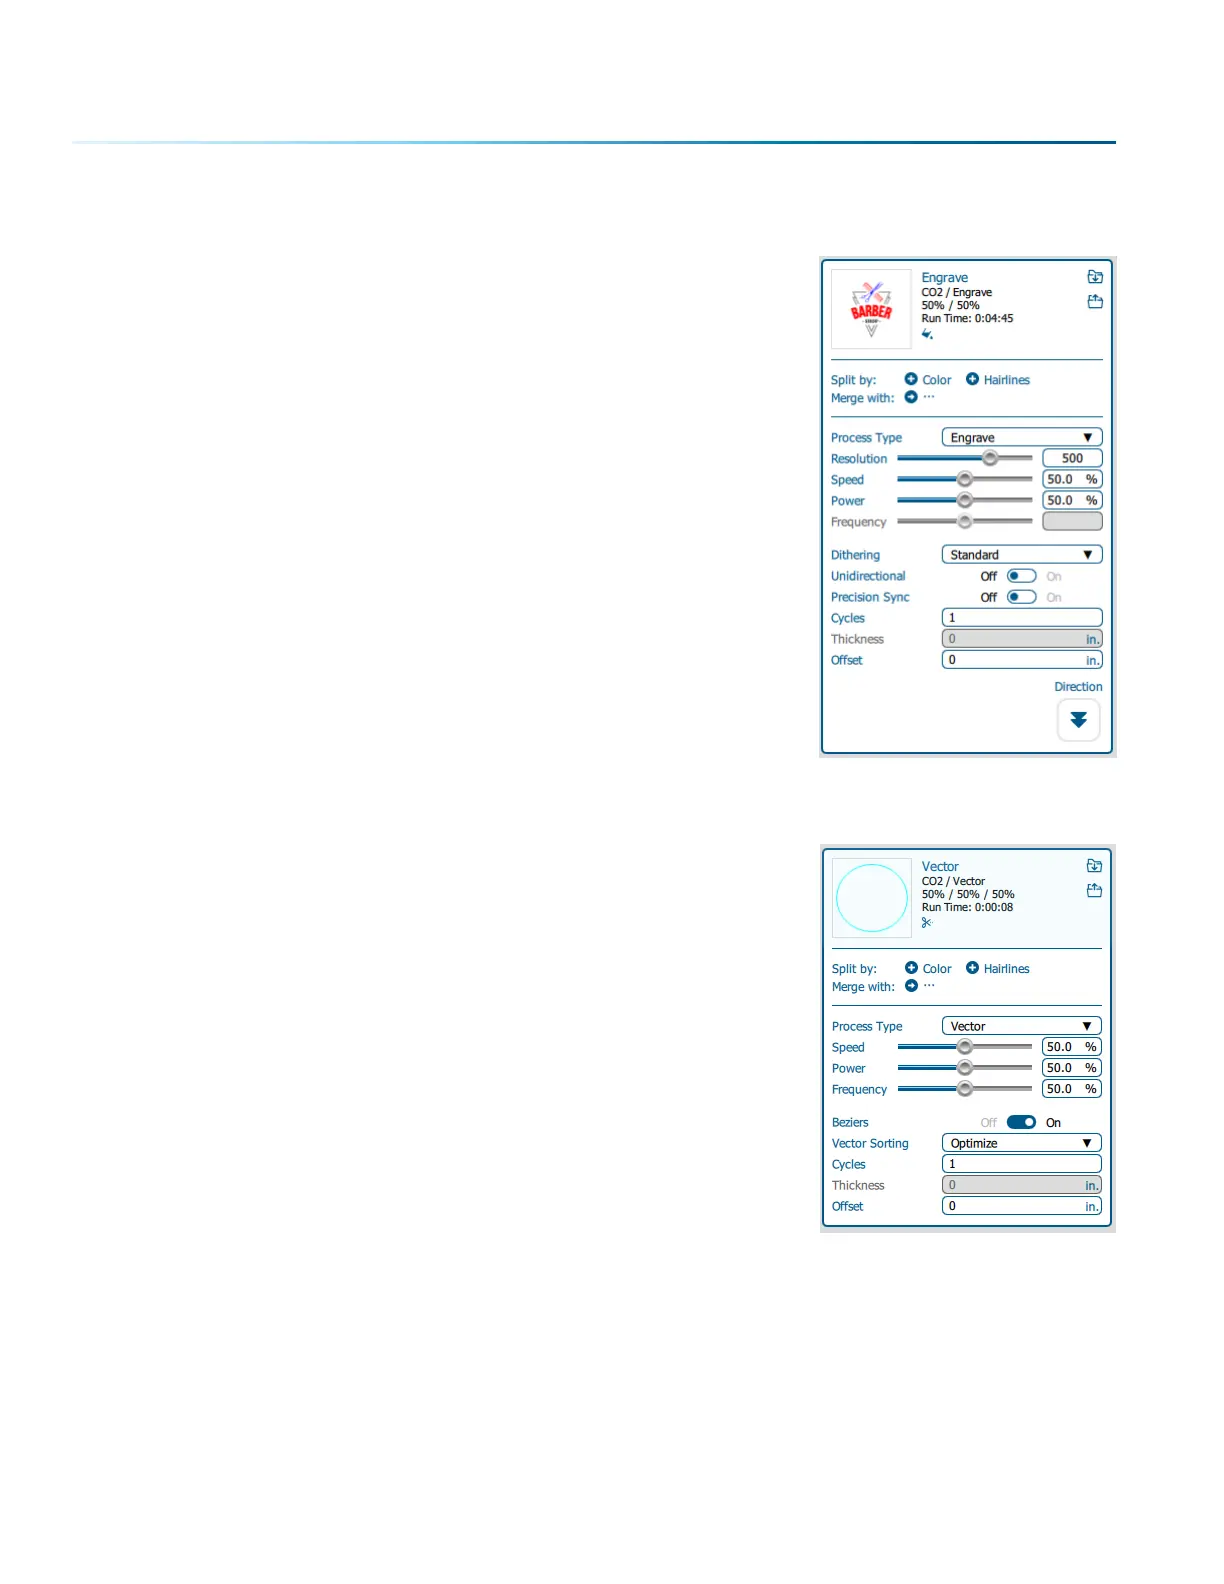
3. With the Engrave process selected, we can now adjust the settings for this process.
• Process Name: Click on the process name (“Engrave” in this example)
to rename the process.
• Run Time: Each process will show an estimated run time, which
depends on the size of the artwork, Speed and Resolution settings.
• Split By: Select either “Color” to move every color in the graphic
to separate processes (useful for color mapping), or “Hairlines” to
manually move .003” (0.077 mm) or thinner vector lines to a separate
process.
• Merge With: Merge the current process with another process layer.
For more details, see “Merging Processes” on page 73.
• Process Type: Choose if you want the process to be “O” (ignored by
the laser), “Engrave”, or “Vector”.
Setting the process to Engrave will engrave all graphics and lines,
regardless of line width. Setting the process to Vector will ignore any
raster graphics and only cut all vector lines in the process.
• Resolution can be set anywhere between 75-1200 DPI. For more
information about resolution, see “Resolution” on page 105.
• Set your Speed and Power. Frequency will only be active when the
process type is set to Vector. For more information, see “Frequency”
on page 80.
• Beziers: This setting fine-tunes how the path of the laser follows
each point in a curve when vector cutting. This setting will only
appear if you are running a vector process.
• Dithering / Vector Sort: The dithering drop-down will appear for
Engrave processes, and Vector Sort for Vector processes.
For more information on Dithering settings, see “Image Dithering”
on page 112. For more information on Vector Sorting, see “Vector
Sorting” on page 43.
• Unidirectional: Set engraving to run le-to-right only.
• Precision Sync: Enhances engraving quality, but increases run time,
by making an invisible box around the engraving. This means that
every engraving line in this process will have the same stroke length.
• Cycles: How many times to repeat this process.
• Laser: This will only appear if you are working with a Dual Source
machine. Choose between the CO2 and fiber laser for each process.
• Thickness: Measure the thickness of the material and input the
number into the Thickness box. Active only when Auto Focus is
enabled to “Thickness”.
• Oset: Oset allows you to focus at any point above or below the
suace of your material. For more information, see “Oset” on page
81.
• Registration: This button is for assigning Registration marks on your
artwork, for more information see “Registration Camera” on page
119.
• Direction: Choose whether you want the engraving to start at the bottom of your piece or the top.
For more information, see “Engrave Direction” on page 80.
Vector Process
Engraving Process
- 64 -
SECTION 5: THE LASER DASHBOARD
 Loading...


