6. Click Scan.
e scanned image is saved to the folder you specied.
Related Information
& “Placing Originals” on page 23
& “Epson Scan 2” on page 14
& “Setting a Resolution at Suits the Scanning Purpose” on page 55
& “Image Adjustment Features” on page 63
& “Editing Scanned Pages Using Epson Scan 2” on page 70
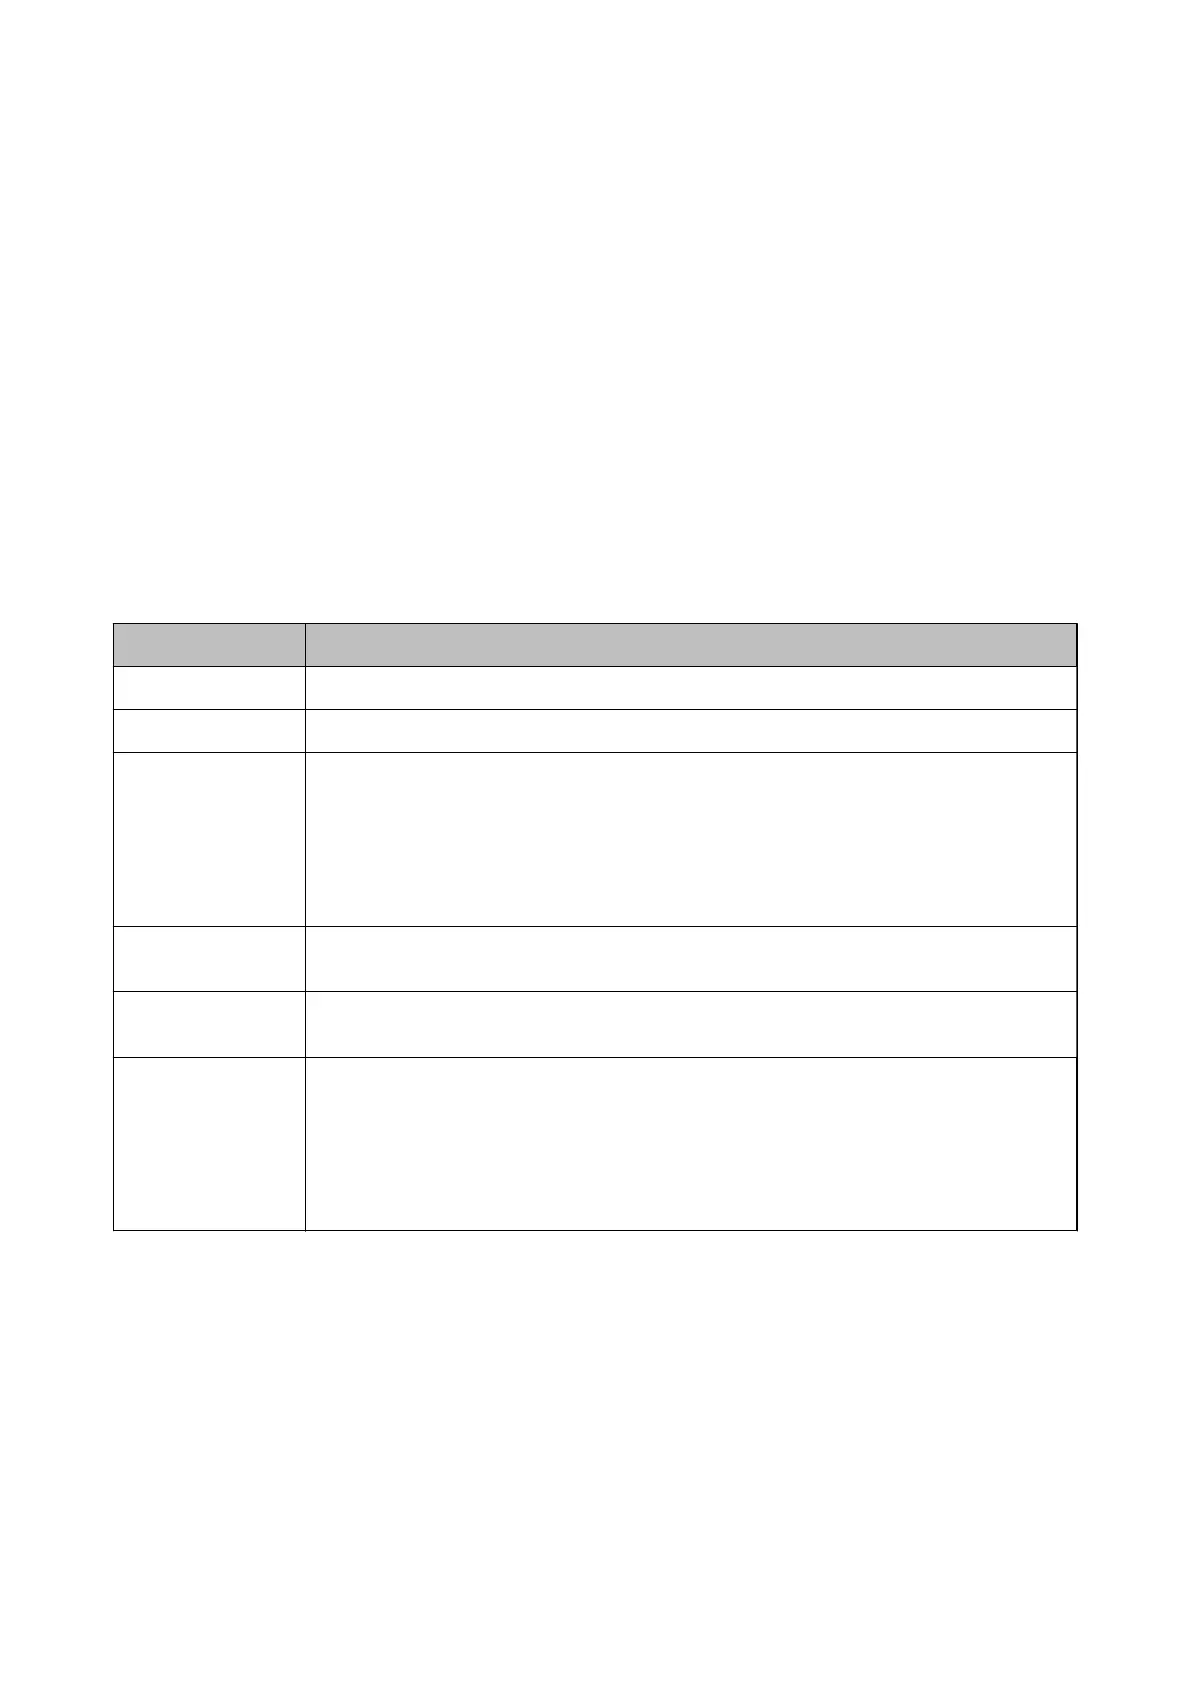
Required Settings for Special Originals in Epson Scan 2
You need to set certain items on the Main Settings tab in Epson Scan 2 when scanning special originals.
Type of Original Required Settings
Envelopes
Select O in Detect Double Feed.
Plastic cards
Select Plastic Card (Landscape) on the Document Size list, or select O in Detect Double Feed.
Carrier Sheet
❏ If you select Auto Detect from the Document Size list, paper skew in the original is
automatically corrected even if you select O in Correct Document Skew.
❏ If you select a other size than Auto Detect from the Document Size list, you can only use
Contents Skew when using Correct Document Skew.
Paper Skew is not applied when this is selected. When you select Paper and Contents Skew,
only contents skew is corrected.
Large size originals
If the size of the original you want to scan is not on the Document Size list, select Customize to
open the Document Size Settings window. Next, create the size manually on the window.
Long paper
If the size is not listed on the Document Size list, select Auto Detect (Long Paper) or select
Customize to create a custom document size.
Laminated cards
To scan transparent areas around the edges, select Customize on the Document Size list to open
the Document Size Settings window. Next, select Scan laminated card in the window.
Note:
e appropriate eect may not be achieved depending on the original. If transparent areas
around the edges are not scanned, select Customize from the Document Size list, and then
create the size manually.
Related Information
& “Placing Originals” on page 23
User's Guide
Basic Scanning
54
 Loading...