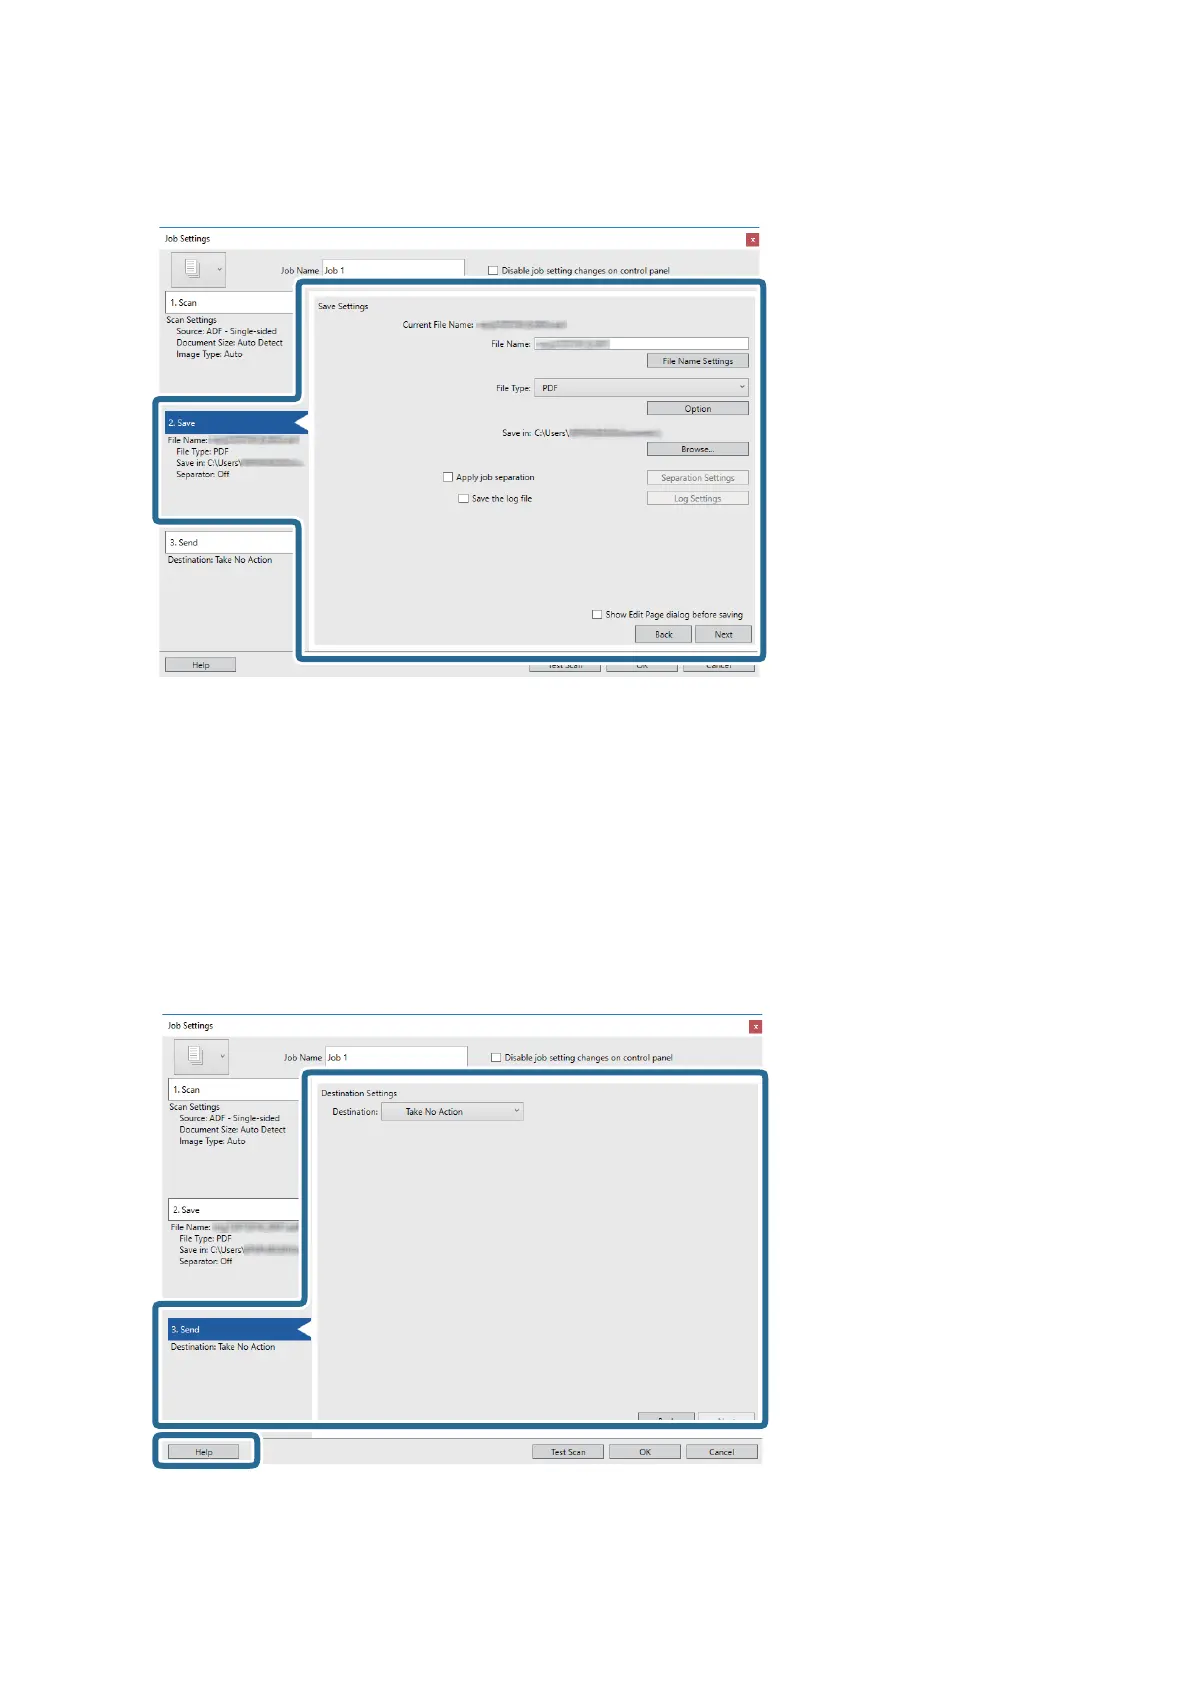
6. Click 2. Save, and then make the save settings.
❏ File Name: Check the settings for the le name. Click File Name Settings to add a time stamp or le
number counter to the le name.
❏ File Type: Select the save format from the list. Click Option to make detailed settings for the le.
❏ Browse: Select the save folder for the scanned image.
❏ Apply job separation: Select to make separation settings.
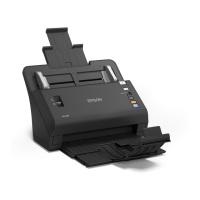
7. Click 3. Send, and then select the Destination.
Destination setting items are displayed according to the destination you selected. Make detailed settings as
necessary. Click Help for details on each item.
User's Guide
Basic Scanning
41