ConfidentialConfidential
Adjus
Adjusttmmeentnt DDeettaails ils oof Adf Adjustjustmmeentntss 6363
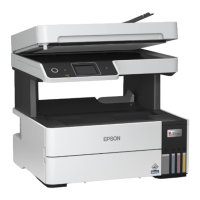
4. 4. Make sure any Make sure any tears or burrs on the tears or burrs on the applied Teflon taapplied Teflon tape, then the modificpe, then the modification of thickness gauation of thickness gauges is complete.ges is complete.
Make sure to wear the Make sure to wear the heavy gloves to prevent the heavy gloves to prevent the cutter from cutting the hand whencutter from cutting the hand when
trimming the Teflon tape.trimming the Teflon tape.
E
E ppssoon n EE TT--44555500, , LL665555//665566 RReevviissiioon n BB
3.3.3.3.1.21.2 ConfConfirmairmation tion procprocedureduree
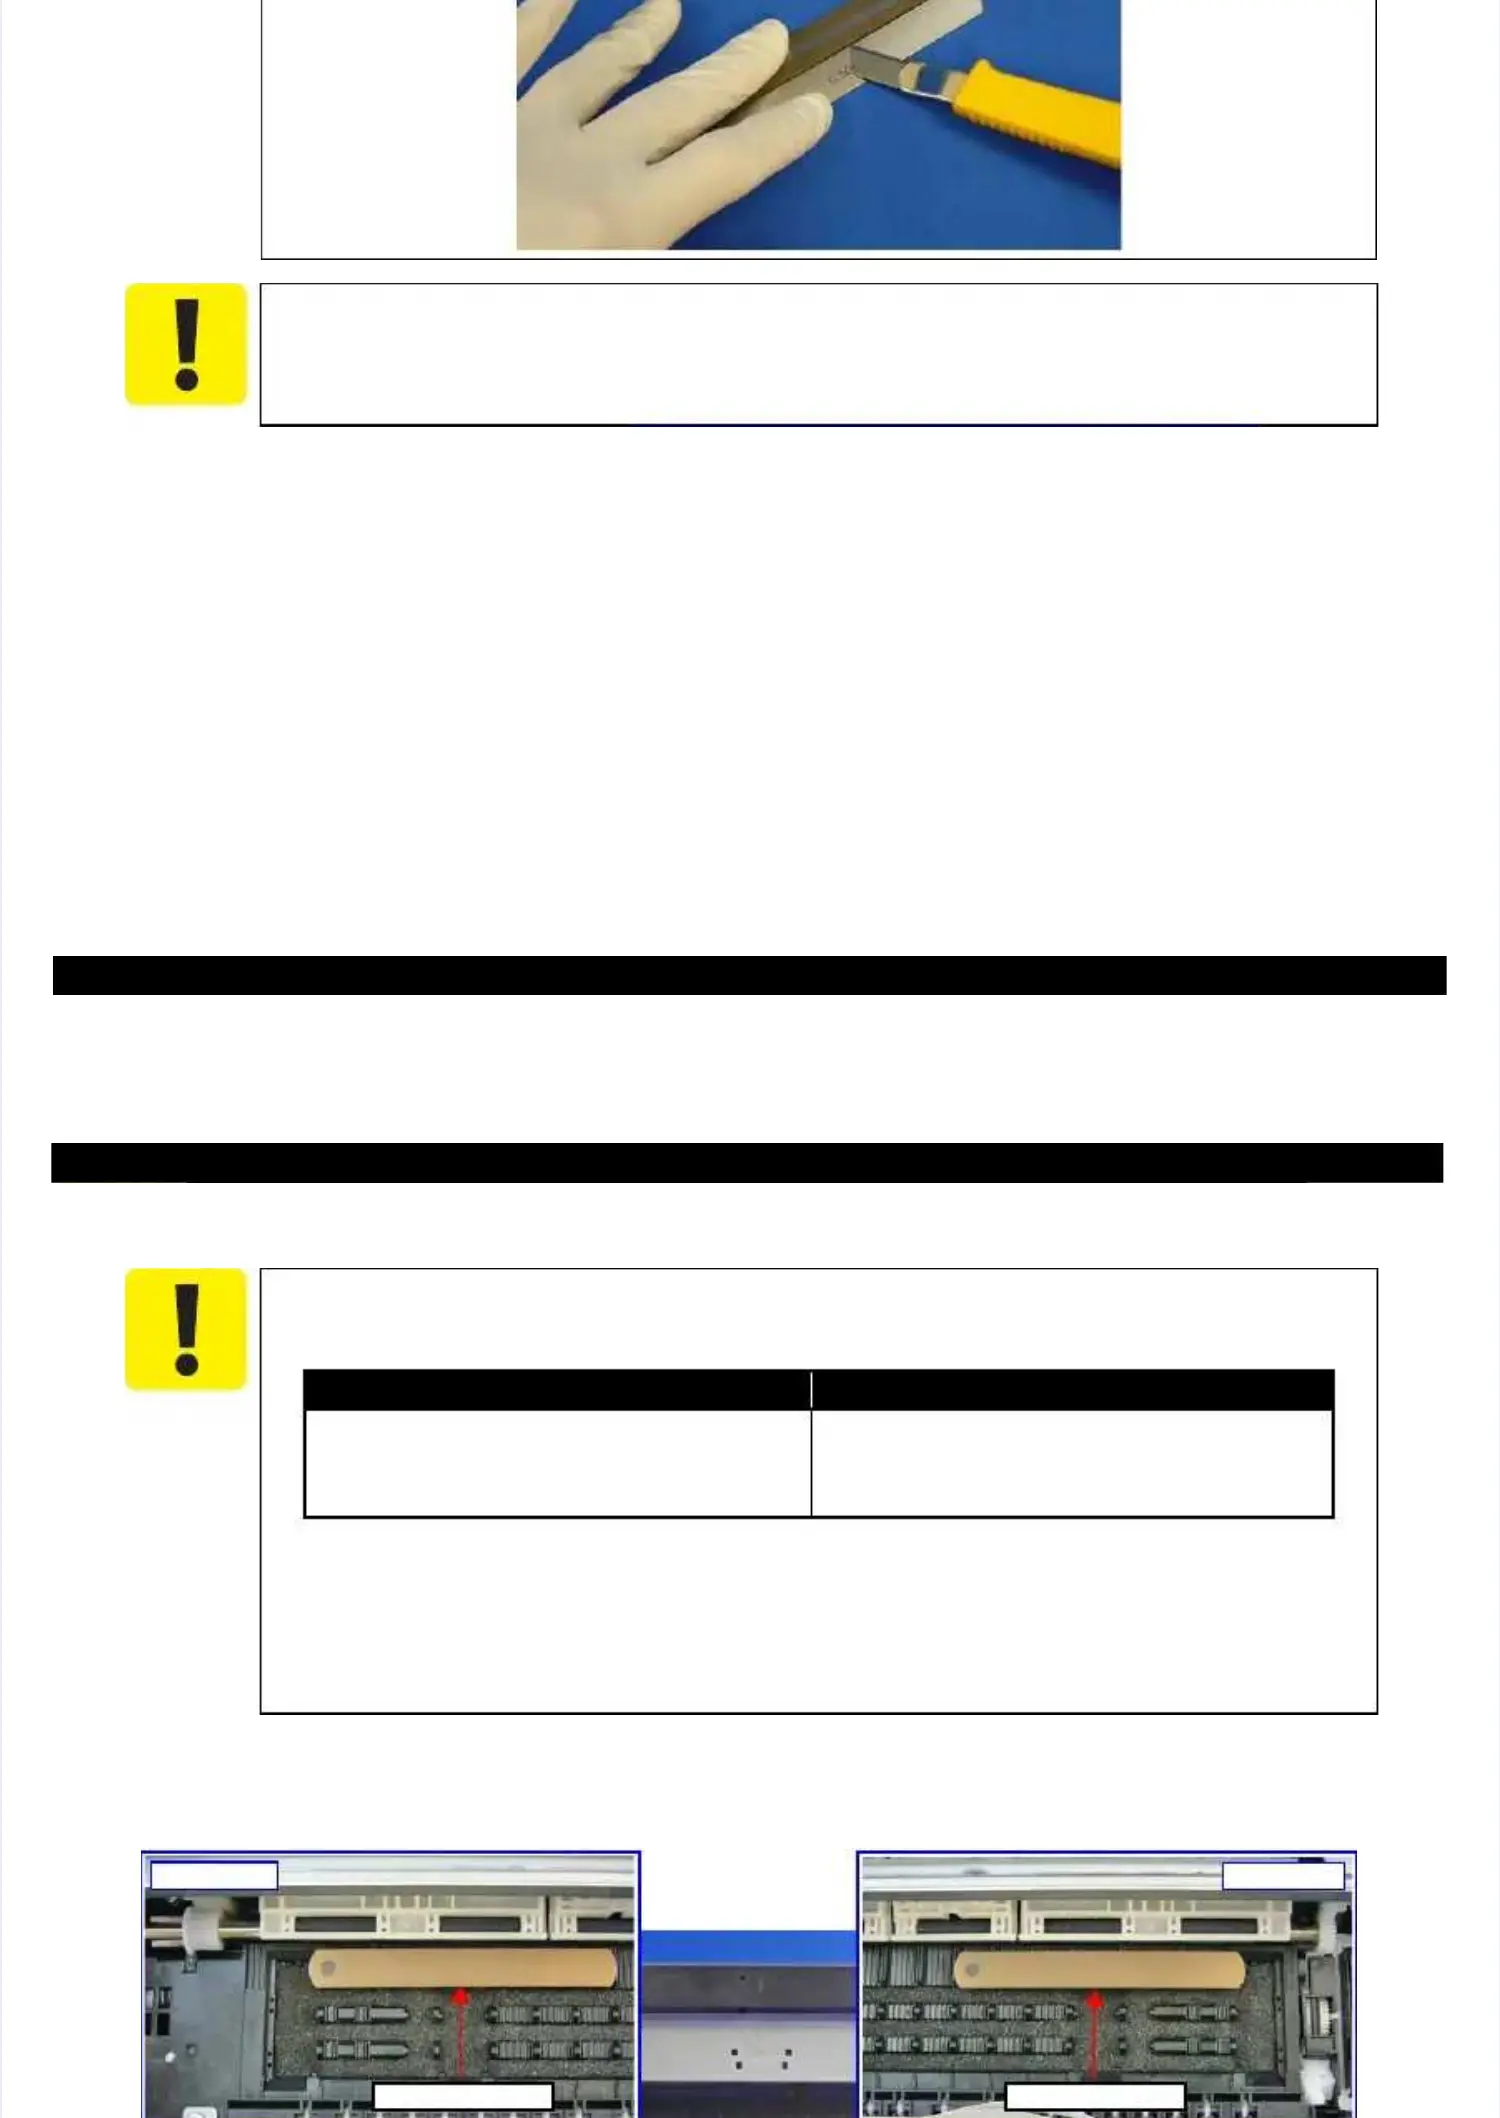
1.1. MovMove the Ce the CR UniR Unit in tht in the mide middle odle of the pf the prinrinterter..
2.2. Place the 1Place the 1.48 mm thi.48 mm thicknesckness gauges ps gauges protectrotected with Teed with Teflon tapflon tape on the poine on the points shown bets shown below.low.
When performing the PG adjustment, make sure of the When performing the PG adjustment, make sure of the following.following.
Make sure the parts assembled on the CR Make sure the parts assembled on the CR Unit are as follows.Unit are as follows.
Move the CR Unit by pulling the top of the CR timing belt.Move the CR Unit by pulling the top of the CR timing belt.
Be careful not to Be careful not to damage the nozzle surface of the damage the nozzle surface of the Printhead with the thickness gauge.Printhead with the thickness gauge.
When make the Printhead touch the thickness gauge, be careful When make the Printhead touch the thickness gauge, be careful not to let not to let the Printheadthe Printhead
run onto the gauge.run onto the gauge.
Pa
Partrt((s) s) to to be be asasssememblbled ed on on ththe Ce CR UR Uninitt:: PaPartrt(s(s) N) NOT OT to to be be asassesemmblbled ed on on ththe Ce CR UR Uninitt
•• EEmmpptty y AAddaapptteerrss •• CCR R SSccaallee
•• AdAdapapteter Cor Coveverr
•• TuTube Gbe Guiuide Sde Sheheetet**
•• Ink SInk Supplupply Aday Adaptepter Tubr Tube Asse Assy*y*
NoteNote "*":"*": Not necessarily removed from the printer if the part(s) is/are not assembled Not necessarily removed from the printer if the part(s) is/are not assembled on the CR Unit.on the CR Unit.
80-digit side80-digit side
Thickness gaugesThickness gauges
0-digit side0-digit side
Thickness gaugesThickness gauges

 Loading...