EasyManuals Logo

Epson SC-F2100 SERIES User Manual

Epson SC-F2100 SERIES
143 pages
To Next Page IconTo Next Page
To Previous Page IconTo Previous Page
Page #43 background imageLoading...
Page #43 background image
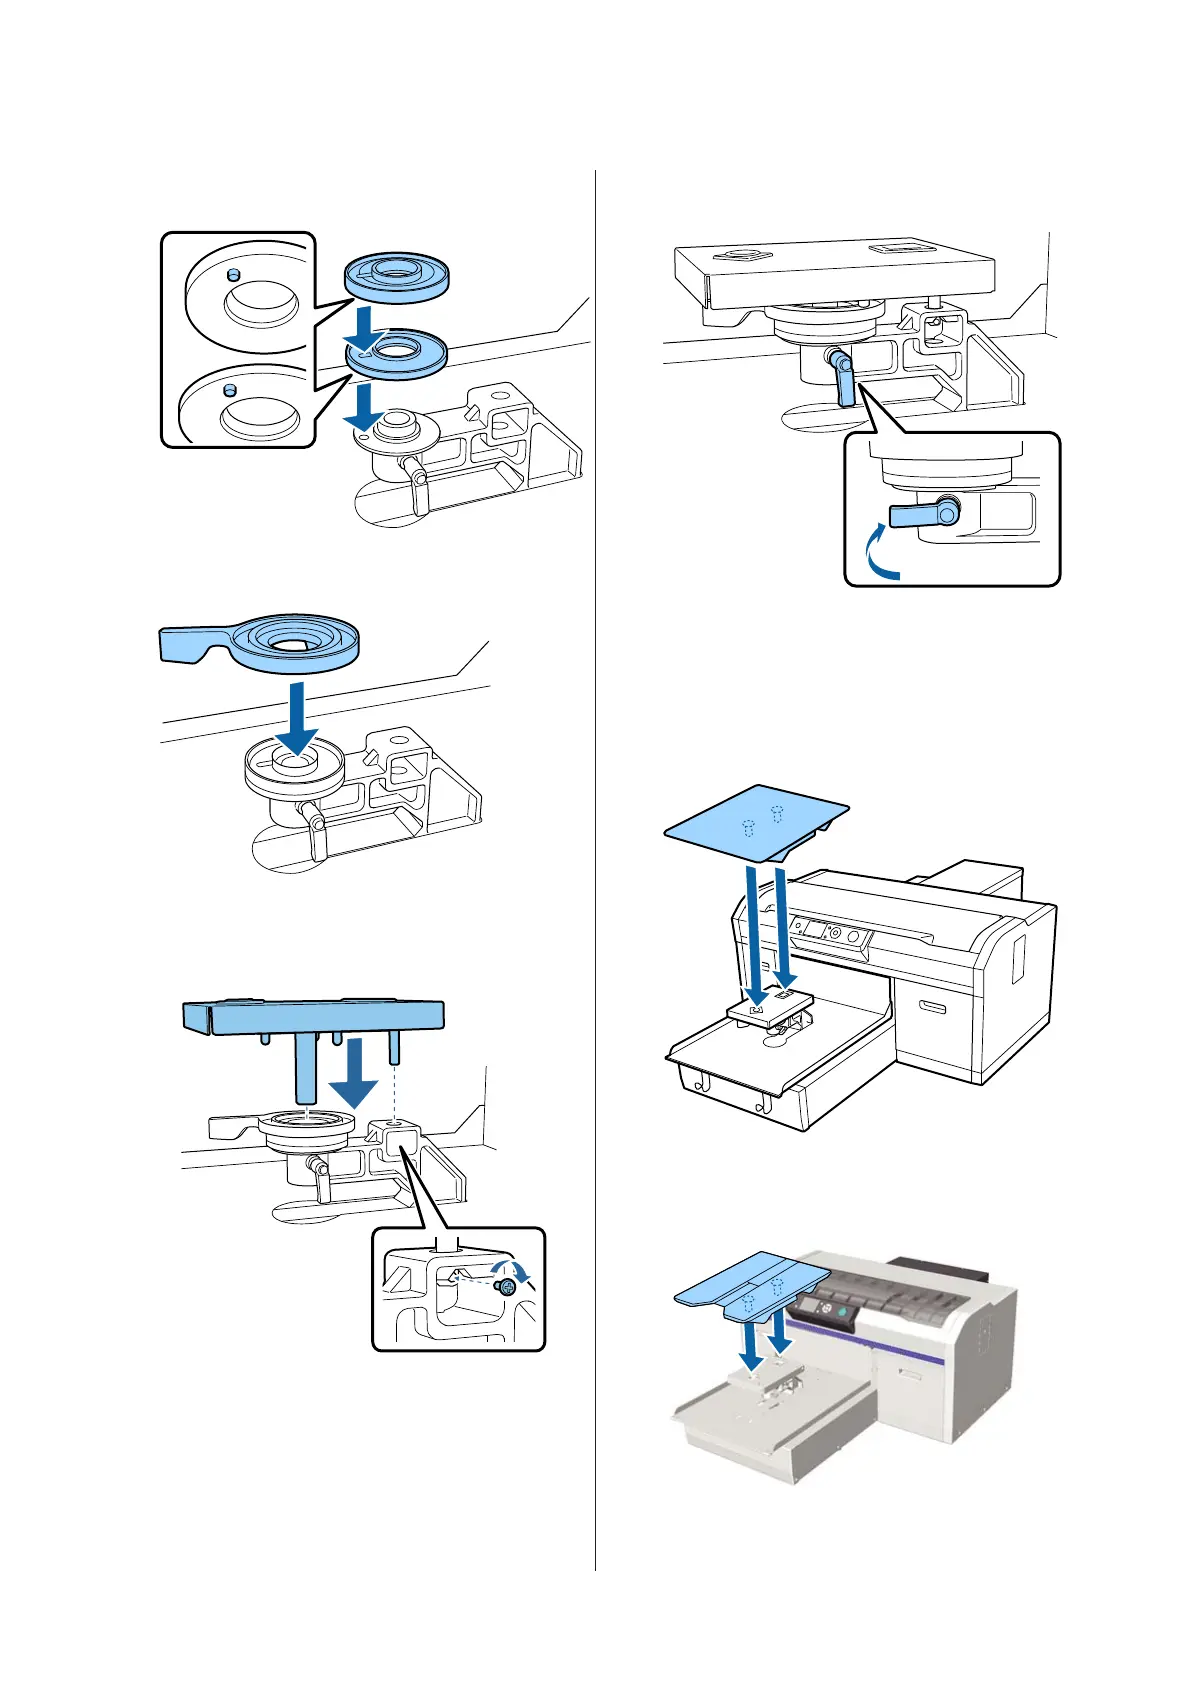
There is no particular stacking order when
installing both spacers.
J
Install the platen gap adjustment lever in the
direction shown below.
K
Return the platen installation plate.
Only tighten the screws that you removed in step
6 when you have installed two spacers.
L
Tighten the fixing lever to secure the platen gap
adjustment lever.
M
Make sure the axes of the replacement platen fit
into the holes.
Installing L, M, S, or XS size platens
It does not matter in which orientation the platen
is installed.
Installing the medium grooved platen
Install so that the cut out section is at the front.
SC-F2100 Series User's Guide
Basic Printing
43

Table of Contents

Other manuals for Epson SC-F2100 SERIES

Questions and Answers:

Question and Answer IconNeed help?

Do you have a question about the Epson SC-F2100 SERIES and is the answer not in the manual?

Epson SC-F2100 SERIES Specifications

General IconGeneral
Ink TypeEpson UltraChrome DG ink
Maximum Print Resolution1440 x 1440 dpi
ConnectivityUSB, Ethernet
Printable AreaUp to 16" x 20"
Ink ColorsCyan, Magenta, Yellow, Black, White
Printer TypeDirect-to-Garment Printer
Operating System CompatibilityWindows, Mac
Platen SizesSmall, Medium, Large
Print SpeedUp to 27 seconds for a light garment

Related product manuals