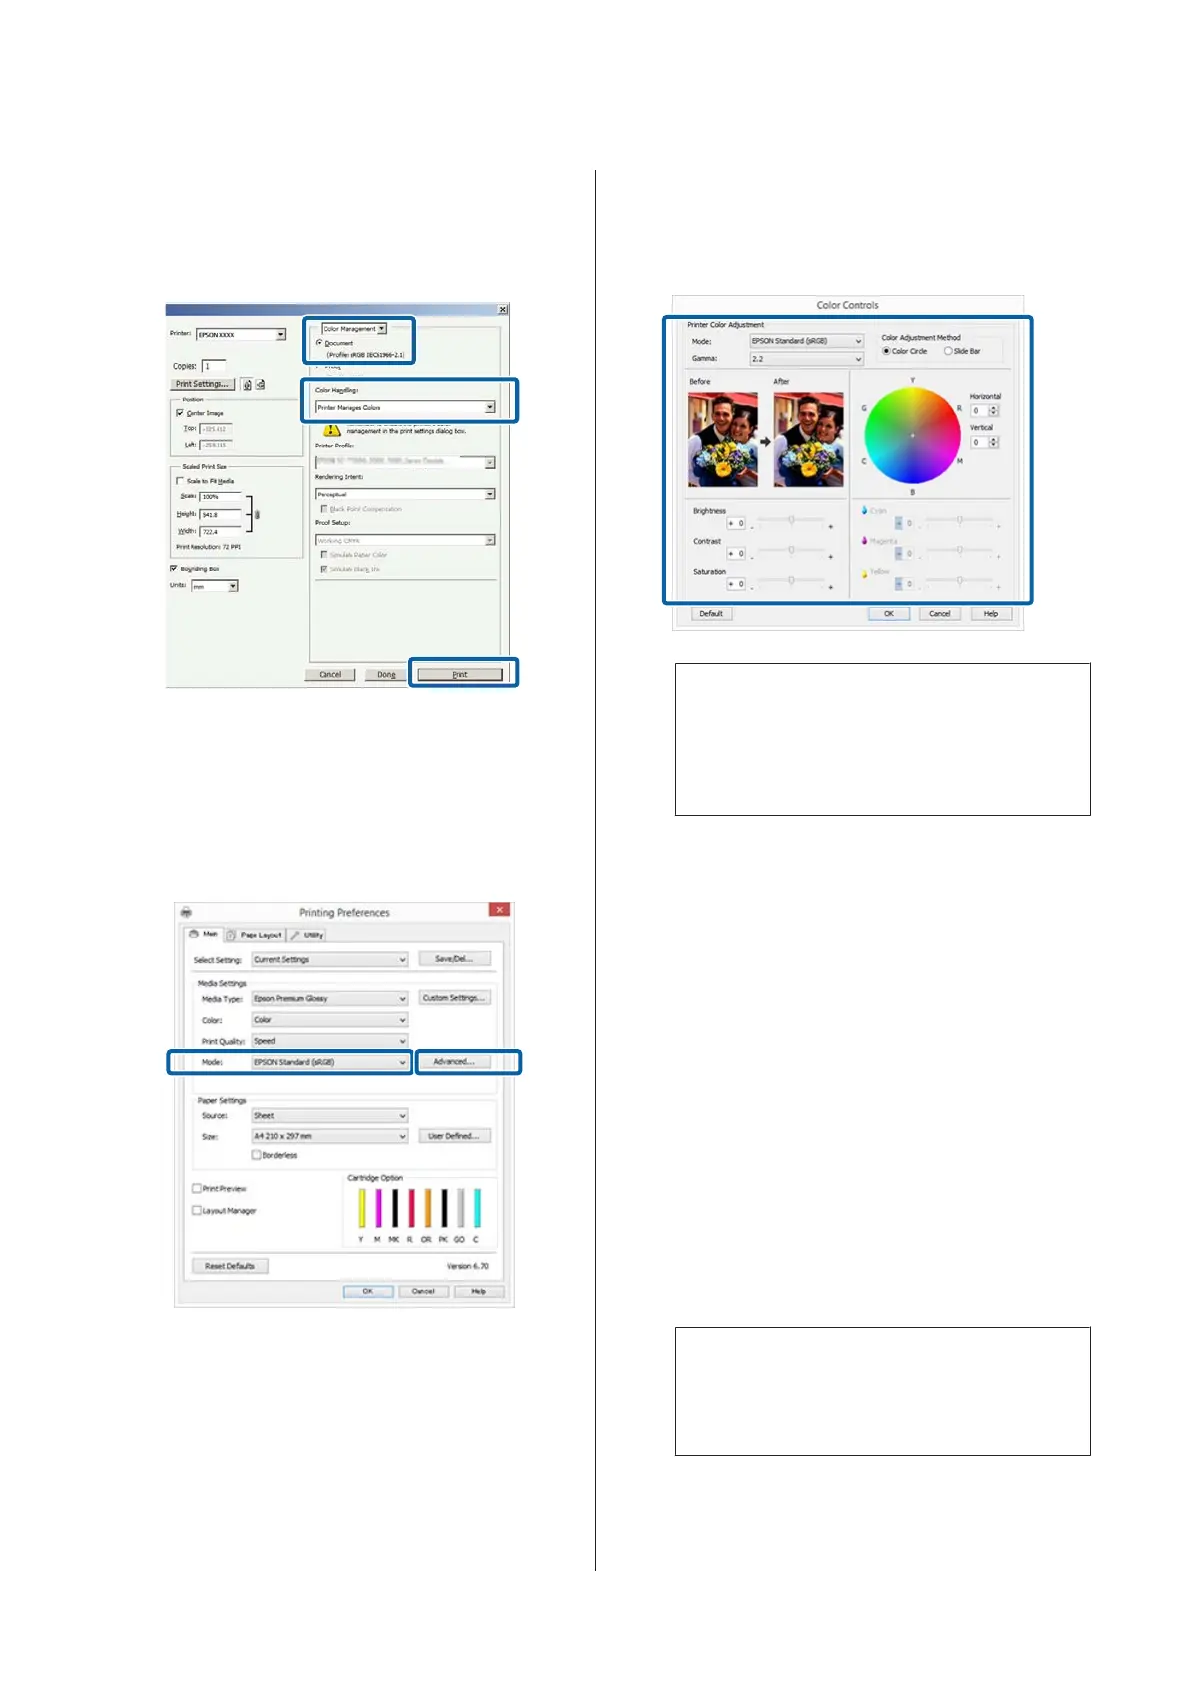
Open the Print screen.
Select Color Management and then Document.
Select Printer Manages Colors as the Color
Handling setting, and then click Print.
B
Display the printer driver Main tab and select
EPSON Standard (sRGB), Adobe RGB, or
EPSON Vivid for Mode.
U “Printing (Windows)” on page 27
To adjust settings manually, click Advanced to
display Color Controls.
C
If you opted to display the Color Controls screen
in Step 2, adjust settings as desired.
See the printer driver help for more details on
each item.
Note:
You can adjust the correction value by checking the
sample image on the left side of the screen. You can
also use the color circle to fine-tune the color
balance.
D
Check other settings and start printing.
Making Settings for Mac OS X
A
When using applications featuring a color
management function, specify how to adjust
colors from these applications.
When using applications without a color
management function, start from step 2.
Set color management to Printer Manages
Colors for the following applications.
Adobe Photoshop CS3 or later
Adobe Photoshop Elements 6 or later
Adobe Photoshop Lightroom 1 or later
In other applications, set No Color
Management.
Note:
For information on the operating systems
supported by each application, visit the
distributor's website.
Example of Adobe Photoshop CS5
Open the Print screen.
SC-P400 Series User's Guide
Printing Varieties
46
 Loading...