C
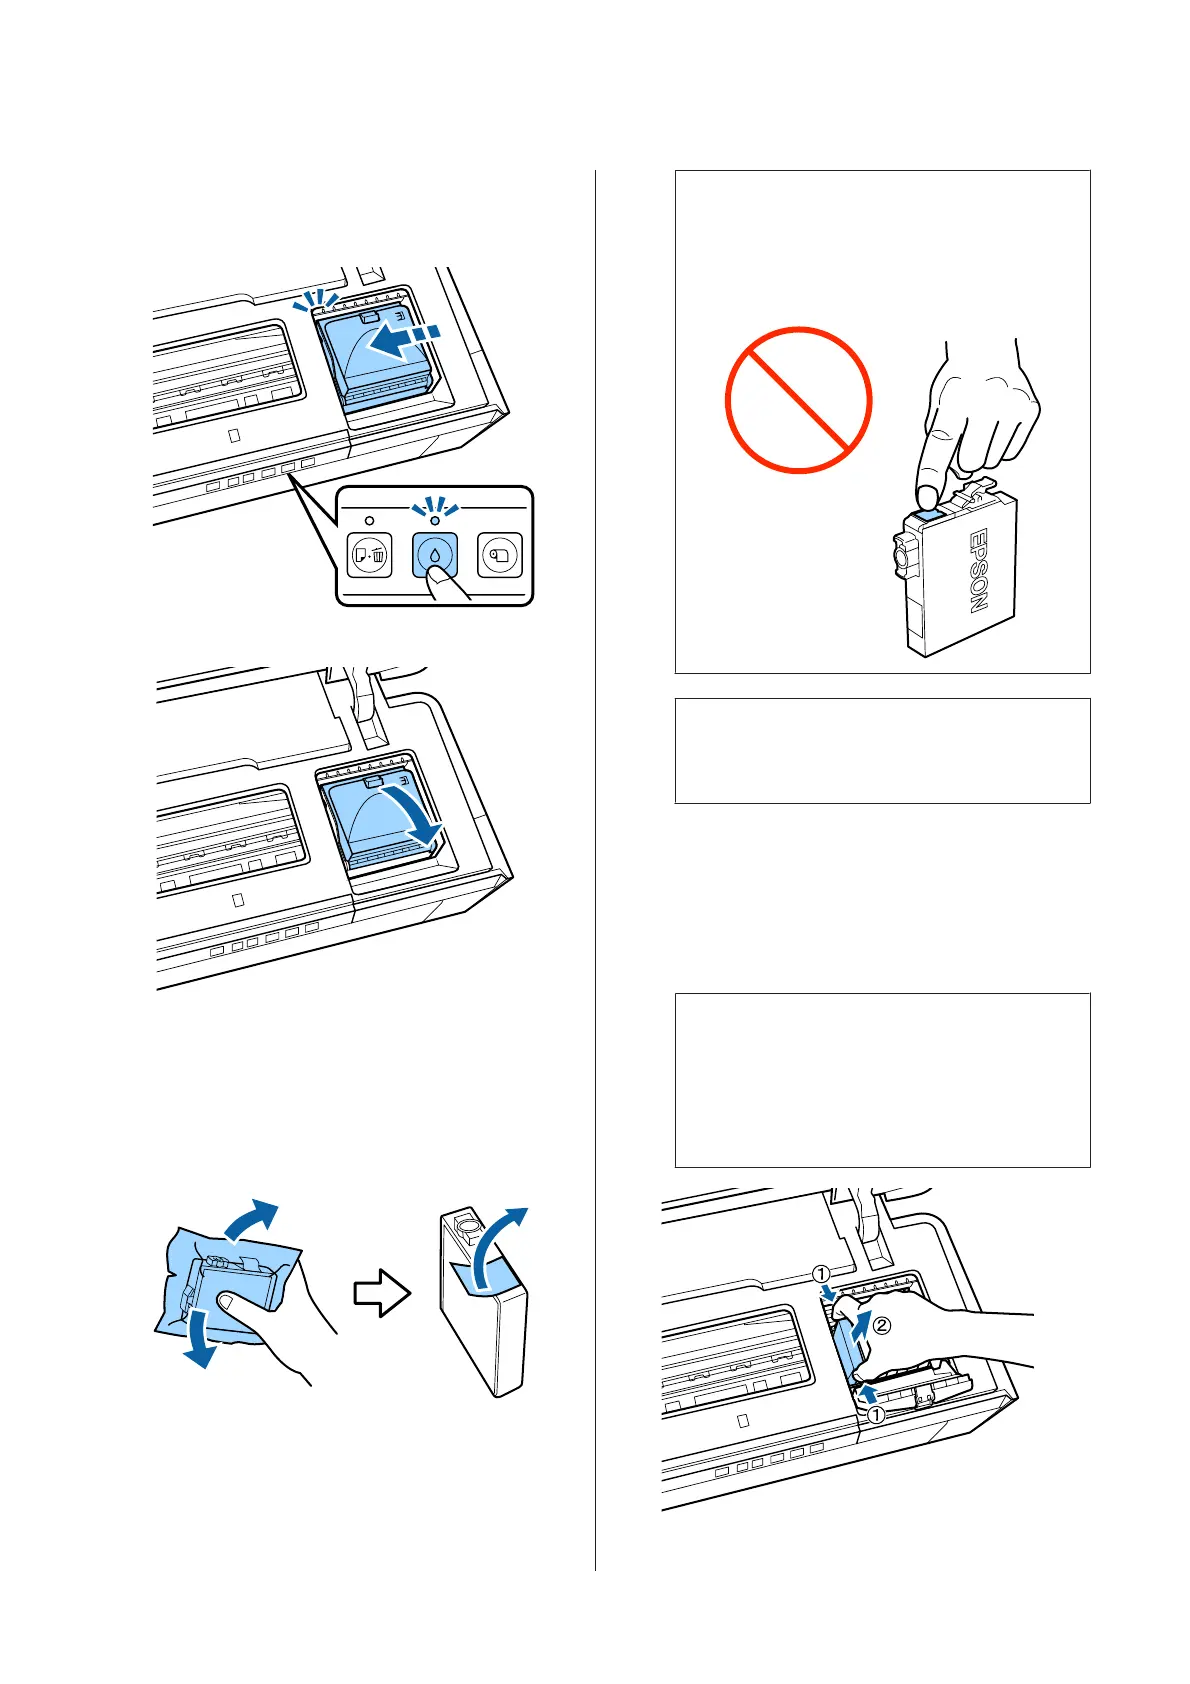
Press the H button.
The print head moves to the ink cartridge
replacement position.
D
Open the cartridge cover.
E
Holding the new cartridge as shown, shake it four
or five times and then remove it from the package
and peel off the yellow tape only.
When shaking the cartridge and removing the
yellow tape, hold the cartridge with the yellow
tape facing up.
c
Important:
Do not touch the parts indicated in the
illustration. You may not be able to print
properly.
Note:
You may hear a rattling sound from inside the
cartridge when it is shaken.
F
Remove the ink cartridge that will be replaced.
Hold the cartridge by the hooks and lift it straight
up.
If the cartridge does not come out easily, pull
harder.
c
Important:
Removed ink cartridges may have ink around
the ink supply port, so be careful not to get any
ink on the surrounding area when removing
the cartridges.
SC-P400 Series User's Guide
Maintenance
82
 Loading...