Explanations in this section use the Windows printer
driver as an example.
Use Epson Printer Utility 4 for Mac OS X.
U “Using Epson Printer Utility 4” on page 69
A
Make sure that the roll paper or a cut sheet of A4
size or larger is loaded in the printer.
U “Loading and Removing the Roll Paper” on
page 28
U “Loading and Removing Cut Sheets” on
page 34
When adjusting using commercially available
paper, make sure you register the Custom Paper
in advance.
U “Before Printing on Commercially Available
Paper” on page 177
B
Choose a paper type that matches the paper in the
printer.
U “Checking and Setting the Paper Type” on
page 37
C
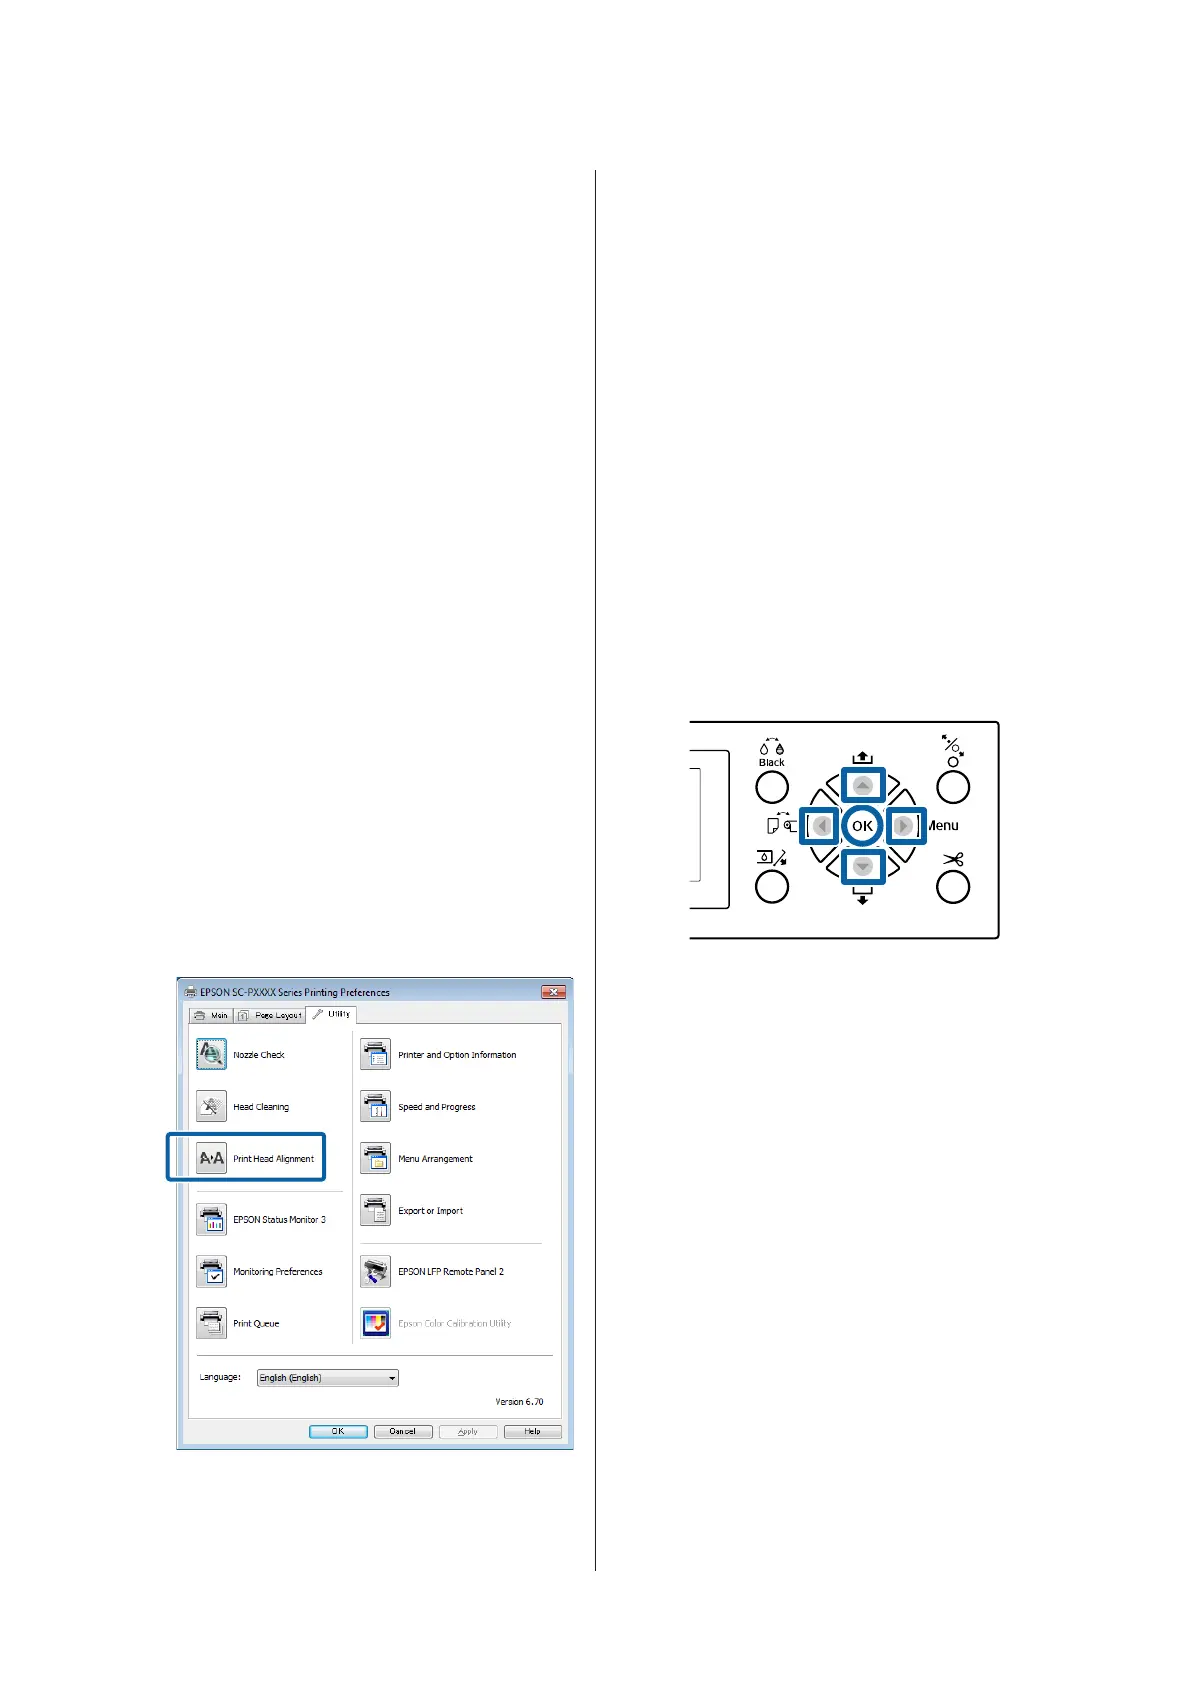
Click Print Head Alignment from the Utility tab
in the printer driver's Properties (or Printing
preferences) screen.
Follow the on-screen instructions.
The sensor reads the adjustment pattern while it
is printing, and automatically registers the
optimum adjustment value to the printer.
Check the adjustment results to confirm if
graininess or misalignment recurs in the printed
image.
If you are not satisfied with the adjustment
results, perform manual adjustment from the
printer.
U “From the printer” on page 131
From the printer
Before starting this procedure, be sure to read the
following:
U “Notes on Head Alignment” on page 130
Buttons that are used in the following settings
A
Make sure that the roll paper or a cut sheet of A4
size or larger is loaded in the printer.
U “Loading and Removing the Roll Paper” on
page 28
U “Loading and Removing Cut Sheets” on
page 34
When adjusting using commercially available
paper, make sure you register the Custom Paper
in advance.
U “Before Printing on Commercially Available
Paper” on page 177
B
Choose a paper type that matches the paper in the
printer.
U “Checking and Setting the Paper Type” on
page 37
C
Press the r button to display the setup menu.
SC-P9000 Series/SC-P7000 Series/SC-P8000 Series/SC-P6000 Series User's Guide
Maintenance
131

 Loading...