EasyManuals Logo

Epson SC-T7200 Series User Manual

Epson SC-T7200 Series
228 pages
To Next Page IconTo Next Page
To Previous Page IconTo Previous Page
Page #173 background imageLoading...
Page #173 background image
G
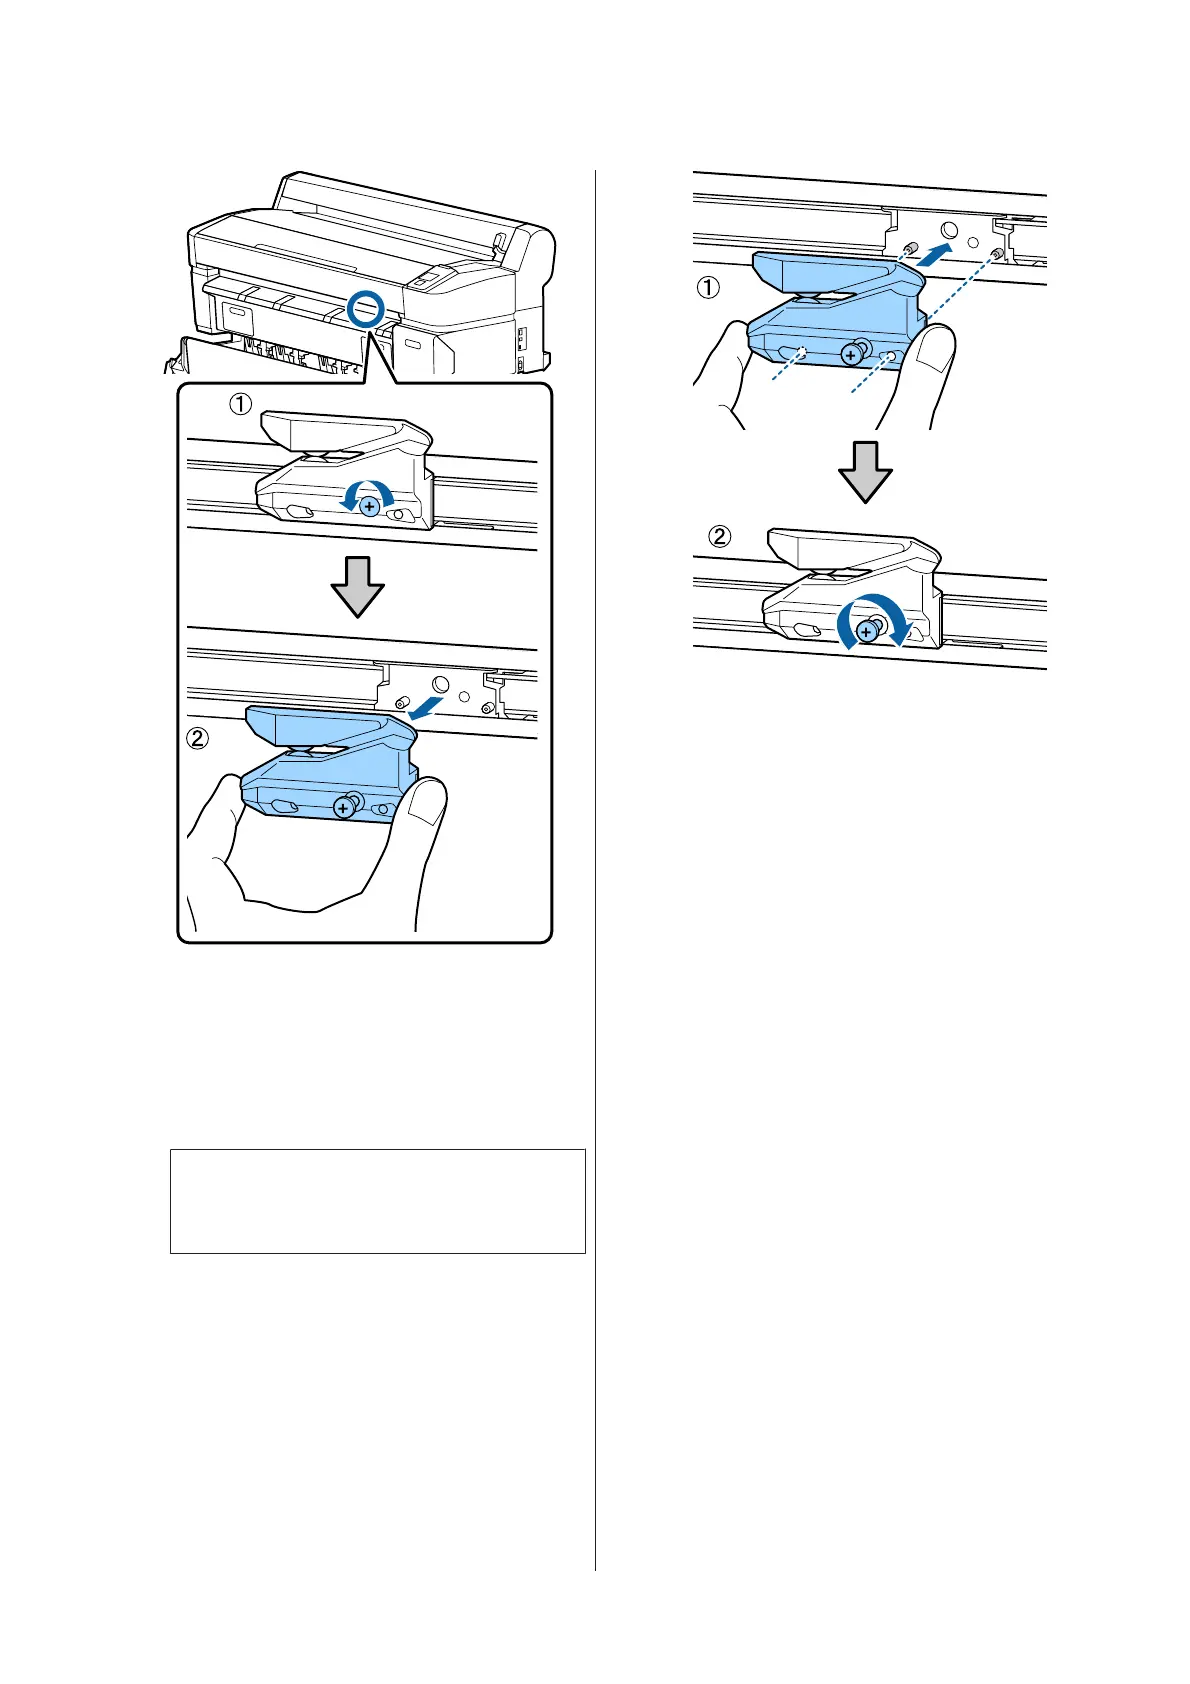
Install the new cutter.
Insert the cutter so that the pin on the printer
matches up with the hole on the cutter. Use a
cross-head screwdriver to tighten down the
screw to hold the cutter in place.
c
Important:
Screw up the cutter firmly, otherwise the cut
position may be slightly shifted or skewed.
H
After replacing the cutter, press the Z button.
The cutter will return to its original position.
Ready is displayed in the control panel when the
process is complete.
SC-T7200 Series/SC-T5200 Series/SC-T3200 Series/SC-T7200D Series/SC-T5200D Series User's Guide
Maintenance
173

Table of Contents

Other manuals for Epson SC-T7200 Series

Questions and Answers:

Question and Answer IconNeed help?

Do you have a question about the Epson SC-T7200 Series and is the answer not in the manual?

Epson SC-T7200 Series Specifications

General IconGeneral
Memory1 GB
Operating SystemsWindows, Mac OS
TechnologyPrecisionCore TFP Print Head
Paper SizesA0, A1, A2, A3+, A3, A4
Media TypesPhoto paper
Print Margin Roll3 mm (top, left, right, bottom)
InterfacesUSB 2.0, Ethernet
EmulationsHP-GL/2
Ink TypeUltraChrome XD2 (Pigment)
Print Resolution2, 880 x 1, 440 DPI

Related product manuals