EPSON Stylus C67/C68/D68 Revision A
PRODUCT DESCRIPTION Operator Controls 14
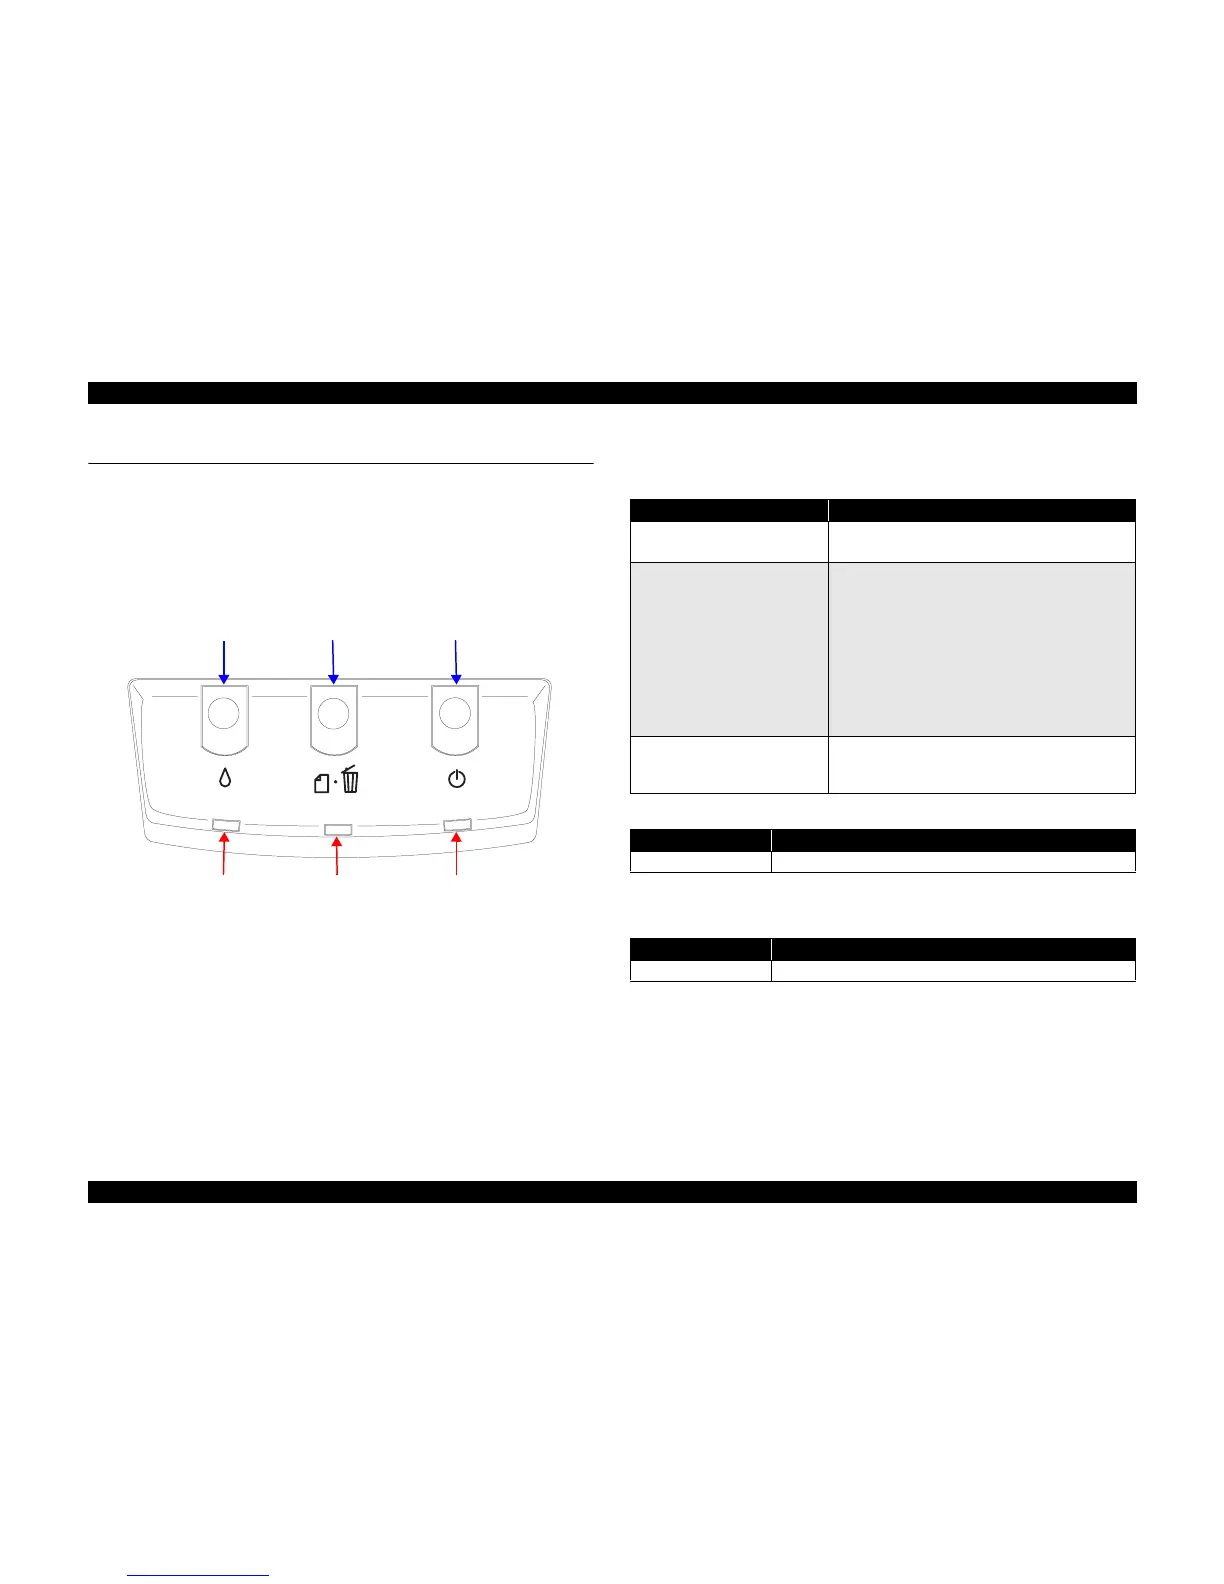
1.3 Operator Controls
1.3.1 Operate Switch
Operate switch is located on the control panel.
1.3.1.1 Switches
There are three non-lock type push switches and three LEDs.
Figure 1-4. Control Panel
1.3.1.2 Indicators
Power LED [Green]
Lights when the power switch is “ON” and AC power is supplied.
Paper LED [Red]
Lights during the paper-out condition, and flashes during the paper-jam condition.
Ink LED [Red]
Lights during no ink condition, and flashes during the ink low condition.
1.3.2 Panel Functions
Note *: Holding down the [Paper] switch, press [Power].
Note *: Holding down the [Power] switch, press [Ink] for about seven seconds.
Ink switch Paper switch Power switch
Paper LED Power LED
Ink LED
Table 1-4. Panel Functions
Switch Function
Paper
• Loads or ejects paper.
• In the condition of printing, cancel the print job.
Ink
• Starts the ink cartridge change sequence. Moves the
carriage to cartridge change position.
• In the condition of ‘Ink Low’, ‘Ink Out’ or ‘No Ink
Cartridge’, moves the carriage to the ink check
position.
• When the carriage is on the ink check position, moves
carriage to next ink check position or cartridge change
position.
• When carriage is on the ink change position, returns
carriage from ink cartridge change position.
Ink
(Holding down for three seconds)
• Starts the cleaning of head.
• In the condition of 'Ink Low', 'Ink Out' or 'No Ink
Cartridge', starts the ink cartridge change sequence.
Table 1-5. Panel functions with power on
Switch Pressing with Power On function
*
Paper Starts status printings.
Table 1-6. Panel functions with power off
Switch Pressing with Power Off function
*
Ink
Compulsory power off.
 Loading...


