EPSON Stylus CX4900/CX4905/CX5000/DX5000/DX5050/CX5900/CX6000/DX6000/DX6050 Revision A
ADJUSTMENT Overview 174
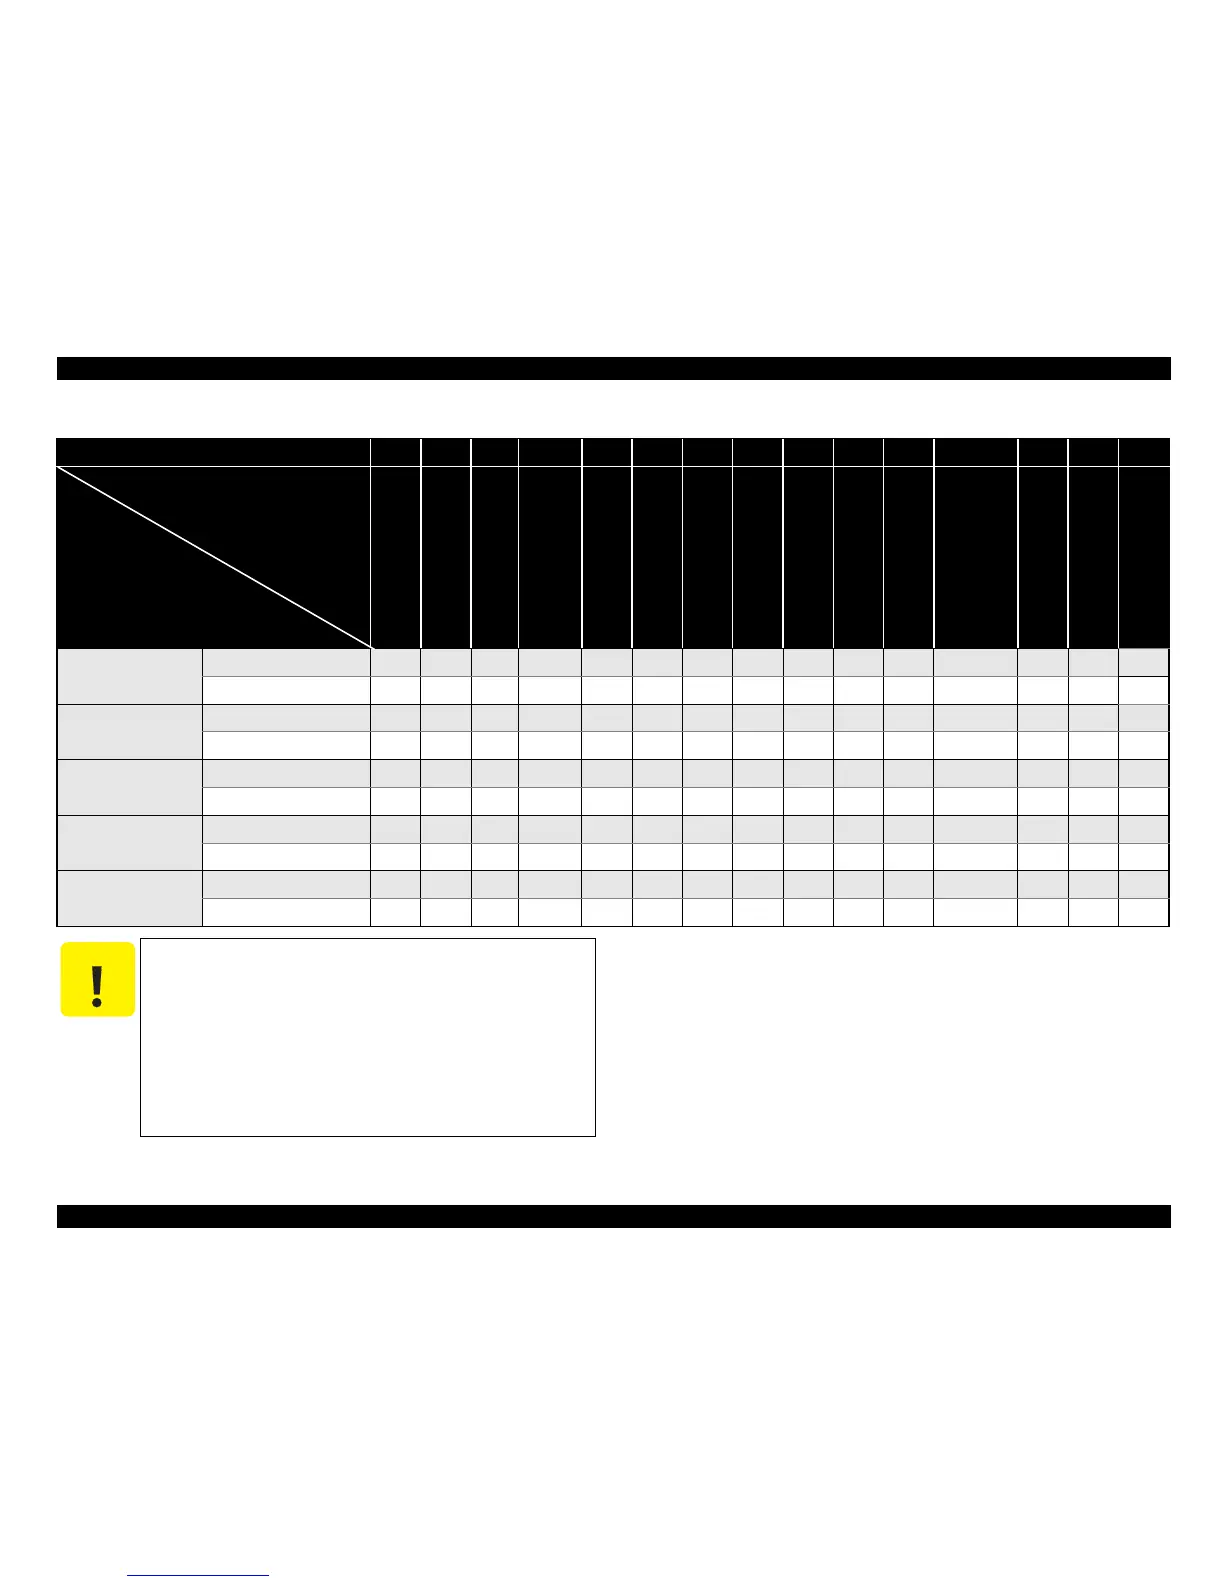
PW sensor
removal --- --- --- --- --- --- --- --- O --- --- --- --- --- ---
replacement --- --- --- --- --- --- --- --- O --- --- --- --- --- ---
CR unit
removal --- --- --- --- --- --- O O O O O --- --- O O
replacement --- --- --- --- --- --- O O O O O --- O O O
CR guide shaft
removal --- --- --- --- --- --- O* O* --- --- O --- --- --- ---
replacement --- --- --- --- --- --- O* O* --- --- O --- O --- ---
PF roller assy
removal --- --- --- --- --- --- O* --- --- --- O* --- --- O O
replacement --- --- --- --- --- --- O* --- --- --- O* --- --- O O
Ink system unit
removal --- --- --- --- --- --- --- --- --- --- --- --- --- --- ---
replacement --- --- --- --- --- --- --- --- --- --- --- --- --- --- ---
Table 5-1. Required Adjustments
Priority 1 2 3 4 5 6 7 8 9 10 11 12 13 14 15
EEPROM data copy
Initial setting
USB ID input
Waste ink pad counter
Ink charge
Head ID input
Top margin adjustment
First dot adjustment
PW sensor adjustment
Head angular adjustment
Bi-d adjustment
PF deterioration adjustment
CR offset
PF adjustment
PF band adjustment
C A U T I O N
When the Main board is replaced with a new one, you may have
to replace waste drain ink pad also in case the EEPROM
parameter back up function is not available on the defective
main board.
After completing the adjustment, check the
printing result with
A4 check pattern by using the Adjustment program.
If the result is not good, perform appropriate adjustment.
If using new main board in the printer mechanism replacement,
you need to perform EEPROM initial setting of main board.
And then, please perform the adjustment by usual procedure.
Adjustment item
Replaced part
 Loading...


