Epson Stylus Photo R3000 Revision A
Disassembly/Reassembly Detailed Disassembly/Reassembly Procedure for each Part/Unit 23
Confidential
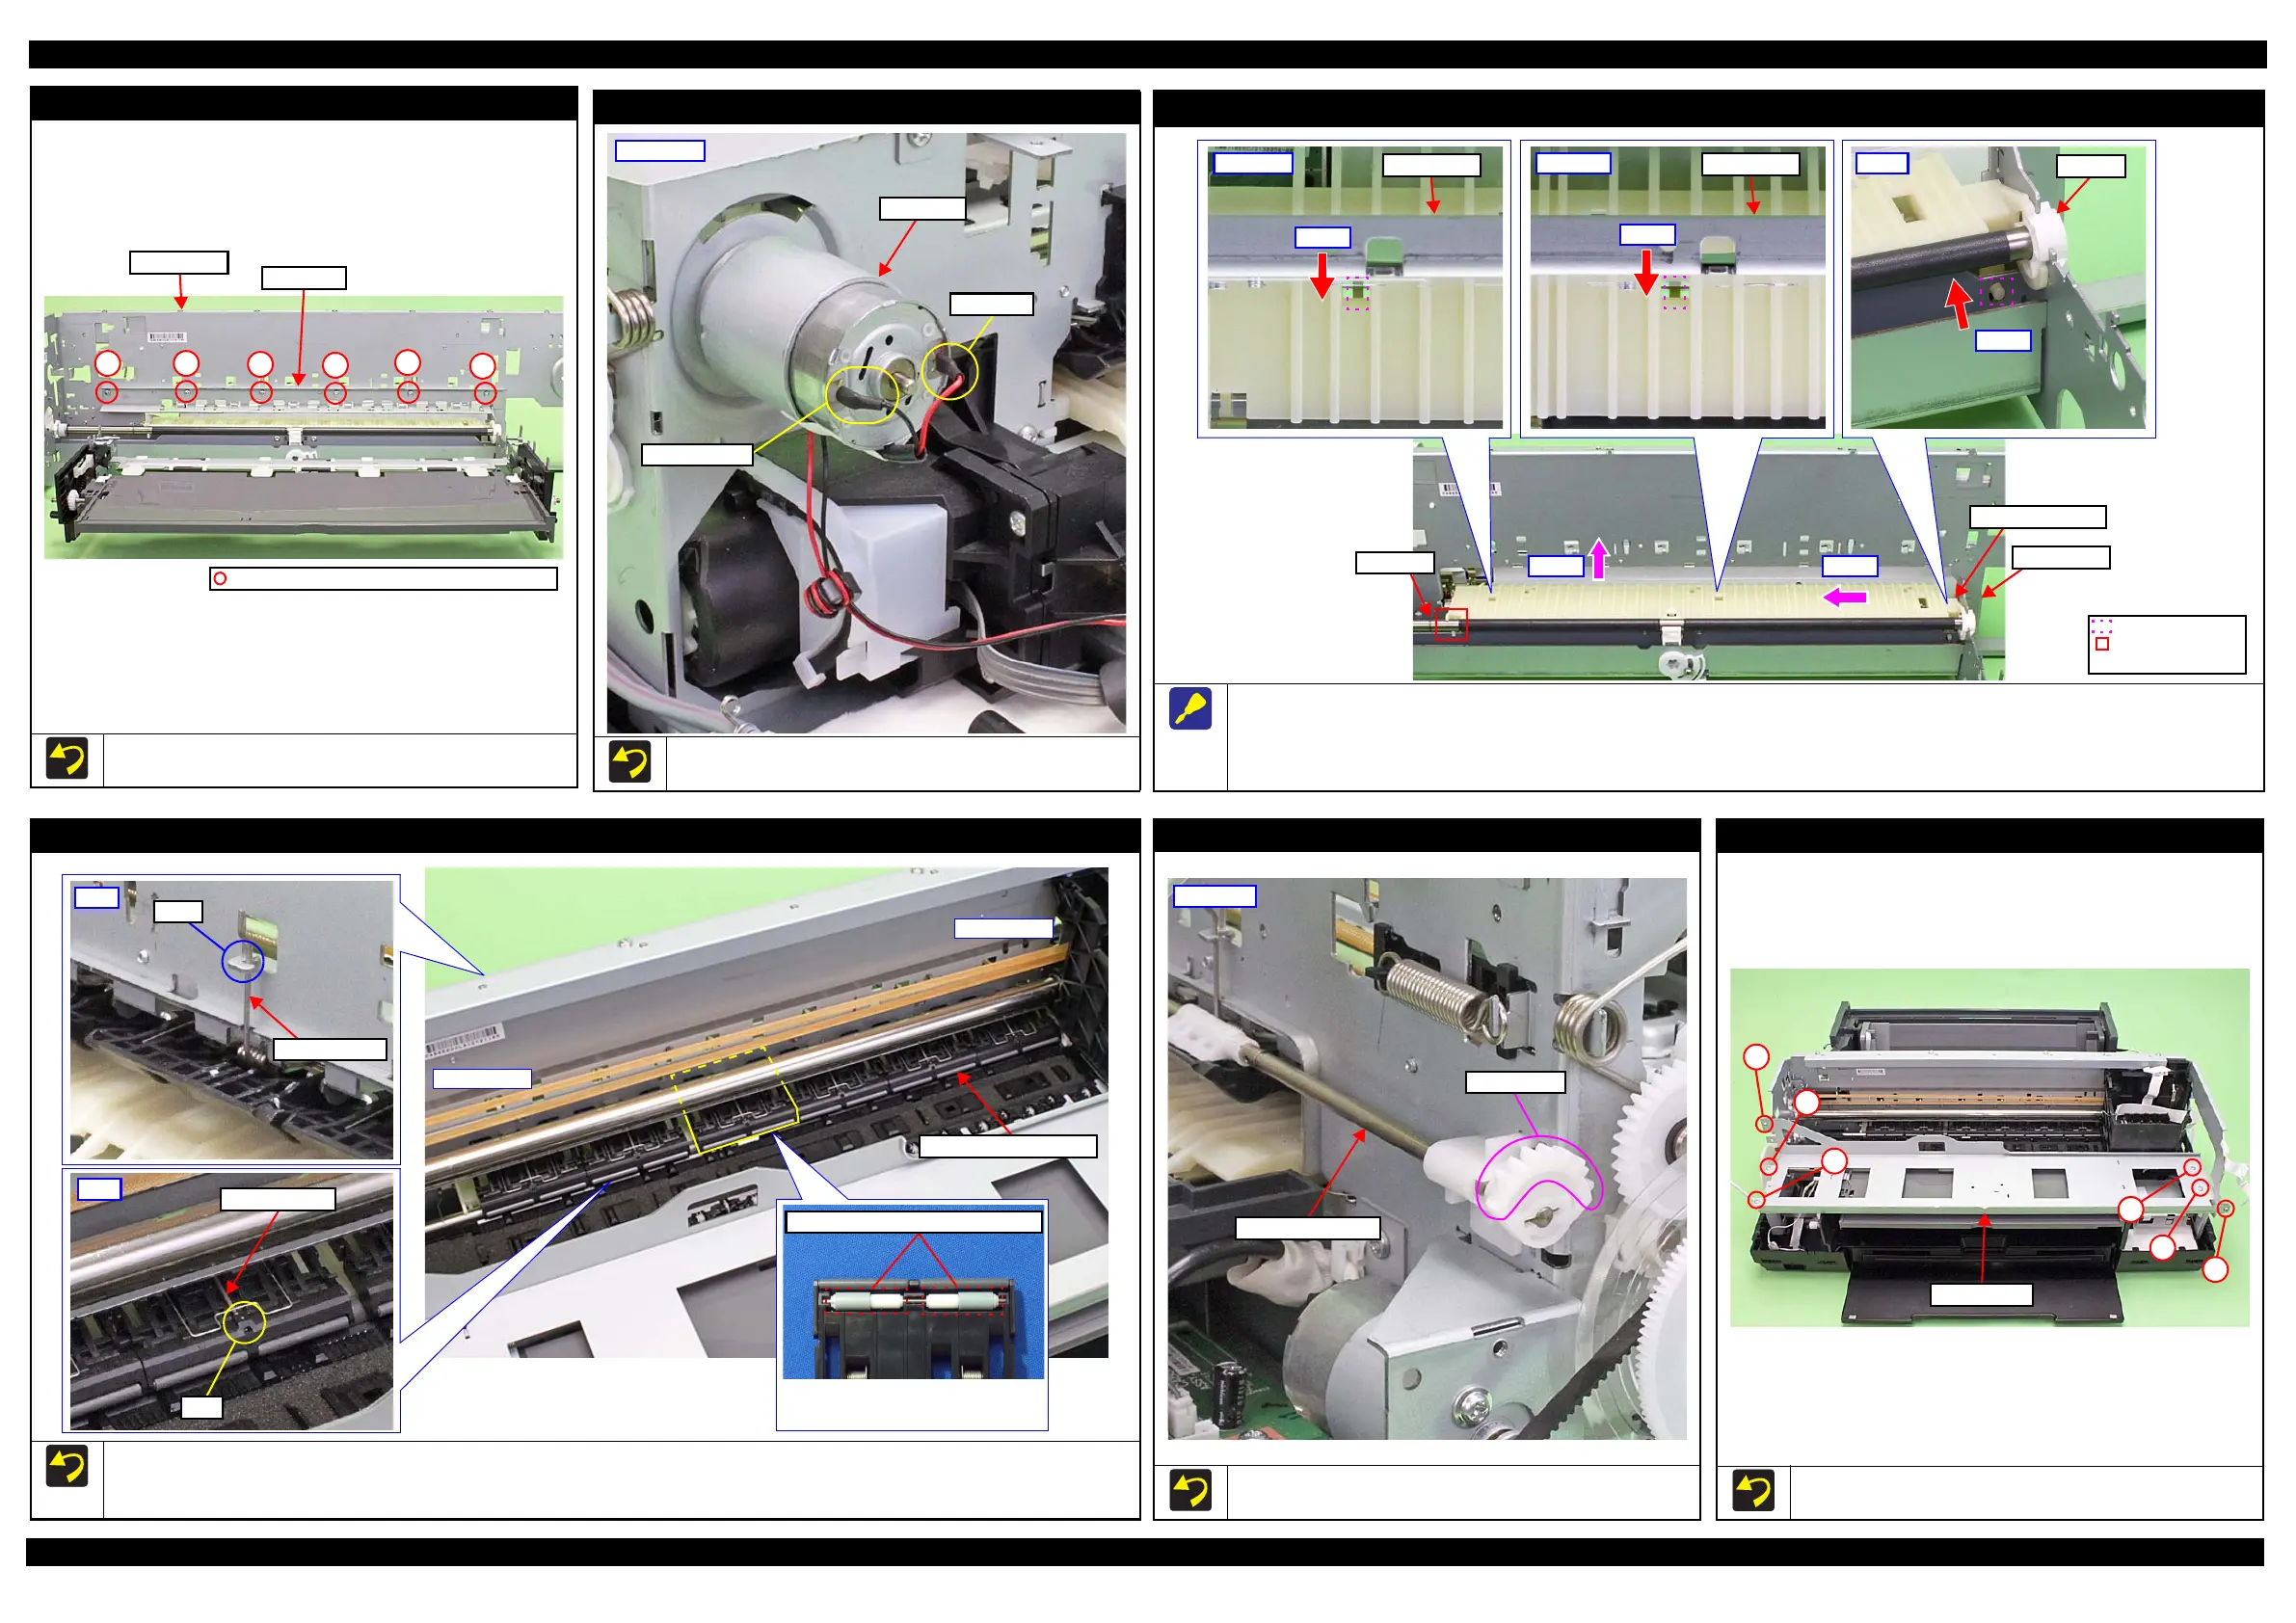
PF Frame
Tighten the screws in the order indicated in the figure above.
PF Frame
Main Frame
1
2
3
4
56
C.B.S-TITE SCREW,3X4,F/ZN-3C(8 1kgf·cm)
CR Motor
When installing the CR Motor, attach it with its red cable to the left
side of the printer.
CR Motor
Red Cable
Black Cable
Rear right
Rear Paper Guide
When removing the Rear Paper Guide, follow the procedure below.
1. Push the positioning dowels (x3) in the direction of the red arrow to release them.
2. Slide the Rear Paper Guide approx. 5 mm to the left to release the right side of the Rear Paper Guide from the Bush, 8.
3. Lift the rear side of the Rear Paper Guide and release it from the PF Roller, and then remove the Rear paper Guide.
Upper left
Step 1
Main Frame
Rear Paper Guide
PF Roller
Step 2Step 3
Engagement point
with PF Roller
Positioning dowel
Main Frame
Upper Paper Guide Assy
Make sure to install the Upper Paper Guide Assy whose roller has shorter rubber parts on the fourth position from 0-digit side.
When attaching the torsion spring, insert the spring leg (straight side) into the hole of the Upper Paper Guide Assy, and engage the other leg to
the hook of the frame.
Upper Paper Guide Assy
The fourth roller of Upper Paper
Guide Assy from the 0-digit side
has shorter rubber parts.
The rubber parts on roller are shorter.
0-digit side
130-digit side
Release Flag Assy
When installing the Release Flag Assy, install it with its gear
section upward.
Release Flag Assy
Gear Section
Rear left
Middle Frame
Tighten the screws in the order indicated in the figure above.

 Loading...


