Epson Stylus Photo R3000 Revision A
Disassembly/Reassembly Detailed Disassembly/Reassembly Procedure for each Part/Unit 26
Confidential
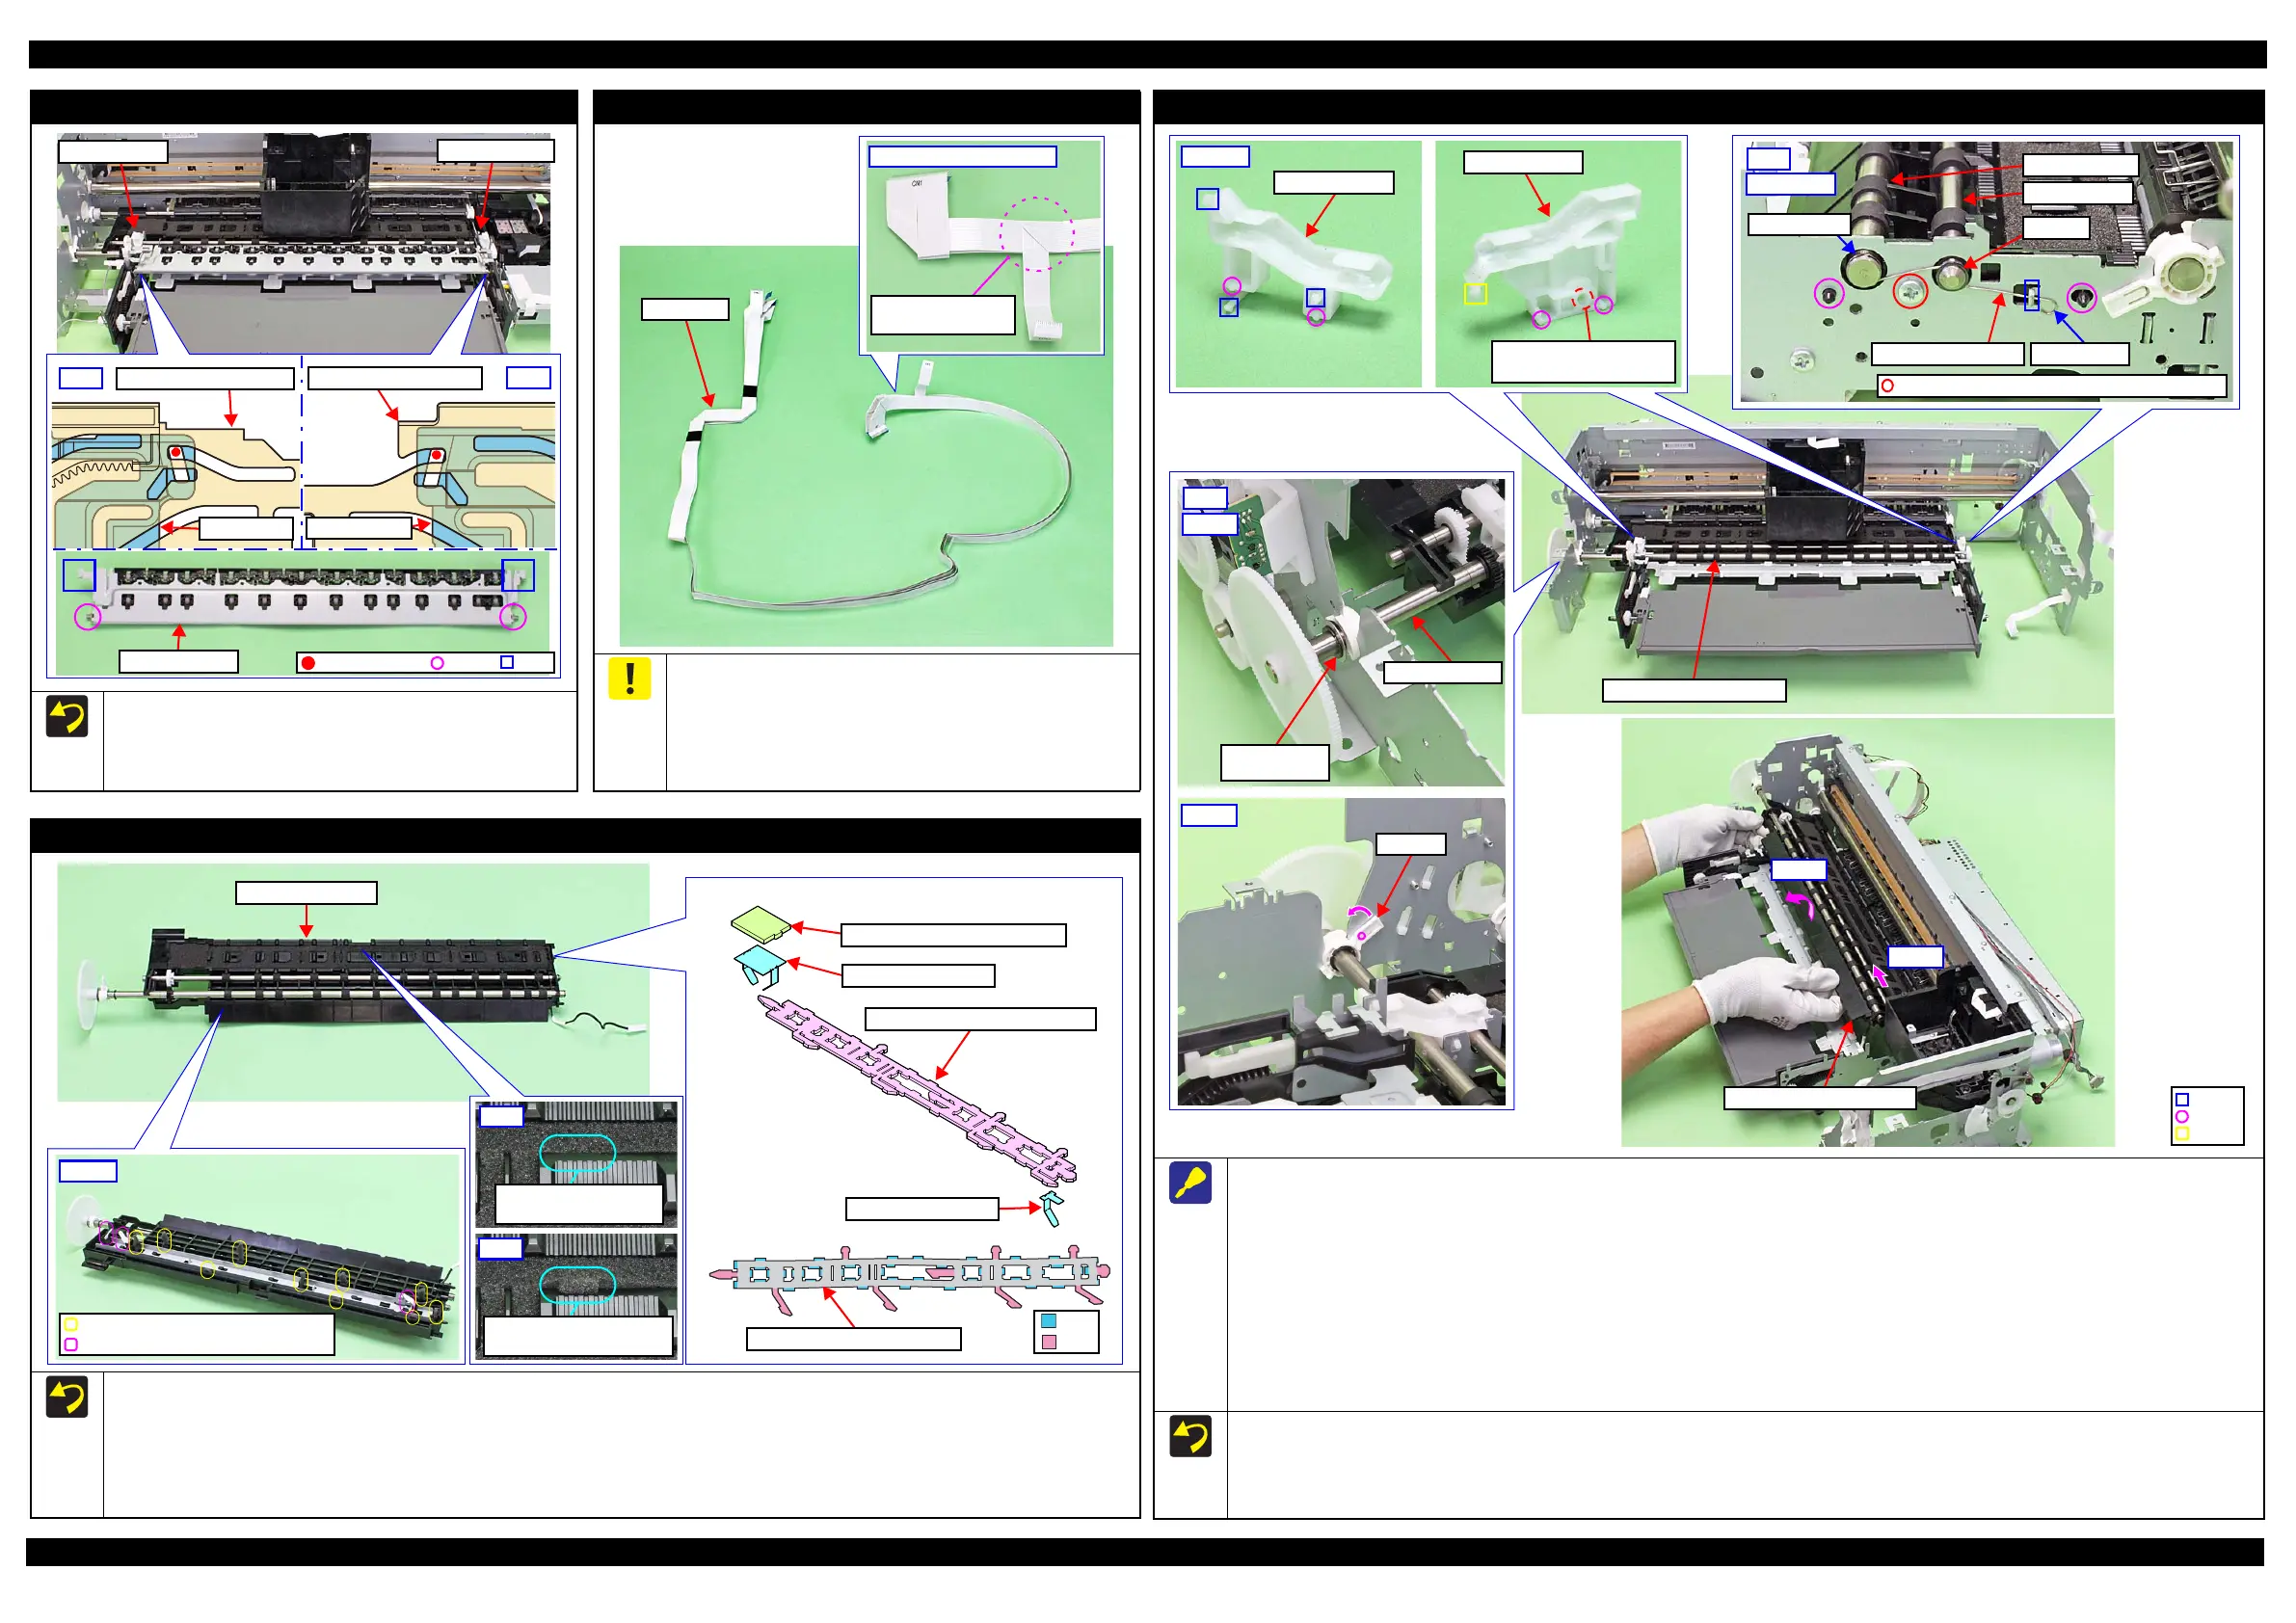
Star Wheel Assy
Attach the dowels on the left/right of the Star Wheel Assy from
the left one first into their attachment positions shown above.
Insert the ribs on the left/right of the Star Wheel Assy to the
grooves on the EJ Frame Slider Left/Right.
Star Wheel Assy
Dowel
Rib
Dowel position
EJ Slider Right
EJ Slider Left
EJ Link Left
Front Left Tray Guide
Left
Front Right Tray Guide
EJ Link RIght
Right
Head FFC
To prevent degradation of print quality due to interference of the
Head FFC (x2) with the CR Unit movement, the Head FFC (x2) are
folded with the jig and bundled together with double-sided tape.
When handling the Head FFC, take care not to make an extra fold
on it other than original ones. Furthermore, do not peel the FFC
apart or change the attachment locations.
Head FFC
Printhead connecting side
Double-sided tape
attachment position
Front Paper Guide Assy
When removing the Front Paper Guide Assy, follow the procedure below.
1. Release the hooks (x3) and dowels (x2) of the EJ Slider Left, and remove the EJ Slider Left.
2. Remove the screw that secure the EJ Slider Right and release the dowels (x2) and rib, and then remove the EJ Slider Right.
3. Remove the EJ Grounding Spring on the right side of the Front Paper Guide Assy.
4. Remove the screw that secure the Front Paper Guide Assy.
5. Remove the Washer,6.9X0.5X10.4 from the EJ Roller Front.
6. Release the dowel of the Bush, 8 and rotate the Front Paper Guide Assy upward and align it with the cutout of the frame.
7. Slide the Front Paper Guide Assy to the left, and release the dowels (x2) on the right side of it from the frame.
8. Lift the front side of the Front Paper Guide Assy and detach the EJ Roller Front from the cutout of the frame, and then remove the Front Paper
Guide Assy while avoiding the parts around it.
When installing the EJ Grounding Spring, follow the procedure below.
1. Engage the Spring Foot A to the groove of the EJ Roller Front.
2. Engage the bent section of the EJ Grounding Spring on the inner side of the washer outside the EJ Roller Rear.
3. Engage the Spring Foot B to the hook of the frame.
EJ Slider Right
C.B.S-TITE SCREW,3X8,
F/ZN-3C (8 ± 1 kgf·cm)
EJ Roller Front
EJ Roller Rear
EJ Grounding Spring
C.B.S-TITE SCREW,3X8,F/ZN-3C (5 ± 1 kgf·cm)
Right
Spring foot A
Spring foot B
Step 3, 4, 7
EJ Roller Rear
Washer
EJ Roller Front
Washer,
6.9X0.5X10.4
Left
Step 5
Front Paper Guide Assy
Step 8
Step 7
Porous Pad Front Paper Guide
When installing the EJ Ink Guide Left/Right, Porous Pad Front Paper Guide and Porous Pad Left Paper Guide, install them in the order shown
above.
After installing the Porous Pad Front Paper Guide, make sure the legs (x10) of the Porous Pad Front Paper Guide and legs (x3) of the EJ Ink
Guide Left/Right are fully pulled out and they drop down straight from the hole of the Front Paper Guide Assy.
Make sure that all ribs (x47) of the Porous Pad Front Paper Guide are fitted into the grooves of the Front Paper Guide, and no pad lifts off from
the platen.
Bottom
Leg of Porous Pad Front Paper Guide
Leg of EJ Ink Guide Left/Right
OK
Rib of Porous Pad Front
Paper Guide is hidden.
NG
Rib of Porous Pad Front
Paper Guide is sticking out.
1: EJ Ink Guide Right
3: EJ Ink Guide Left
4: Porous Pad Left Paper Guide
2: Porous Pad Front Paper Guide
Porous Pad Front Paper Guide
Rib
Leg

 Loading...


