Variety of Printings 26
Mac OS X Leopard Printer Driver Guide
C
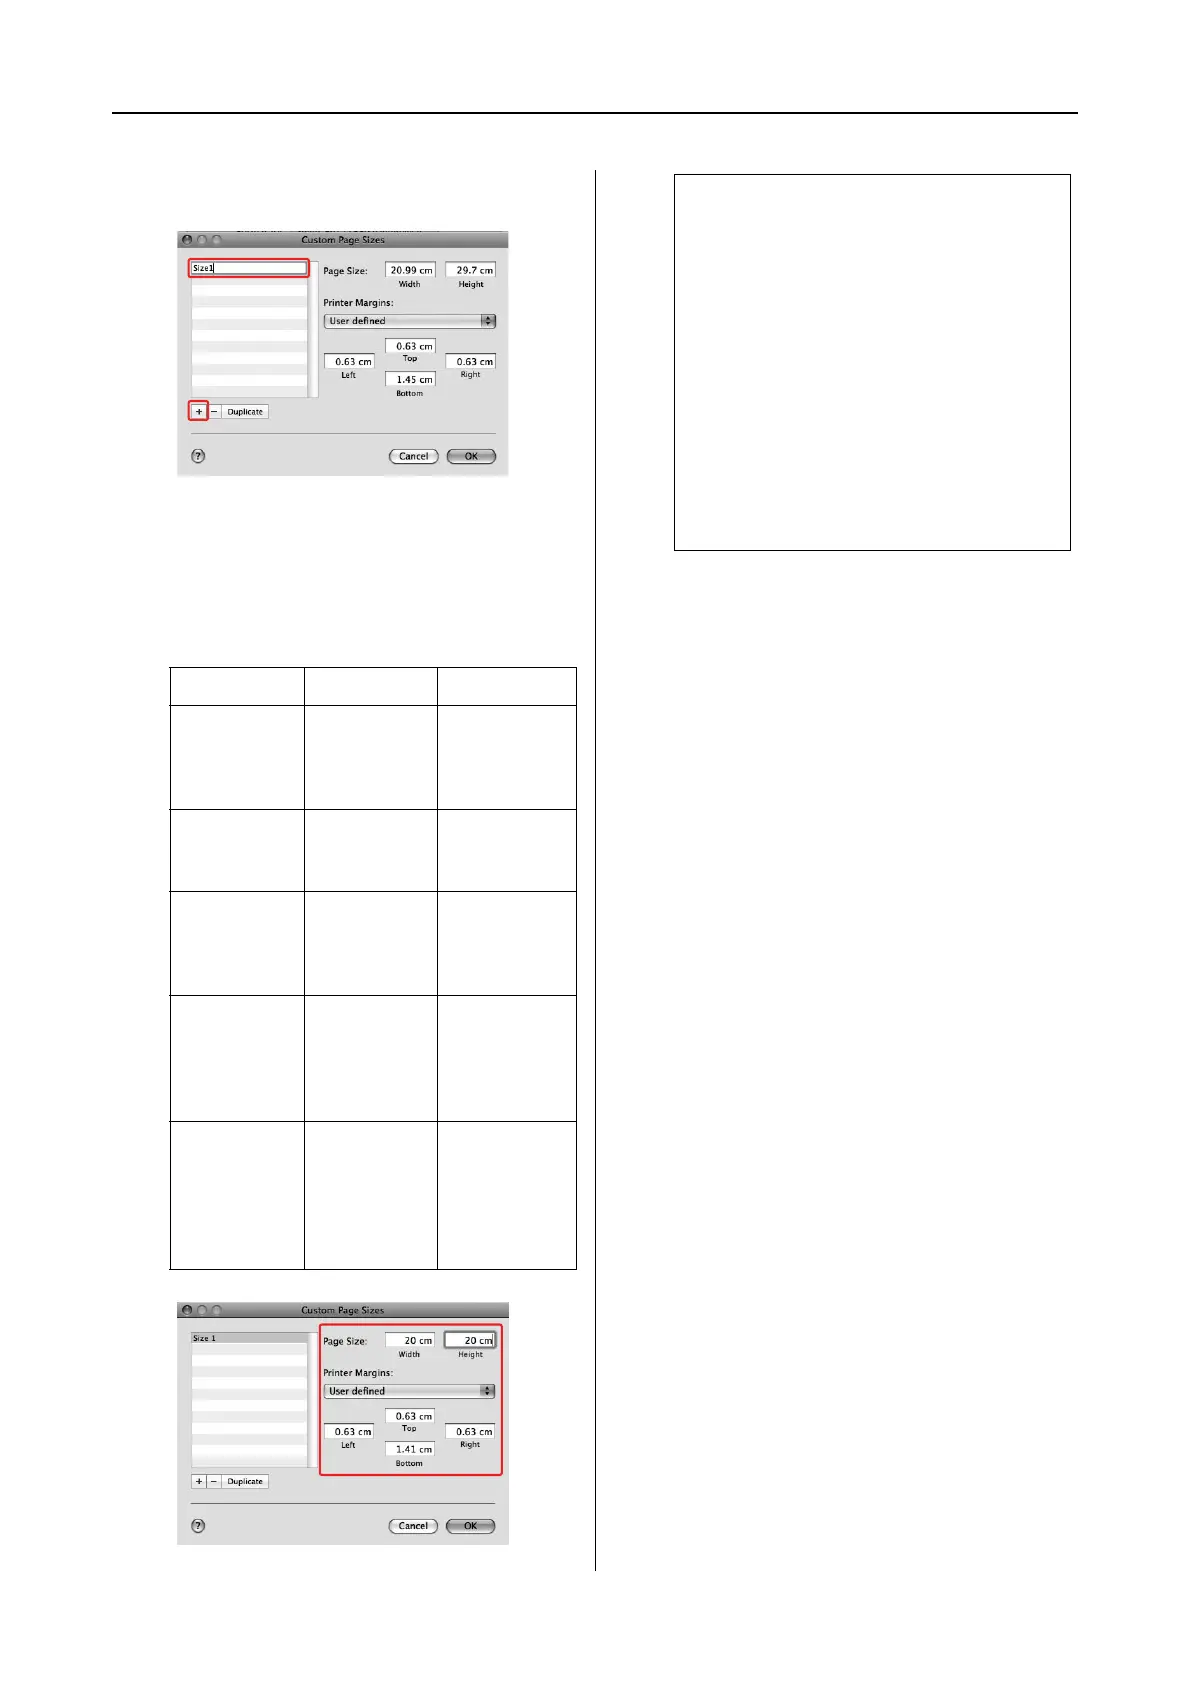
Click +, and enter the paper size name.
D
Enter the paper width, paper height, and
margins, and then click OK.
The paper size and printer margin you can
set is as follow.
E
Click OK.
The custom paper size is registered in the
Paper Size pop-up menu. Now, you can
print by taking the same steps as usual.
Page setup Paper size Margins
Sheet Supported
paper size
Top, Left,
Right: 3 mm
Bottom:
14.2 mm
Roll Paper Supported
paper size
Top, Bottom,
Left, Right:
3mm
Roll Paper
(Banner)
Supported
paper size
Top, Bottom:
0mm
Left, Right:
3mm
Roll Paper
(Borderless,
Auto
Expand)
The paper
width that
supports
borderless
printing.
Top, Bottom,
Left, Right:
0mm
Roll Paper
(Borderless,
Retain Size)
Roll Paper
(Borderless,
Banner)
The paper
width that
supports
borderless
printing and
plus 6 mm.
Top, Bottom,
Left, Right:
0mm
Note:
❏ To change the setting you have registered,
click the paper size name from the list.
❏ To duplicate the paper size you have
registered, click the paper size name from
the list, and then click Duplicate.
❏ To delete the paper size you have
registered, click the paper size name from
the list, and then click -.
❏ The custom paper size setting is different
depending on the version of the operating
system. See your operating system’s
documentation for details.
 Loading...


