1-14 Setting Up the Printer
4. If you are replacing a used ribbon, grasp the end of the tab and
remove it from the printer. See the illustration in step 5 for the
location of the tab.
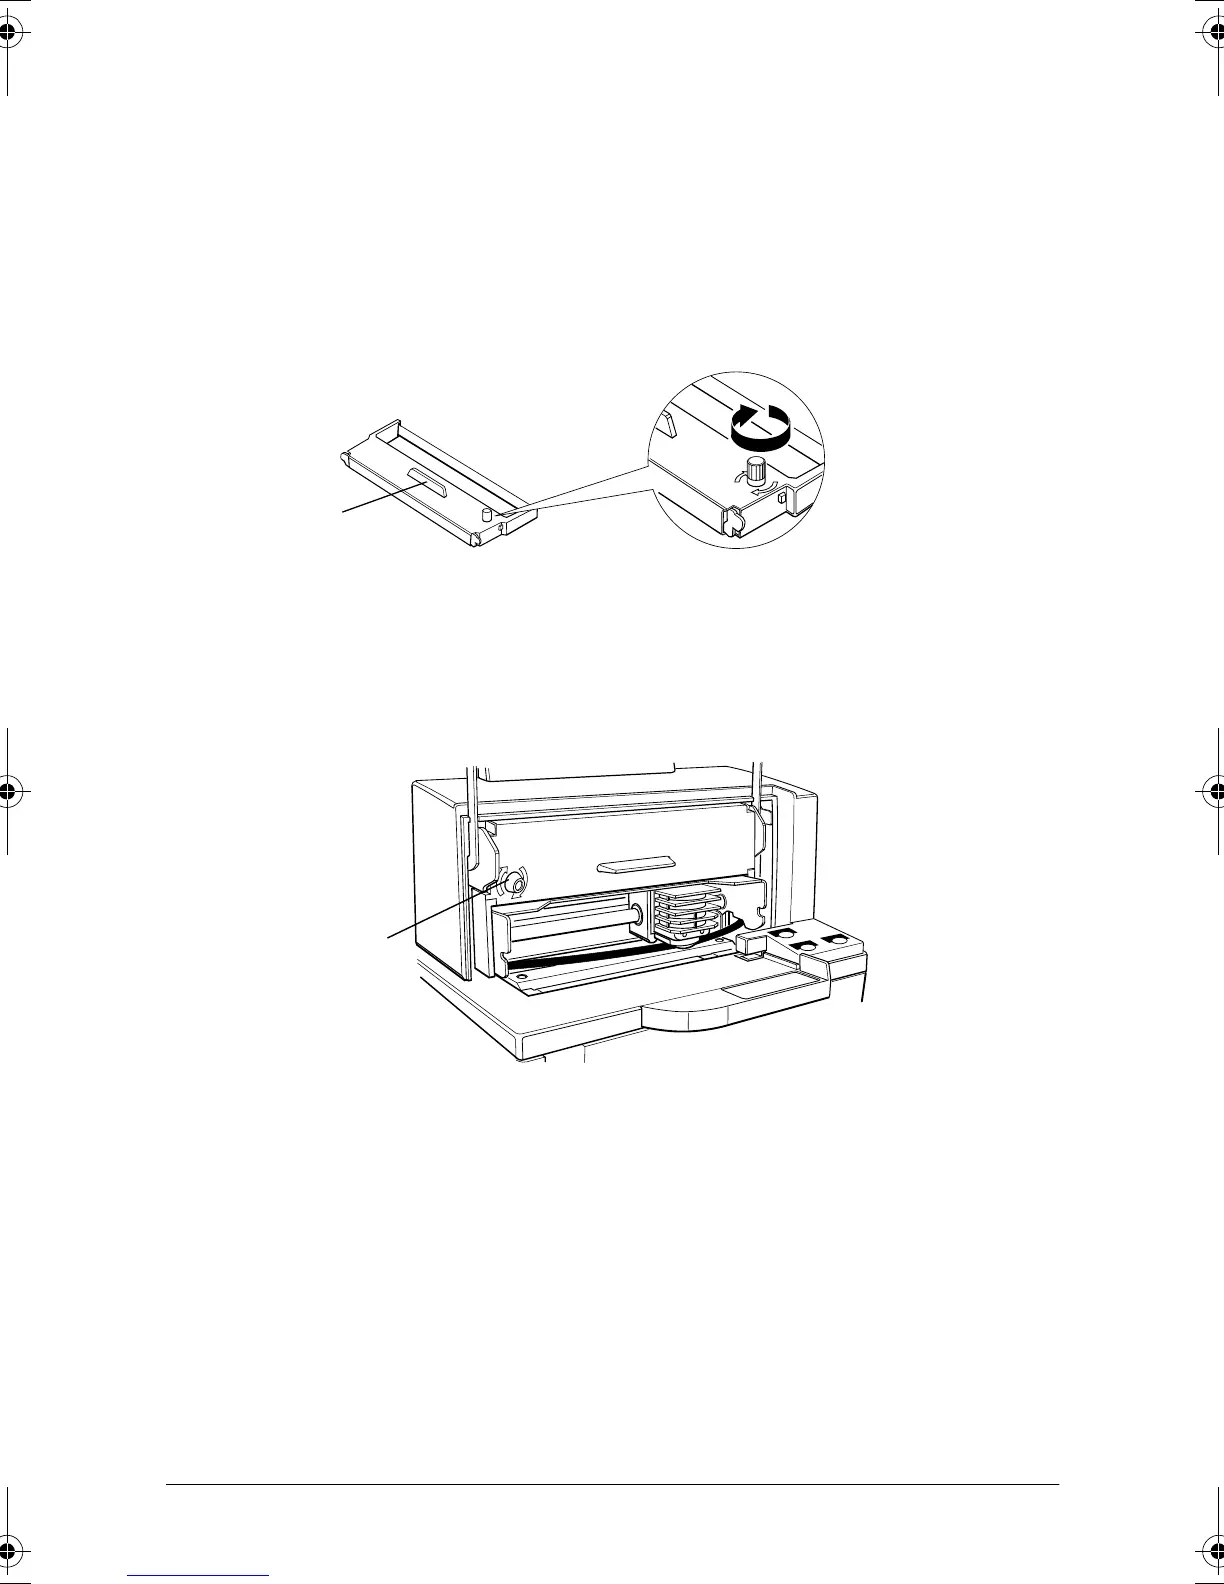
5. Turn the ribbon knob two or three times in the direction of the
arrow to take up any slack in the ribbon.
6. Insert the ribbon cassette in the printer and rotate the cassette's
knob two or three more times. This is necessary to place the
ribbon in the correct position.
Make sure that the ribbon is installed below the print head
without wrinkles or creases. (See ➄ on the label for an
illustration of where the ribbon should go.)
If the ribbon is not installed correctly, remove the cassette and
repeat steps 5 and 6 above.
Tab
Knob
H5po1r3.fm Page 14 Tuesday, July 14, 1998 12:31 PM
 Loading...