Setting Up the Printer 1-3
Connecting the Cables and Grounding the Printer
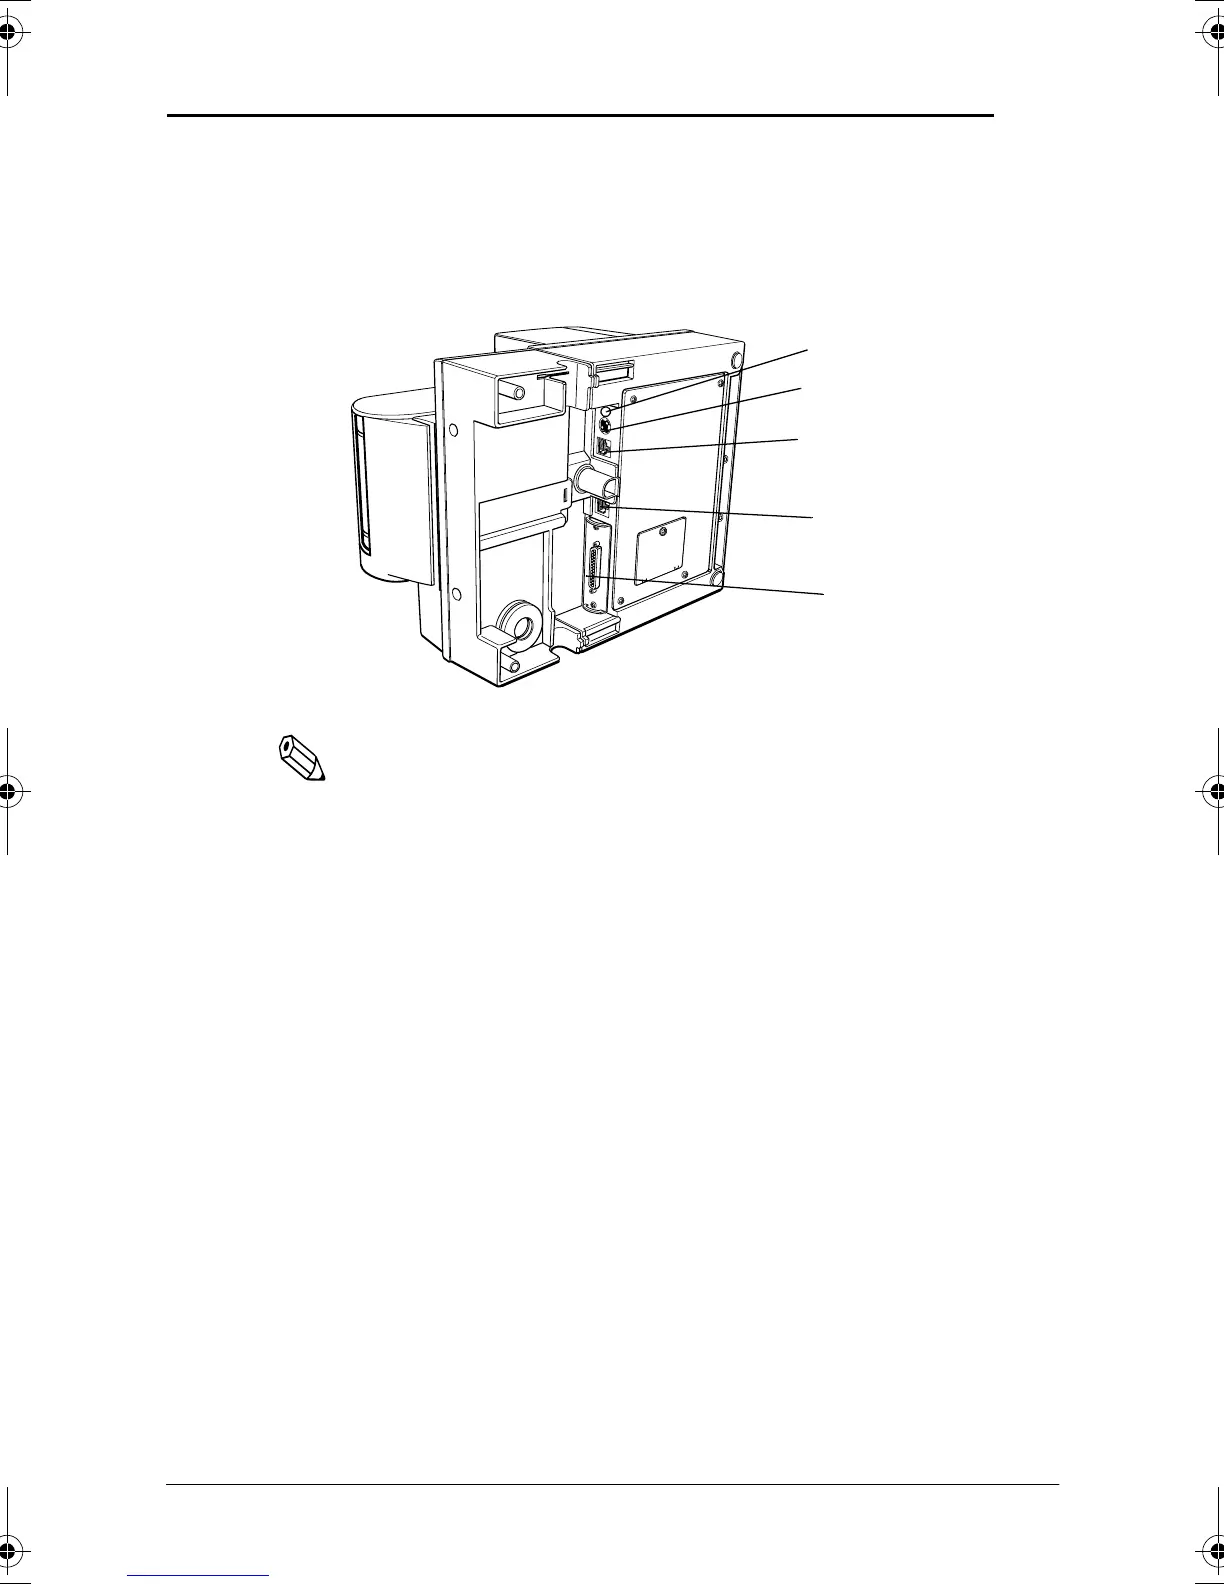
You can connect up to five cables to the printer. They all connect to
the connector panel on the bottom of the printer, which is shown
below:
Note:
There are caution labels beside the drawer kick-out connector
and the display module connector.
Depending on the interface installed, the interface connector on
your printer may look different from the one illustrated.
The display module connector of the printer can be used only for
the serial interface.
Before connecting any of the cables, make sure that both the printer
and the computer are turned off.
Connecting the computer
You need an appropriate interface cable.
1. Plug the cable connector securely into the printer’s interface
connector.
Grounding screw
Power supply
Drawer kick-out
Display module
Interface
(See note below)
H5po1r3.fm Page 3 Tuesday, July 14, 1998 12:31 PM
 Loading...