6-2 Installation Rev.B
Confidential
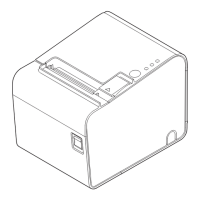
Horizontal Installation
Place the printer with the paper exit facing upward. When you install the printer horizontally,
perform the following steps.
1. Attach the switch panel label as shown below.
2. If the autocutter is set to full cut, attach the paper outlet guide using the paper outlet tape
(double-sided tape) as shown below.
Note:
If you install the printer horizontally and choose full cut without attaching the paper outlet guide, the cut
paper falls inside the paper path, which can result in double-cuts, a paper jam, or cutter error. However, if
the printer is installed vertically or partial cut is chosen, the paper outlet guide is not necessary.
Wall Mounting
The printer can be attached to the wall by using the wall hanging bracket (WH-10). When you
are going to use the printer by mounting it on a wall, see the installation manual that comes with
the wall hanging bracket.
Switch panel labell
paper outlet guide
paper outlet guide
paper outlet tape
 Loading...