You can check and clean the print head by using the printer's control panel.
1.
Select Maintenance on the printer's control panel.
To select an item, use the
u
d
l
r
buttons, and then press the OK button.
2.
Select Nozzle Check.
3.
Follow the on-screen instructions to load paper and print the nozzle check pattern.
4.
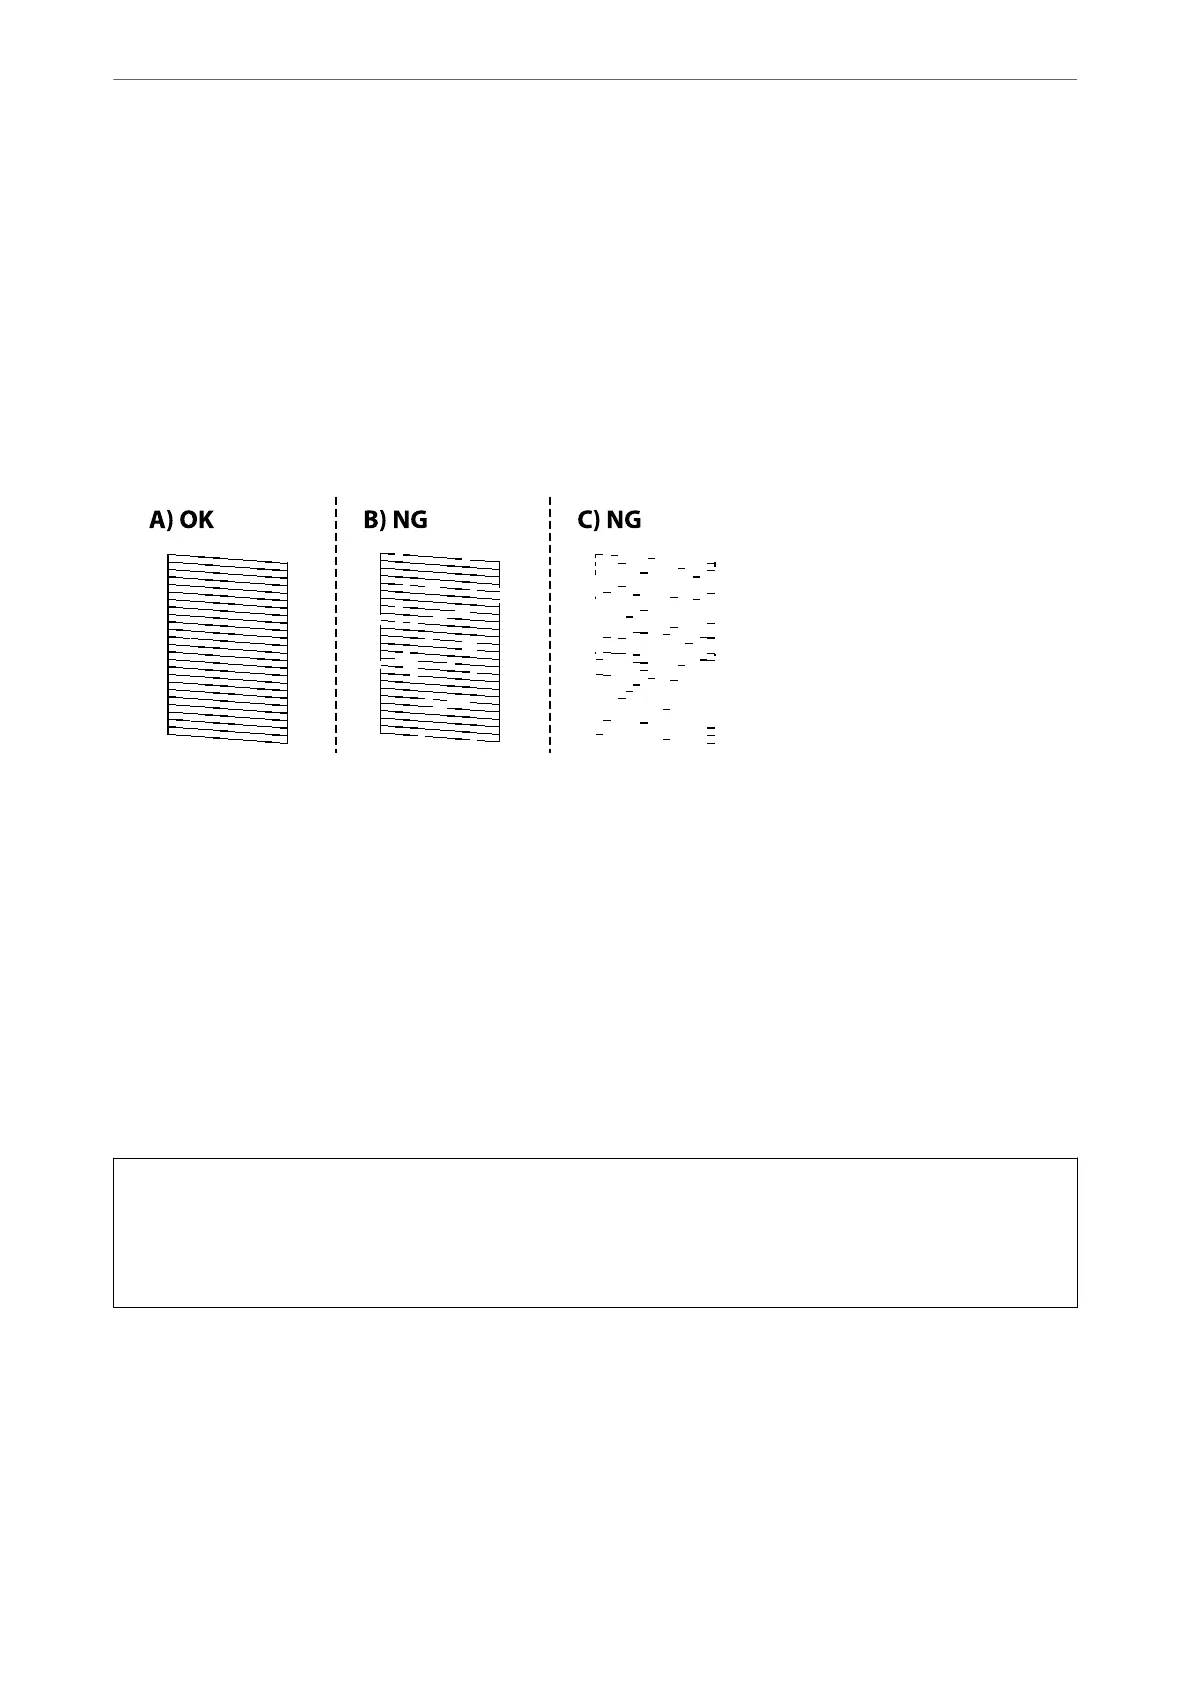
Check the printed pattern to see if the print head nozzles are clogged.
❏ A:
All lines are printed. Select No. No further steps are needed.
❏ B or close to B
Some nozzles are clogged. Select Ye s , and then select Cleaning on the next screen.
❏ C or close to C
If most lines are missing or not printed, this indicates most nozzles are clogged. Select Ye s , and then select
Power Cleaning on the next screen.
5.
Follow the on-screen instructions to perform print head cleaning or Power Cleaning.
6.
When cleaning is
nished,
the nozzle check pattern is printed automatically. Repeat cleaning and printing the
pattern until all lines are printed completely.
c
Important:
If print quality has not improved aer repeating nozzle check and head cleaning 3 times, wait for at least 12 hours
without printing, run the nozzle check once again, and then repeat head cleaning if necessary. We recommend
turning o the printer by using the
P
button. If print quality has still not improved, run Power Cleaning.
Note:
You can also check and clean the print head from the printer driver.
❏ Windows
Click Print Head Nozzle Check on the Maintenance tab.
❏ Mac OS
Apple menu > System Preferences > Printers & Scanners (or Print & Scan, Print & Fax) > Epson(XXXX) > Options
& Supplies > Utility > Open Printer Utility > Print Head Nozzle Check
Maintaining the Printer
>
Improving Print, Copy, Scan, and Fax Quality
>
Checking and Cleaning the Print Head
102

 Loading...


