4746 ERGON BIKE ERGONOMICS
Quick Installation
1. Read the handbook thoroughly
2. Mount the cleats onto the shoes so that they can still be moved
3. Place one of the shoes on the top side of the opened Ergon TP1,
ensuring that the cleat is fitted into the cut-out
4. Move the shoe into the correct position as outlined in the handbook. For
reference an old shoe setup can also be used
5. Start by setting the Fore / Aft position of the cleat, then adjust the
Q-Factor and finally the angle of the foot (rotation). Take note of the length
of the pedal axle as this differs according to model used
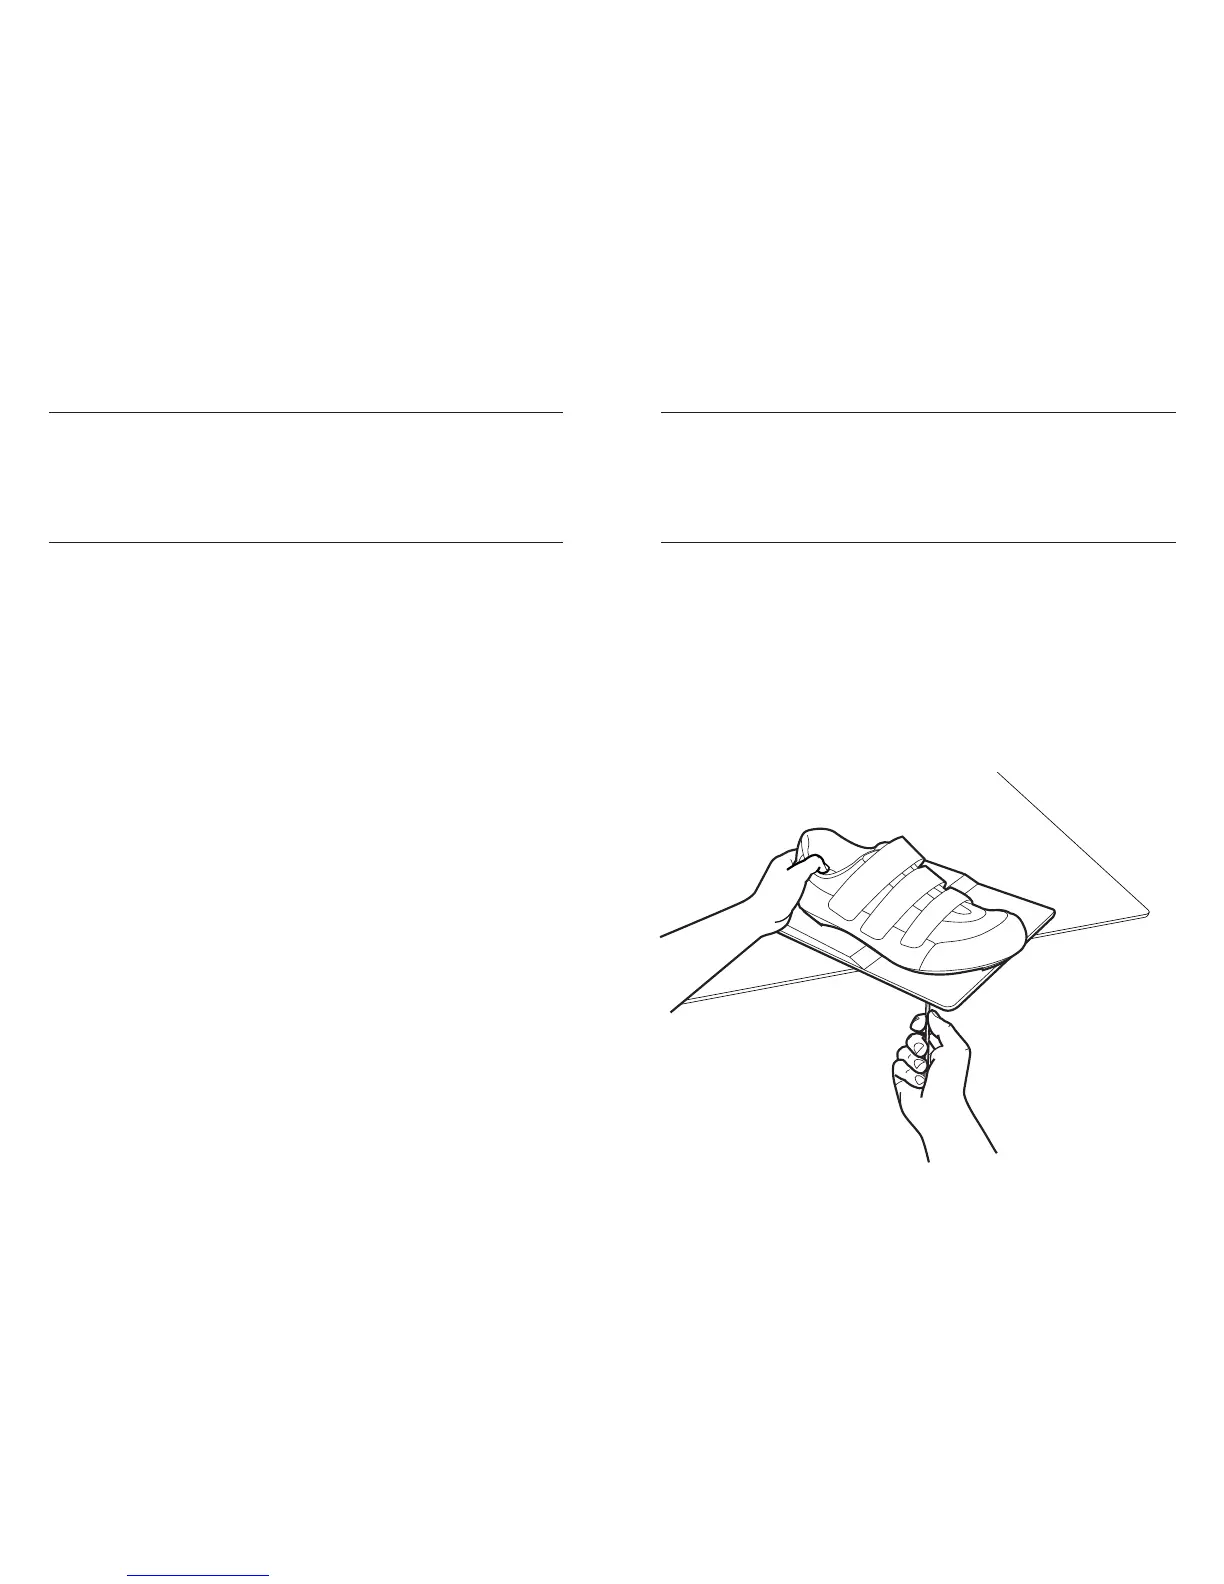
6. Tighten the screws without allowing the shoe to move – we suggest
holding the heel of the shoe. By sliding the Ergon TP1 over the edge of a
table the screws can be accessed from underneath
7. Remove the shoe from the Ergon TP1 and tighten the cleats to the
correct torque using a torque wrench
8. Place both shoes onto the Ergon TP1 and set the cleat position
symmetrically on the shoe which is still to be set up
9. Tighten the screws on the second shoe following the instructions above
10. Go out and ride. If needed small adjustments can be made. Please repeat
the process until the correct position is found. Only work on one shoe at
a time. The other can be used as reference