29
GB
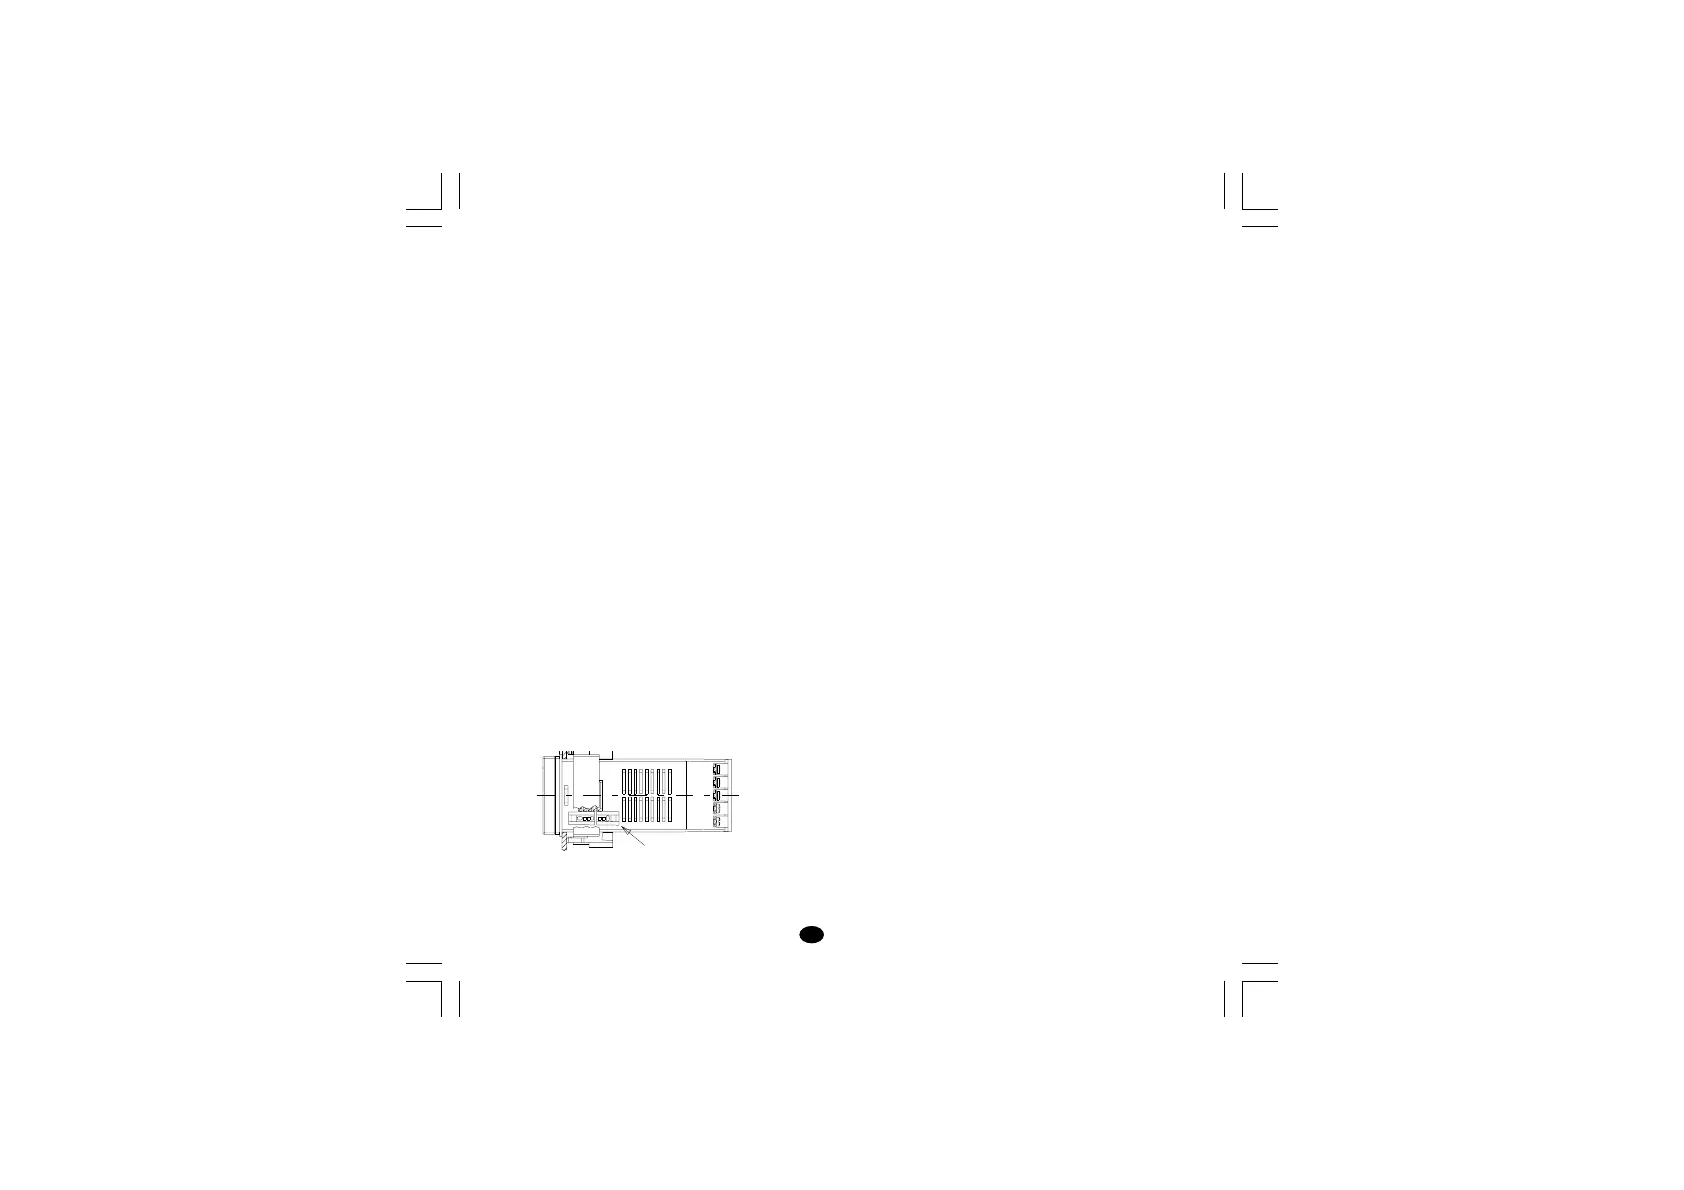
CPI connection socket
7.4 OUTS
OUT 1 (Heating):
Relay out with SPDT contact;
a) Out contact 3A / 250 V AC on resistive load.
b) Logic voltage for solid state relay command.
Logic state 1: 24 Vdc +20% @ 1mA,
14Vdc +20% @20 mA
Logic state 0: <0.5V
OUT 2 (Cooling or alarm 1)
Relay out with SPST contact (Form A).
Out contact 2A/250V AC on resistive load.
OUT 3 (alarm 2)
Relay out with SPST contact;
Out contact 2A/250V AC on resistive load.
NOTE: the "OUT 3" and the "logic input" options
are mutually exclusive.
7.5 CPI – CONFIGURATION PORT INTERFACE
The instrument has a lateral socket into which a
special five-pin connector can be inserted. This
connector, supplied as an option together with its
interface, can connect to the RS232 port of a
normal PC on which the management software
must be installed.
By means of the software, the configuration can
be managed directly from the PC.
In this case the instrument display and keypad are
not operative.
8. MAINTENANCE
1) SWITCH THE EQUIPMENT OFF (power
supply, relay out, etc.).
2) Take the instrument out of it case.
3) Using a vacuum cleaner or a compressed air jet
(max. 3 kg/cm
2
) remove all deposits of dust and
dirt which may be present on the louvers and
on the internal circuits being careful not to
damage the electronic components.
4) To clean external plastic or rubber parts use
only a cloth moistened with:
- Ethyl Alcohol (pure or denatured) [C
2
H
5
OH] or
- Isopropyl Alcohol (pure or denatured)
[(CH
3
)
2
CHOH] or
- Water (H
2
O).
5) Make sure that there are no loose terminals.
6) Before putting the instrument back in its case,
make sure that it is perfectly dry.
7) Put the instrument back and turn it ON.
lxe-1-B00.p65 10/18/02, 3:47 PM29