ESS XT-3 OWNER’S MANUAL
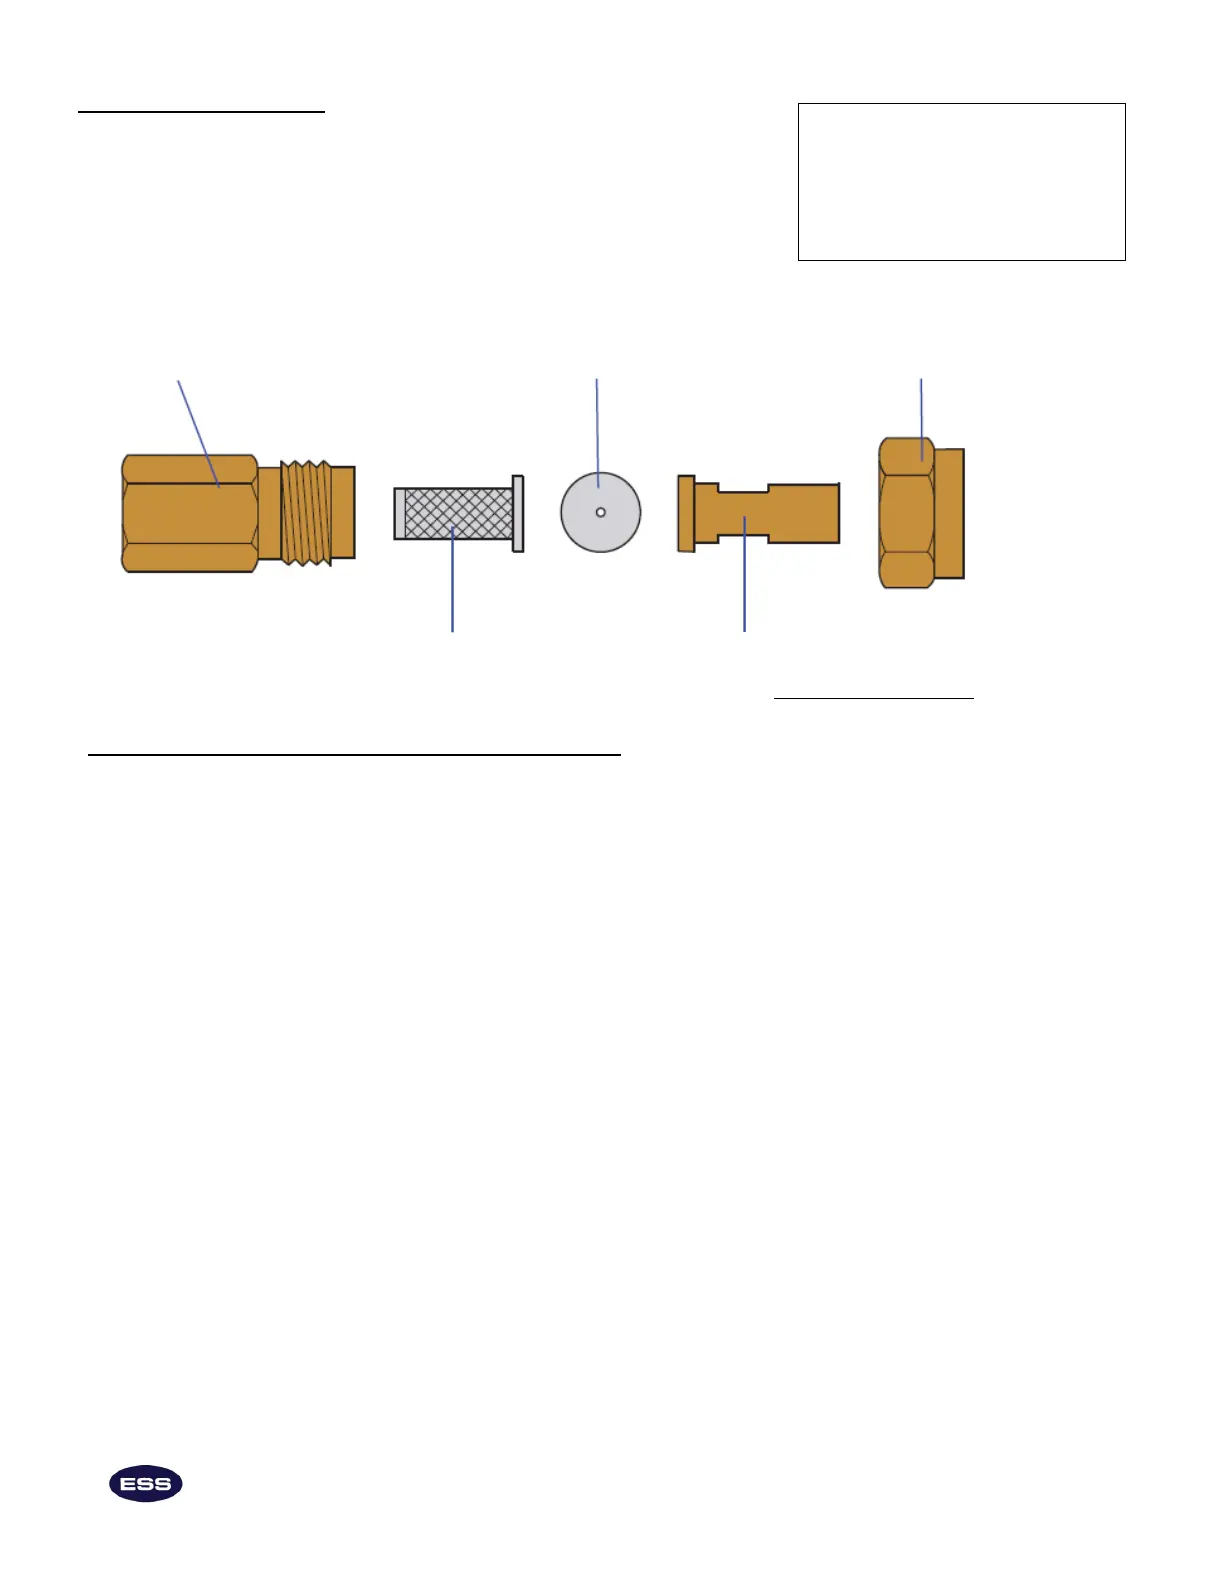
To disassemble, clean and reassemble the liquid lter
(see labeled drawing above):
1. Using a 13/16” wrench on the cap (Item 8) and an 11/16” wrench on the 1/8”
NPT body (Item 12), unthread them. Note: When you disassemble the liquid
lter assembly, noce how the parts t together in order to reassemble them
properly. Be careful not to lose any parts, parcularly the ow disk (Item 10)
which is inside the cap. The sprayer will not funcon correctly without the ow
disk.
2. Remove the strainer (Item 11) from the 1/8” NPT body.
3. If the 1/8” NPT body contains residue, clean it with compressed air or clean
water.
4. Clean the strainer with compressed air or clean water. If residue sll remains in
the 50 mesh screen, disassemble the strainer. Unscrew the top brass part from
the boom brass part. The 50 mesh screen slides o the brass body and can be
cleaned with compressed air or clean water. If residue sll remains, soak the 50
mesh screen and screw the top brass part back on the lower brass part.
5. If the ow disk is sll in the cap, remove it. Check the aperture of the ow disk
for blockage. If there is any, clean it with compressed air or water. Replace the
ow disk so that the numbers on the disk face the strainer.
6. Replace the strainer in the 1/8” NPT body.
7. Rethread the 1/8” NPT body and the cap.
You may have to clean the liquid
lter more
frequently if the XT-3 is
being used to spray high-parcle
density soluons.
Liquid lter assembly
The liquid lter assembly is located outside the base of the spraywand.
It is composed of these parts: a 1/8” NPT body (Item 12), a strainer (Item 11), a
ow disk (Item 10), an adapter (Item 9) and a cap (Item 8). The strainer is the
acve ltering element in the volume of liquid that ows through the line. There is
an extra ow disk and an extra strainer in the XT-3 Parts Kit in case the
originals are lost or damaged.
11
Liquid Filter Assembly
1/8” NPT Body (Item 12)
Flow Disk (Item 10)
Cap (Item 8)
Strainer (Item 11)
Adapter (Item 9)