ESS XT-3 OWNER’S MANUAL
Nozzle Assembly
It is very important to follow all the maintenance and cleaning
procedures to ensure that the electrostac sprayer will funcon properly.
Although the MaxCharge™ nozzle will outperform all electrostac spray
technology on the market, regular cleaning will ensure peak operang
performance.
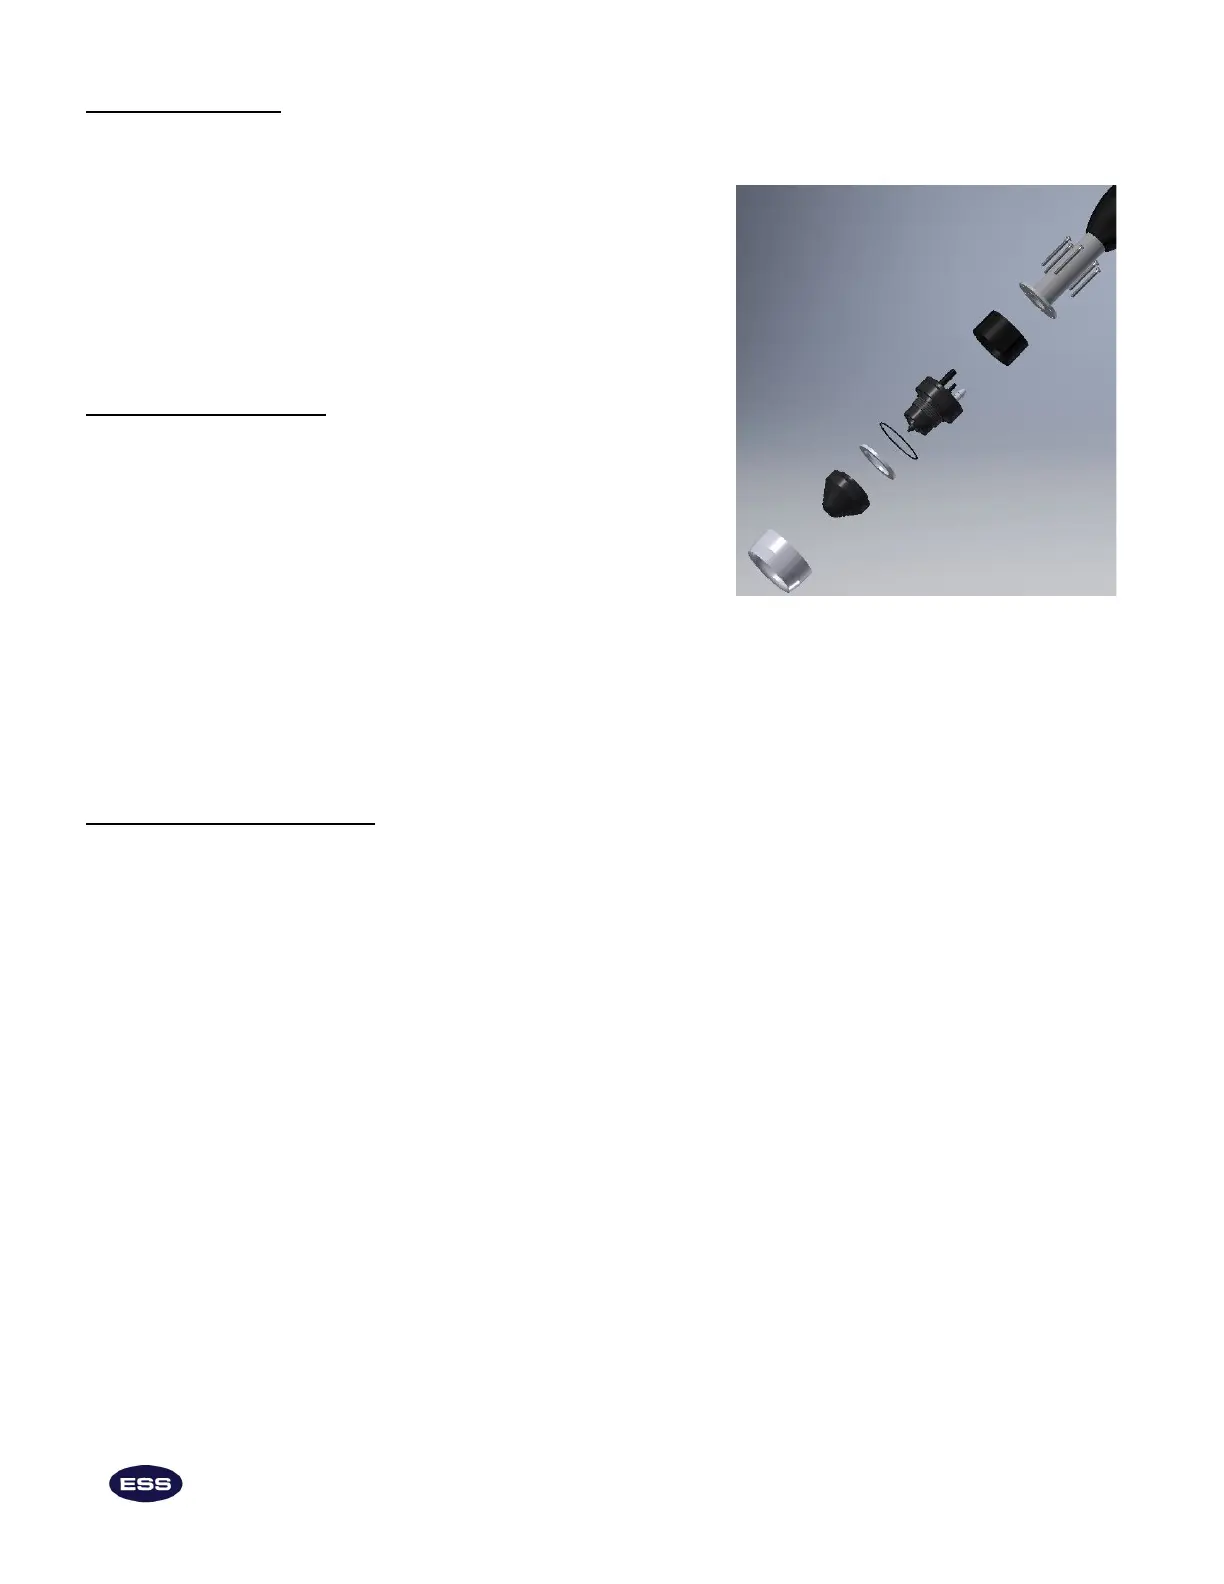
The nozzle assembly is located at the end of the spray gun wand. It is
composed of a nozzle body, internal o-ring, Teon ring, cover, external
o-ring, and a hood (see labeled drawing at right). To access the nozzle
components, just unscrew the nozzle cover by hand.
Cleaning the spraywand
Always rinse the spraywand out with clean soapy water aer every day’s
spraying. That is the most important thing you can do to ensure trouble
free operaon of your XT -3 sprayer. By cleaning aer each and every
working day you will avoid the long term chemical buildup that
eventually causes clogs, poor spray paerns and shortens nozzle life.
Establish maintenance intervals to disassemble and clean the nozzle. Your
nozzle maintenance schedule will vary depending on the types of
chemicals used and adherence to pre- and post- spray checks. In general it
is sucient to thoroughly clean nozzles every 50 hours. If heavy loads of
weable powers are used, the cleaning schedule should be sooner.
12
To clean the nozzle assembly
1. Slide the hood over the nozzle cover.
2. Unscrew the cover from the nozzle base and remove the Teon ring. Clean any debris fromaround the nozzle p. Note: There
is a small o-ring in the nozzle around the base of the p – take care that it doesn’t fall o. If it does, clean it and press back into
place. Also, take care not to damage the nozzle p when the cover is removed.
3. Soak the ring, cover, and hood in a mild detergent soluon. Use a small brush (so or mild bristle) to clean the inside of the
cover and the hole through it. Also, be sure to clean the hood. It is important to clean inside the hood and the two cavies.
Rinse thoroughly.
4. Scrub the nozzle base with the detergent soluon using a so bristle brush. Clean the ceramic outlet. Be sure to thoroughly
clean the base cavity and take care not to damage the nozzle p. Rinse and make sure the small o-ring is in place.
5. Reassemble nozzle by placing the Teon ring on the base and screwing the cover on hand ght. Next, slide the hood over the
nozzle and seat it securely against the external o-ring. Wipe clean the exterior of all hoses and ngs connected to the nozzle.
The electrode cover should be hand ght. Never use pliers or other tools to ghten it. The insulang ring should be
loose.