218
POWERHEAD
POWERHEAD ASSEMBLY
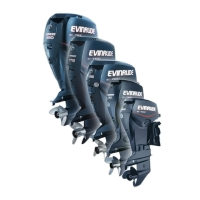
Apply a 1/16 in. (2 mm) bead of RTV Adhesive
around each water passage on the block and cyl-
inder head as shown. Apply adhesive with a brush
around thermostat seat area on block.
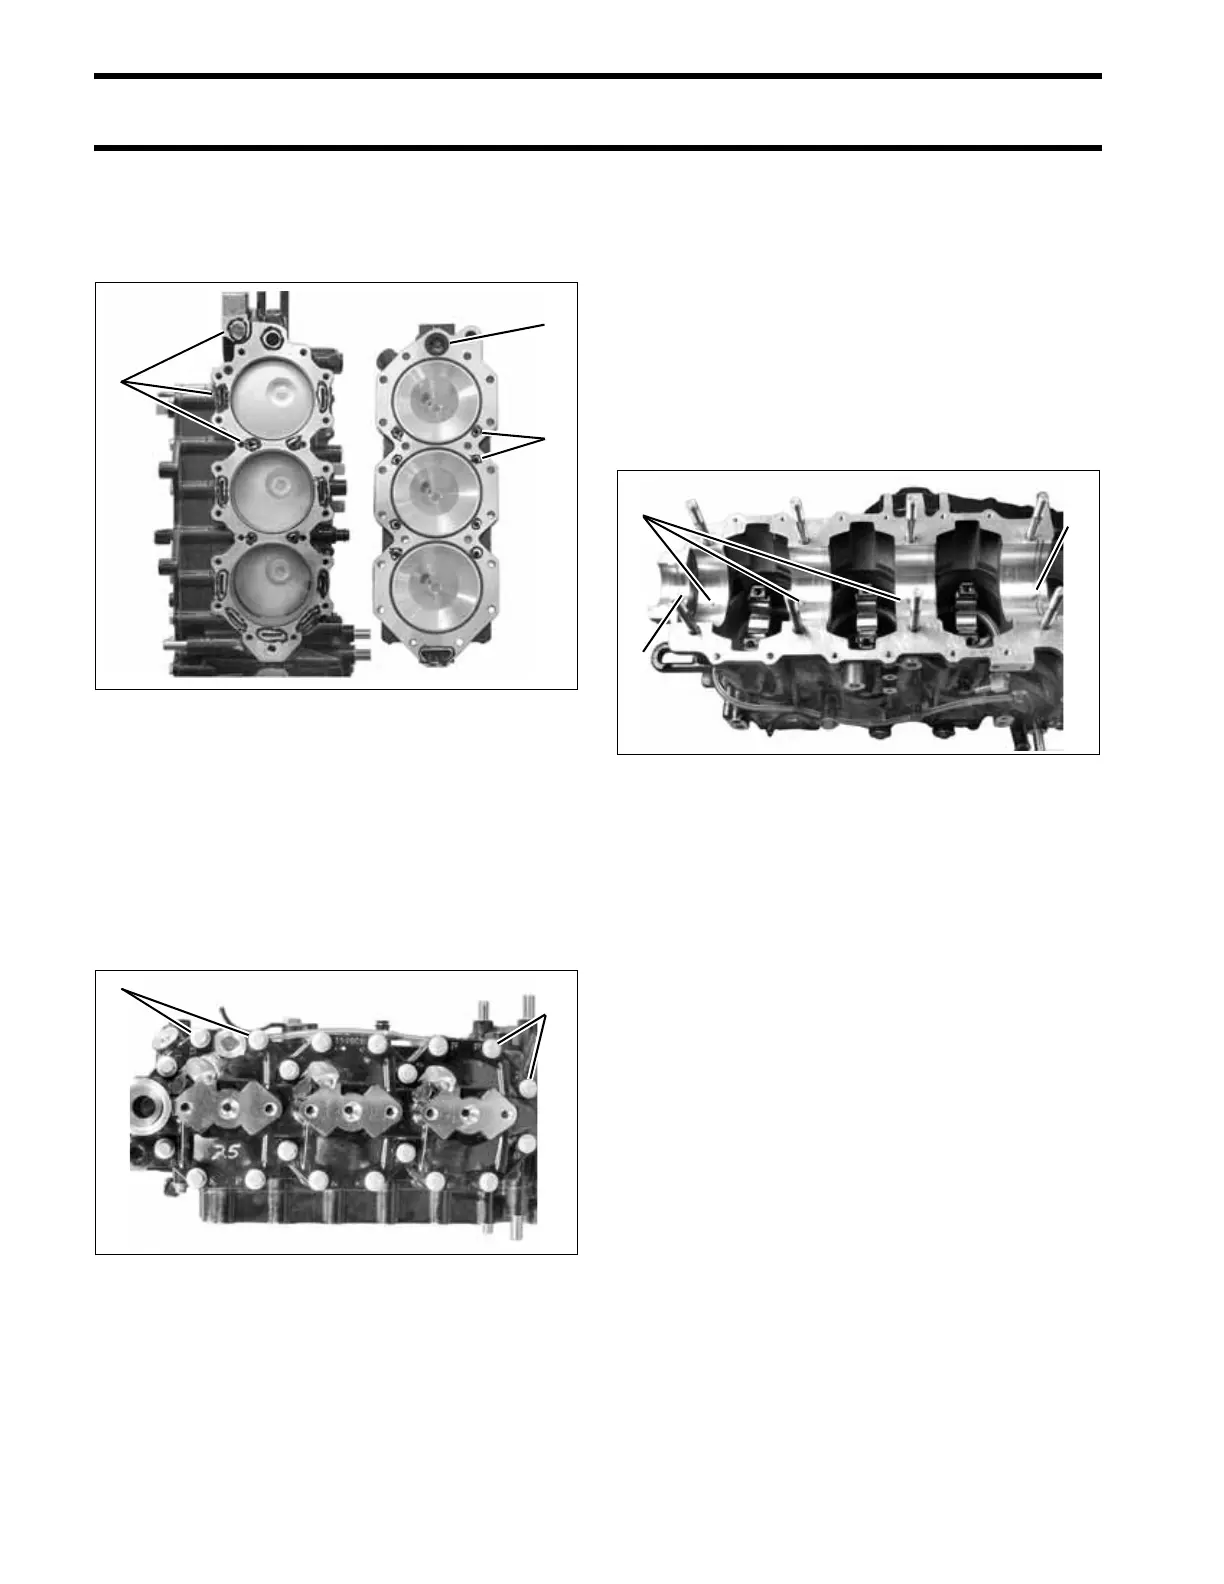
Install cylinder head with the thermostat toward
the top. Apply outboard lubricant to threads and
install the cylinder head screws. DO NOT use any
sealant on threads
Following sequence on cylinder head, tighten all
screws in stages to a torque of 168 to 192 in. lbs.
(19 to 21.5 N·m).
Crankshaft and Connecting
Rod Installation
Rotate cylinder block so crankcase mating flange
is facing up.
Apply Gasket Sealing Compound to lower oil seal
groove in cylinder block. DO NOT put any sealer
in upper seal groove.
Check that main bearing alignment dowel pins are
seated in the block.
Push all pistons to the top of cylinders. Remove
numbered connecting rod caps.
Gently lower crankshaft into place.
• Align tab on lower bearing seal housing with
hole in crankcase.
• Align upper oil seal in groove.
• Locate each main bearing on its dowel pin. A
mark placed on the bearing race opposite the
1. RTV adhesive
2. Thermostat seal
002065
1. Cylinder head screws (20 total) 002066
2
1
1
1
1
1. Gasket Sealing Compound
2. Dowel pins
3. No sealer here
002114
12
3
 Loading...