262
GEARCASE
GEARCASE REMOVAL AND INSTALLATION
Gearcase Installation
IMPORTANT: Before installing gearcase, shift
rod adjustment MUST be checked. Refer to
SHIFT ROD ADJUSTMENT on p. 266.
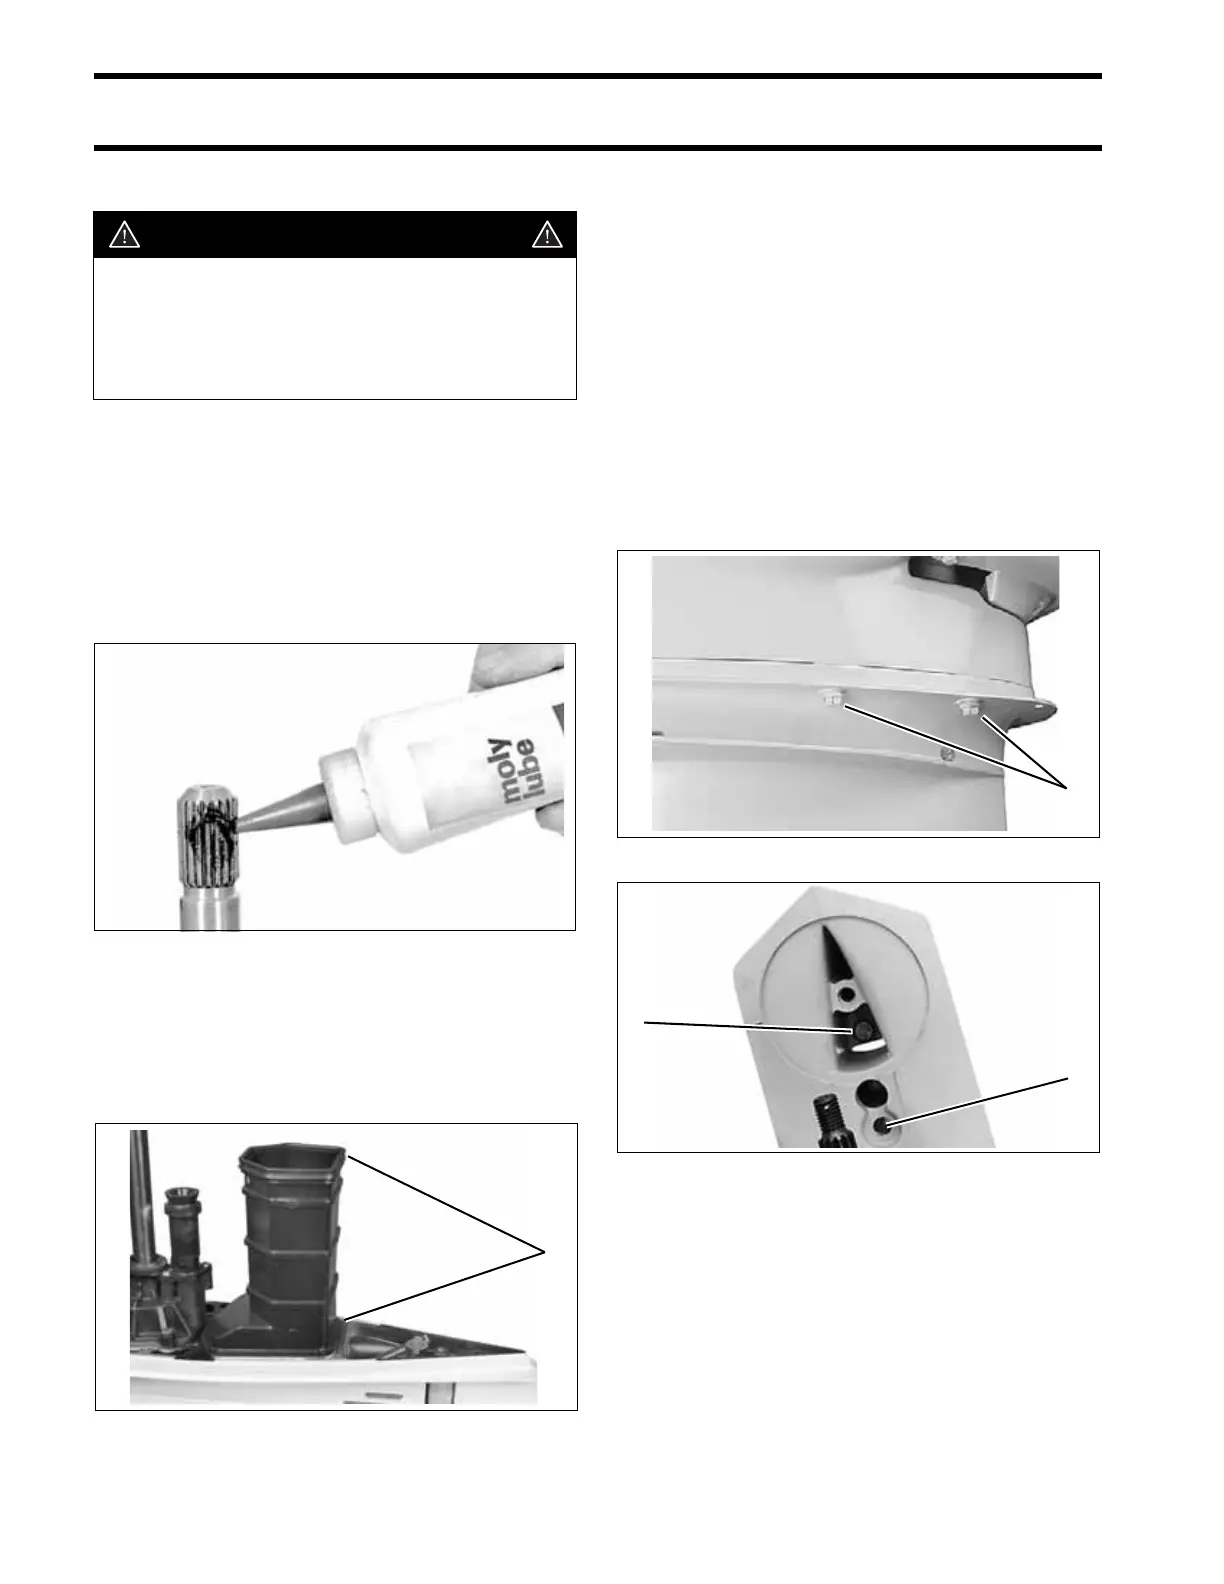
Coat the driveshaft splines with Moly Lube. DO
NOT coat top surface of the driveshaft because
lubricant may prevent seating of the driveshaft in
the crankshaft.
Apply Adhesive 847 to the lower exhaust housing
seals’ inner surfaces. Place two new seals on the
housing. Apply Triple-Guard grease to the seals’
outer surfaces and place the housing on the gear-
case.
Apply Gel-Seal II to gearcase mating surface pads
on exhaust housing. Slide the gearcase into
place, making sure:
• Driveshaft engages the crankshaft.
• Water tube enters the water pump.
• Lower inner exhaust housing installs correctly.
• Shift rod does not turn and is positioned prop-
erly in shift shaft connection area.
Apply Gasket Sealing Compound to threads of the
gearcase retaining screws. Tighten the screws to
a torque of:
• 3/8 in. screws – 26 to 28 ft. lbs. (35 to 38 N·m)
• 7/16 in. screws – 40 to 50 ft. lbs. (54 to 68 N·m)
Apply Gasket Sealing Compound to threads of the
trim tab screw. Install and align the trim tab with
the index marks noted prior to disassembly.
Tighten the trim tab screw to a torque of 35 to 40
WARNING
During service, the outboard may drop
unexpectedly. Avoid personal injury;
always support the outboard’s weight with
a suitable hoist or the tilt support bracket
during service.
30385
TYPICAL
1. Lower exhaust seals
001985
1
1. 3/8 in. screws 001990
1. 7/16 in. screw
2. 3/8 in screw
COA3139
1
1
2
 Loading...